Ingredients and Equipment
Select High-Quality Plums: Choose plums that are suitable for jam-making, such as Damson or Greengage.
Selecting the right ingredients is crucial for making a high-quality plum jam that is not only delicious but also retains its natural flavor and texture. When it comes to choosing plums, you’ll want to select varieties that are specifically suitable for jam-making.
Damson plums are an excellent choice for jam-making due to their dark blue skin and firm, sweet flesh. They have a unique flavor that is both tangy and slightly sweet, making them perfect for creating a rich and full-bodied plum jam.
Greengage plums, on the other hand, are known for their sweet, juicy flesh and tender skin. They have a delicate flavor that is both sweet and tart, making them an excellent choice for adding depth and complexity to your plum jam.
In addition to selecting the right type of plum, it’s also essential to choose plums that are in good condition and at the optimal ripeness for jam-making. You’ll want to select plums that have a slight give when pressed, but still feel firm to the touch.
Other Essential Ingredients
In addition to the right type of plum, you’ll also need the following ingredients to make high-quality plum jam:
- Granulated sugar
- Water
- Pectin (optional)
- Citric acid (optional)
It’s worth noting that you can use a combination of granulated sugar and honey or other sweeteners to add flavor and complexity to your plum jam.
Equipment Needed
To make high-quality plum jam, you’ll need the following equipment:
- Large pot (at least 4-quart capacity)
- Strainer or food mill
- Glass jars with lids and bands for storing the jam
- Canning funnel
It’s essential to use a large pot that is deep enough to allow for easy stirring and to prevent the plum mixture from splashing over during cooking.
Miscellaneous Tips
In addition to selecting the right ingredients and equipment, there are a few other tips to keep in mind when making high-quality plum jam:
- Make sure to wash your hands thoroughly before handling the plums and equipment.
- Use a clean and sanitized workspace to prevent contamination of the jam.
- Follow safe canning practices to ensure that the jam is properly sterilized and sealed for long-term storage.
By following these tips and using high-quality ingredients, you’ll be able to make delicious and homemade plum jam that will impress your friends and family for years to come!
Measure the Ingredients: Use a kitchen scale to ensure accuracy in measuring sugar, lemon juice, and spices.
To prepare this plum jam recipe, it’s essential to start with accurate measurements of all ingredients. A kitchen scale is an invaluable tool for ensuring precision in measuring sugar, lemon juice, and spices.
When using a kitchen scale, first, make sure it’s calibrated correctly. Consult the manufacturer’s instructions or reset the scale if necessary. This step ensures that your measurements are accurate throughout the recipe.
Select the unit of measurement you need: grams (g) or milliliters (ml). For sugar and spices, grams are usually the preferred unit of measurement. For lemon juice, milliliters might be more convenient.
Measure each ingredient separately to avoid cross-contamination. For example, measuring the lemon juice after handling dry ingredients can affect the accuracy of your measurements.
Sugar: Measure 400g of granulated sugar using the kitchen scale. This is a crucial measurement as it affects the jam’s set point and flavor balance.
Lemon Juice: Measure 60ml of freshly squeezed lemon juice. Use a separate cup or container to catch any accidental spills from squeezing the lemons.
Spices: You’ll need approximately 1/2 teaspoon each of ground cinnamon, nutmeg, and ginger. These measurements may vary depending on your personal preference for spice intensity.
Other ingredients, such as plums (800g), can be weighed or measured using a standard kitchen measuring cup, but always double-check with the recipe for accuracy.
Keep in mind that accurate measurements are critical to achieving the perfect balance of flavors and textures in your plum jam. Take your time when measuring each ingredient, and don’t hesitate to re-measure if you’re unsure.
Preparation and Cooking
Pit and Chop Plums: Remove stones from plums and chop them into small pieces to release their juices.
To prepare and cook with pit and chopped plums, it’s essential to remove the stones from the fruit first. This process allows you to access the flesh and release its natural juices, which are a crucial component in creating a delicious plum jam.
The pits or stones can be removed by cutting the plums in half lengthwise or around their equator, depending on how easily the stone comes out. For firmer varieties of plums like Italian Prunes or Japanese Plums, it’s easier to cut them around their equator. On the other hand, softer plum varieties like Santa Rosa can be cut lengthwise.
Once you’ve decided which method to use, carefully insert a knife into the seam and twist it slightly as you cut along the circumference of the plum, effectively opening it up. Gently pry out the stone with your fingers or the flat side of the knife blade. Continue this process for all the plums you need.
Next, chop the plums into small pieces to release their natural juices and pulp. A fine-chop is preferred, as this will ensure that the plum’s flavors are evenly distributed throughout the jam. You can use a chef’s knife or a food processor to achieve the desired consistency.
It’s worth noting that the type of plum you choose for your recipe can impact the final texture and flavor of the jam. Some plums, like those used in traditional Italian Prune recipes, will produce a firmer jam due to their higher pectin content. In contrast, softer plum varieties will yield a more loose or runny jam.
In preparation for cooking with your chopped plums, make sure they’re properly drained of any excess liquid. This helps prevent an overly wet or soggy jam during the cooking process.
Cook the Plum Mixture: Combine chopped plums with water in a saucepan and bring to a boil, then reduce heat and simmer until the mixture has reduced and thickened.
To cook the plum mixture, start by combining chopped plums with water in a saucepan. The amount of water you add will depend on how thick or thin you want your jam to be, but a general rule of thumb is to use about 1 cup of water for every 2 cups of chopped plums.
Next, bring the mixture to a boil over high heat, stirring occasionally. This will help to break down the cell walls of the plums and release their natural pectins, which will thicken the jam as it cooks.
Once the mixture has reached a boil, reduce the heat to medium-low and simmer for about 20-25 minutes, or until the mixture has reduced and thickened. You can test the consistency of the jam by placing a small amount on a chilled plate and letting it cool to room temperature. If the jam is still runny, continue to simmer for a few more minutes and check again.
As the mixture cooks, you may notice that it starts to foam or bubble up. This is completely normal and can actually be beneficial, as it will help to incorporate air into the jam and give it a lighter texture.
To ensure that your jam sets properly, it’s essential to reach the correct temperature during cooking. The ideal temperature for setting is between 217°F (103°C) and 220°F (104°C). You can use a candy thermometer to monitor the temperature of the mixture as it cooks.
Once the jam has reached the desired consistency and temperature, remove it from the heat and let it cool slightly before transferring it to a clean jar or container. Let the jam cool completely before storing it in the refrigerator or freezer.
Remember that homemade plum jam will typically have a softer set than store-bought jams, but it should still be thick enough to hold its shape on a spoon. If you find that your jam is too runny, you can try cooking it for a few more minutes and testing again.
Preserving the Jam
Add Sugar and Spices: Add granulated sugar, lemon juice, and any desired spices (such as cinnamon or ginger) to the plum mixture and stir to combine.
Once you have added granulated sugar, lemon juice, and any desired spices to the plum mixture, it’s essential to stir the ingredients thoroughly to combine them evenly.
This step is crucial in achieving a balanced flavor profile in your plum jam. The granulated sugar will not only add sweetness but also help to balance out the tartness of the plums.
The lemon juice serves as a natural preservative, helping to inhibit the growth of bacteria and mold that can cause spoilage.
When it comes to adding spices, the options are endless. Cinnamon is a classic choice for plum jam, adding a warm and comforting flavor. Ginger, on the other hand, adds a spicy kick that complements the sweetness of the plums perfectly.
Other spices you can consider adding include nutmeg, allspice, or even a pinch of salt to enhance the flavor. The key is to experiment with different combinations to find the perfect balance for your taste buds.
Now that the sugar and spices have been added, make sure to stir the mixture well to ensure everything is evenly distributed.
This step is also where you can adjust the consistency of the jam to your liking. If it’s too thick, add a bit more lemon juice or water. If it’s too thin, simmer it for a few minutes to reduce the liquid and achieve the desired texture.
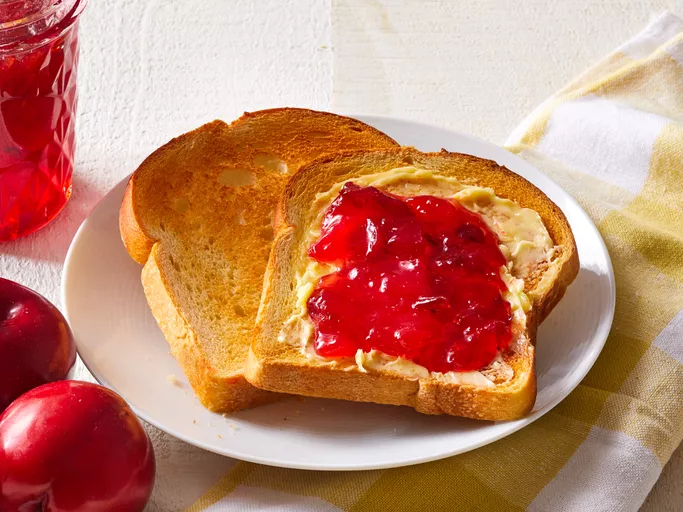
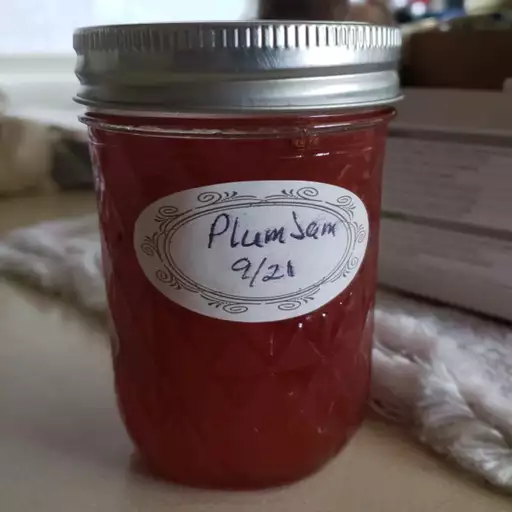
Pack and Store the Jam: Spoon the jam into clean, sterilized jars and seal according to recommended food preservation guidelines from a reputable authority such as the USDA.
To ensure the plum jam remains safe for consumption and maintains its quality, it’s crucial to follow proper preservation methods. This involves packing the jam into clean, sterilized jars. The first step is to prepare a water bath canner or a large pot with enough water to cover the jars by at least an inch. Bring the water to a rolling boil.
While the water is heating up, carefully scoop the plum jam into hot, sterilized jars, leaving about 1/4 inch of headspace between the jam and the lid. Remove any air bubbles by running a non-metallic utensil, such as a plastic spatula or chopstick, around the inside of the jar.
Next, secure the lids onto the jars, but do not tighten them yet. Place the jars into the water bath canner or large pot with boiling water, making sure they are fully submerged. Process the jars in the boiling water for 10 minutes, adjusting for altitude as necessary according to recommended guidelines from a reputable authority such as the USDA.
After the processing time has elapsed, carefully remove the jars from the boiling water using a clean canning tool or tongs. Place them on a wire rack or towel to cool, undisturbed for 12-24 hours. Do not tighten the lids during this cooling period.
Once cooled, check the seals by pressing on the top of each lid. If the lid does not move and the seal is tight, it’s likely sealed properly. Store the jars in a cool, dark place like a pantry or cupboard to preserve the quality of the plum jam for a longer duration. Always follow proper food preservation guidelines from a reputable source such as the USDA to ensure the jam remains safe to eat.
- Best Datanyze Alternatives for 2025 - April 24, 2025
- Best Hunter.io Alternatives for 2025 - April 22, 2025
- Best Lead411 Alternatives for 2025 - April 22, 2025

