
Ingredients and Equipment
Essential Ingredients
The ingredients required to make Ezekiel bread are straightforward, yet specific. The fundamental component of this recipe is a mixture of six different types of grains including wheat, barley, beans (such as kidney or pinto), lentils, spelt, and millet.
These grains should be unprocessed and free from additives, ensuring that they remain in their natural state. Some common alternatives to the specific ingredients mentioned can be used, such as using dried chickpeas instead of kidney beans.
The Ezekiel bread recipe does not require any yeast or other leavening agents due to the germination process involved, which allows the grains’ enzymes to break down the starches into sugars and produces lactic acid. This natural fermentation results in a slightly sour flavor and helps to preserve the bread for longer periods of time.
Other ingredients such as salt and water are necessary but not particularly special in this recipe. Salt can be added according to individual taste, while an adequate amount of filtered or spring water is required to hydrate the grains properly during germination.
In terms of equipment, a food processor, blender, or grain mill may be needed depending on the form of the ingredients and desired texture of the bread. A mixing bowl, measuring cups, and utensils such as spoons or whisks are also essential for preparing the dough before it goes into fermentation.
During the germination process, a covered container such as a large pot or plastic bin can be used to provide an adequate environment with suitable temperature control. An oven is needed towards the end of the baking process to dry and harden the bread after its initial cooking in boiling water or steam.
It’s worth noting that some people might prefer to use a dehydrator for the final stages of drying, depending on personal preference for texture and moisture content. This can also be done using conventional oven settings for a longer period of time, although careful monitoring is required to avoid over-drying.
The overall goal when preparing Ezekiel bread is to maintain its nutritional integrity by using minimal processing while still ensuring an acceptable taste and texture.
1 1/2 cups of whole wheat flour
The ingredients for making Ezekiel bread are quite straightforward, but it’s essential to understand the types and quantities required. When it comes to flour, the recipe calls for a specific amount and type.
The main ingredient in this Ezekiel bread recipe is whole wheat flour, which makes up 1 1/2 cups of the total dry ingredients. It’s crucial to use high-quality, unbleached, and unbromated whole wheat flour for the best flavor and nutritional value. Some recipes may suggest using other types of flour, such as all-purpose or bread flour, but it’s vital to stick with whole wheat for this classic recipe.
Now that we’ve covered the flour requirement, let’s discuss the equipment needed to make Ezekiel bread. This recipe doesn’t require any specialized tools or gadgets beyond what you might already have in your kitchen pantry.
The key pieces of equipment include a large mixing bowl for combining dry ingredients, a measuring cup and spoon set for accurate measurements, and a clean work surface or countertop for kneading the dough. You’ll also need a baking sheet lined with parchment paper to shape and bake the bread.
While not essential, having a stand mixer or hand mixer can be helpful when mixing the dough, especially if you’re new to bread-making. A pastry scraper or rubber spatula is also useful for scraping down the sides of the bowl and folding in ingredients.
1/4 cup of sugar or honey
In order to make a delicious batch of Ezekiel bread, you will need some basic ingredients and equipment.
Ingredients
- 1 cup of warm water
- 1/4 teaspoon of salt
- 2 tablespoons of olive oil
- 1/4 cup of sugar or honey (you can use either one, but keep in mind that honey will give a slightly different flavor)
- 2 cups of whole wheat berries (also known as Kamut or spelt)
- 1 cup of barley
- 1/2 cup of millet
- 1/2 cup of beans (such as kidney, black, or pinto)
- 1 tablespoon of yeast (make sure to use a natural yeast like sourdough starter or active dry yeast)
Equipment
- A large mixing bowl
- A measuring cup and spoons
- A blender or food processor (optional, but recommended for grinding the whole grains)
- Stand mixer with a dough hook attachment (optional, but highly recommended for kneading the dough)
- Two large bowls for rising and shaping the dough
- A baking stone or baking sheet lined with parchment paper
1 packet of active dry yeast (2 1/4 teaspoons)
To make the classic Ezekiel bread, you’ll need the following ingredients:
- 1 1/2 cups of warm water
- 3 tablespoons of olive oil
- 1 teaspoon of salt
- 1 packet of active dry yeast (2 1/4 teaspoons)
- 1 cup of whole wheat flour
- 1/2 cup of whole barley flour
- 1/2 cup of whole rye flour
- 1/2 cup of spelt flour
- 6 tablespoons of ground flaxseed
The equipment you’ll need to make this bread includes:
- A large mixing bowl
- A measuring cups and spoons
- A digital scale (optional)
- A wooden spoon or stand mixer
- A dough scraper or spatula
- A clean surface for kneading the dough
- A bread loaf pan or proofing basket (optional)
It’s worth noting that the ingredients and equipment listed above can be adjusted based on personal preference and available ingredients. Additionally, some people may choose to use a stand mixer with a dough hook attachment to simplify the kneading process.
1 teaspoon of salt
In making Ezekiel bread, you will need a combination of ingredients and equipment to achieve the desired texture and taste.
The ingredients include:
- 1 cup of whole wheat berries
- 1/2 cup of barley
- 1/2 cup of rye
- 1/4 cup of millet
- 1/4 cup of spelt
- 1 teaspoon of salt
- 1 tablespoon of sugar
- 1 packet (2 1/4 teaspoons) of active dry yeast
- The equipment you will need includes:
- A large mixing bowl
- A measuring cups and spoons
- A wooden spoon or spatula
- A dough scraper
- A clean work surface for kneading the dough
- A baking sheet or bread stone lined with parchment paper
- An oven
It’s worth noting that some of these ingredients and equipment may vary depending on your personal preferences and the specific recipe you are following.
In addition, if you don’t have whole wheat berries, barley, rye, millet, or spelt, you can substitute them with other grains or use a combination of different types of flour to achieve a similar texture and flavor.
1 tablespoon of vegetable oil
- In order to make Ezekiel bread, it is essential to have the right ingredients and equipment on hand.
For the ingredients, you will need:
- 2 cups of warm water
- 1 tablespoon of vegetable oil (preferably extra-virgin olive oil)
- 2 teaspoons of salt
- 1 teaspoon of sugar
- 2 tablespoons of yeast (either active dry or instant yeast will work)
- 4 cups of whole wheat flour (preferably freshly ground)
- 1 cup of rye flour (also preferably freshly ground)
- 1/2 cup of barley flour
- 1/2 cup of spelt flour
- As for the equipment, you will need:
- A large mixing bowl or stand mixer fitted with a dough hook attachment
- A measuring cups and spoons set
- A wooden spoon or silicone spatula for kneading and folding the dough
- A clean work surface or pastry mat for rolling out the dough
- A sharp knife or bench scraper for dividing the dough into equal portions
- A lightly floured baking sheet or bread stone for proofing the loaves
Other Equipment Needed
To make this delicious Ezekiel bread, you will need to gather a variety of ingredients and equipment.
The main ingredients are:
- 2 cups of whole wheat berries
- 1 cup of barley flour
- 1/2 cup of soybeans
- 1/2 cup of kidney beans
- 1/4 cup of poppy seeds
In addition to these ingredients, you will need some basic equipment:
- A large mixing bowl
- A wooden spoon or spatula
- A measuring cup and spoons
- A stand mixer (optional)
Other equipment needed includes:
- A dough scraper
- A large, lightly oiled bowl to proof the dough
- A baking sheet or bread stone for baking the loaves
- A sharp bread lame or pizza wheel for scoring the loaves (optional)
Stand mixer with a dough hook attachment
The Ezekiel bread recipe requires several ingredients to create this ancient grain bread, which includes:
- Wheat: This is one of the primary grains used in the recipe. Choose a high-protein, soft wheat or hard wheat.
- Barsley: This grain provides fiber and nutrients. Use malted barley for its distinctive flavor.
- Spelt: An ancient type of wheat with a slightly sweet taste that adds depth to the bread.
- Millet: A small, round grain used in various parts of the world as an ingredient in baked goods. Millet contributes to the chewy texture and nutty flavor.
- Beans (such as kidney beans or black beans): These add fiber, protein, and nutrients like folate, iron, and potassium.
- Salt: A small amount is necessary to enhance the flavors of other ingredients. Choose unrefined sea salt for better taste.
As for equipment needed to prepare the Ezekiel bread recipe:
- Stand mixer with a dough hook attachment: This essential piece of kitchen equipment will come in handy for mixing, kneading, and developing gluten in the dough.
- Large mixing bowl: A sturdy mixing bowl is necessary for combining ingredients before transferring them to the stand mixer.
- Dough scraper or pastry cloth: To scrape the dough from the sides of the bowl during mixing and kneading, consider using a dough scraper or pastry cloth. These tools can also help to prevent sticking and tearing of the dough.
- Measuring cups and spoons: For precise measurement of ingredients to ensure accurate proportions in your Ezekiel bread recipe.
- Baking sheets lined with parchment paper or a silicone mat: These will be used for rising the dough, shaping it into loaves, and finally baking them to perfection.
Large bowl for mixing and rising
The Ezekiel Bread Recipe requires specific ingredients to produce a delicious, nutritious loaf. The main components are:
- FLOUR: 4 cups whole wheat flour (also known as hard red winter or hard white)
- BARLEY FLOUR: 1 cup barley flour
- MILLET FLOUR: 1/2 cup millet flour
- SPELT FLOUR: 1/2 cup spelt flour
- SALT
To make Ezekiel Bread, you’ll also need various kitchen tools and equipment. Key items include:
- A large mixing bowl for combining dry ingredients
- A large measuring cup for accurately measuring liquids
- A stand mixer or a manual whisk for mixing wet and dry ingredients together
- An electric dough kneader (optional) to simplify the kneading process
- a large bowl covered with plastic wrap or a damp cloth for rising the dough in a warm place such as an oven or by using proofing equipment.
Please note that while it’s not necessary, using a stand mixer can significantly speed up the mixing and kneading process.
Measuring cups and spoons
The following are the ingredients needed to make a traditional Ezekiel bread recipe:
- 2 cups of warm water
- 2 tablespoons of sugar
- 1 tablespoon of salt
- 2 tablespoons of olive oil
- 3 cloves of garlic, minced
- 1 cup of whole wheat berries (such as spelt or kamut)
- 1/2 cup of barley
- 1/4 cup of millet
- 1/4 cup of oats
Additionally, the following ingredients are optional but recommended:
- 1 tablespoon of flaxseed (ground or whole)
- 1 teaspoon of apple cider vinegar
- The equipment needed to make this Ezekiel bread recipe includes:
- Large mixing bowl
- Measuring cups (dry and liquid) – typically made from stainless steel, plastic, or glass
Measuring cup types:
- Dry measuring cups: These are designed to measure dry ingredients accurately. They have markings for each unit of measurement and a non-slip base.
- Liquid measuring cups: These are used to measure liquids. They often come with a spout or lip that allows for easy pouring.
Measuring spoons – typically made from stainless steel, plastic, or silver-plated metal
Measuring spoon types:
- Tablespoons
- Teaspoons
- Milliliters (mL)
A stand mixer with a dough hook attachment (optional)
A bread machine (optional)
A baking stone or baking sheet for baking the finished loaf
Wooden spoon or spatula for scraping down the sides of the bowl
In making Ezekiel bread, it’s essential to use high-quality ingredients that are free from additives and preservatives. The traditional recipe calls for six types of grains: wheat, barley, beans, lentils, spelt, and millet.
You’ll need:
- 2 cups of whole wheat flour
- 1/2 cup of whole barley flour
- 1/4 cup of brown or green lentils, rinsed and drained
- 1/4 cup of dried chickpeas, soaked overnight and drained
- 1/4 cup of dried white beans, such as navy or cannellini, soaked overnight and drained
- 2 tablespoons of salt-free seasoning blend
- 1 tablespoon of sugar or honey (optional)
- 1 teaspoon of active dry yeast
- 4 cups of lukewarm water
You’ll also need some basic equipment:
- Mixer or bread machine with a dough hook attachment
- Bench scraper or wooden spoon for scraping down the sides of the bowl
- Large mixing bowl (at least 3-quart capacity)
- Measuring cups and spoons
- Colander or strainer for rinsing grains and beans
The wooden spoon or spatula is used to scrape down the sides of the bowl, ensuring that all ingredients are well incorporated into the dough. This helps prevent lumps from forming and ensures a uniform texture throughout the bread.
Instructions
Mixing the Dough
- The process of mixing the dough for Ezekiel bread involves several steps that are crucial to achieving the desired texture and flavor.
- The first step is to combine 2 cups of warm water, 1 tablespoon of olive oil, and 1 teaspoon of salt in a large mixing bowl.
- Next, add 2 cups of whole wheat flour, 2 cups of barley flour, 2 cups of rye flour, 2 cups of triticale flour, and 2 cups of spelt flour to the bowl in that order.
- Mix all the dry ingredients together using a wooden spoon or a stand mixer with a dough hook attachment until they are well combined.
- Gradually pour in the liquid mixture while continuously mixing the ingredients until a shaggy dough forms.
- Cover the bowl with plastic wrap and let it sit at room temperature for 24 to 48 hours, allowing the flour to absorb the liquid and the natural yeast on the grains to activate.
- After the sitting time has passed, add another 1 cup of whole wheat flour, 1 tablespoon of honey or maple syrup (optional), and 1 teaspoon of active dry yeast (optional) to the bowl.
- Mix all the ingredients together until they form a cohesive ball of dough. If the dough is too sticky, you can add more flour. If it’s too dry, you can add more water.
- Knead the dough on a floured surface for 10-15 minutes, until it becomes smooth and elastic.
- Shape the dough into a round or oblong loaf and place it in a greased bowl, turning it to coat evenly with oil.
- Cover the bowl with plastic wrap and let it rise at room temperature for about 4-6 hours, or until it has doubled in size.
- Precise measurements are essential to achieving the correct consistency of the dough. If you adjust any of the ingredients, make sure to compensate by adjusting other ingredients accordingly.
Here is a summary of the ingredients needed and their quantities:
- 2 cups warm water
- 1 tablespoon olive oil
- 1 teaspoon salt
- 2 cups whole wheat flour
- 2 cups barley flour
- 2 cups rye flour
- 2 cups triticale flour
- 2 cups spelt flour
- 1 tablespoon honey or maple syrup (optional)
- 1 teaspoon active dry yeast (optional)
Remember to handle the dough gently and avoid overworking it, as this can result in a dense loaf.
Combine flour, sugar, yeast, and salt in a large mixing bowl.
The first step in making Ezekiel bread is to combine four essential ingredients in a large mixing bowl: flour, sugar, yeast, and salt.
To begin, you will need:
- 2 cups of all-purpose flour (or whole wheat flour)
- 1 tablespoon of sugar
- 1 teaspoon of instant yeast (make sure it’s the instant type, not active dry yeast)
- 1 teaspoon of salt
Mix these ingredients together in a large bowl until they are well combined.
It’s essential to use high-quality ingredients, especially the flour and sugar, as they will affect the flavor and texture of your Ezekiel bread.
The ratio of 2:1:1:1 (flour:sugar:yeast:salt) is a classic combination that yields a delicious and nutritious loaf of bread. Feel free to adjust the quantities to suit your dietary needs or preferences, but keep in mind that using too little flour may result in a dense bread.
Add vegetable oil to the dry ingredients and stir until well combined.
- The key to successfully executing the Ezekiel bread recipe lies in adhering to precise instructions, particularly when it comes to handling and combining various ingredients.
- A crucial aspect of this process involves adding vegetable oil to the dry ingredients, which can be achieved by following a simple yet deliberate sequence of steps. Here is a step-by-step guide on how to incorporate vegetable oil into your Ezekiel bread recipe:
- Begin by pre-measuring and sifting the dry ingredients, which typically include wheat berries, rye flour, lentils, and other whole grains.
- Next, add the measured vegetable oil to the sifted dry ingredients in a separate mixing bowl.
- Gradually stir the dry ingredients into the oil using a wooden spoon or a silicone spatula until you achieve an even blend. It is essential to ensure that all particles are evenly coated with the oil.
The addition of vegetable oil serves several purposes, including:
- Enhancing moisture retention: By coating the dry ingredients with vegetable oil, you help retain moisture within the dough, resulting in a more tender crumb and a softer texture.
- Reducing crust formation: Vegetable oil can inhibit the formation of a hard crust on the surface of your Ezekiel bread, allowing for a more delicate and palatable eating experience.
- Aiding gluten development: Some experts suggest that the oil helps to lubricate the gluten strands within the dough, making it easier to develop and work with.
Ultimately, adhering to these instructions will help you create an authentic and delicious Ezekiel bread recipe with a rich nutritional profile and a unique flavor profile.
Gradually add 1 cup of warm water (around 100°F) to the dry mixture and mix using a wooden spoon or spatula until a shaggy dough forms.
When it comes to following instructions, especially when working with yeast-based recipes like Ezekiel bread, clarity and patience are key. The process of creating this dough requires a gentle touch and a willingness to allow each step to unfold as described.
The first part of the instruction to “Gradually add 1 cup of warm water (around 100°F) to the dry mixture” is crucial in activating the yeast correctly. This temperature range is ideal because it encourages fermentation without shocking the yeast, which could lead to a slow rise or no rise at all.
The addition of this warm water is a pivotal moment as it starts to break down the dry ingredients and initiate the hydration process. It’s essential not to rush through this step; instead, allow each addition to be fully incorporated before adding more water. This gradual approach helps in ensuring that the dough comes together evenly.
Once the water has been added, the instruction to “mix using a wooden spoon or spatula until a shaggy dough forms” kicks into play. At this stage, it’s about introducing minimal mixing to avoid developing the gluten excessively, which would lead to a tough crumb and lose the bread’s signature texture.
Here are some tips for effectively executing these steps:
- Selecting the right utensils: A wooden spoon or spatula is preferred over electric mixers because they apply gentle pressure, which aids in preserving the delicate gluten structure. This allows the dough to develop naturally without becoming too dense.
- Temperature control: The water should be around 100°F for optimal yeast activity. This temperature range ensures that the yeast cells start fermenting the sugars immediately.
- Gradual addition: Adding the warm water in stages allows each component to hydrate evenly, reducing the likelihood of developing uneven texture or density within the dough.
It’s also beneficial to remember that patience and gentle handling are essential throughout this process. The longer you wait for fermentation, the more complex the flavors will become, giving your Ezekiel bread a rich depth and aroma. With each step followed carefully, you’ll end up with a deliciously unique and nutritious loaf that embodies the spirit of traditional bread-making.
Rising the Dough
The process of rising the dough for Ezekiel bread is a crucial step that requires patience, precision, and the right conditions. It’s essential to create an environment that fosters the growth of yeast, allowing the dough to rise and develop its signature flavor and texture.
To start, make sure your workspace and equipment are clean and sanitized. This includes your mixing bowls, utensils, and hands. A clean environment will help prevent contamination and ensure the health and safety of your bread.
Next, take the dough out of the refrigerator or the storage container where it has been resting. Gently turn the dough over to release any air bubbles that may have formed during fermentation. Be gentle when handling the dough, as excessive manipulation can damage the delicate network of gluten strands.
Transfer the dough to a lightly oiled bowl or a proofing basket lined with parchment paper. This will prevent the dough from sticking and make it easier to handle during the rising process.
Cover the bowl or proofing basket with plastic wrap or a damp towel, creating a warm, draft-free environment that promotes yeast activity. The ideal temperature for rising is between 75°F and 80°F (24°C and 27°C), but this can vary depending on your location and the type of yeast you’re using.
Allow the dough to rise for about 1-2 hours, or until it has doubled in size. You can check the dough’s progress by gently pressing your finger into the surface; if it springs back slowly, it’s ready. If it doesn’t spring back at all, it may be under-proofed and needs more time.
Once the dough has risen to the desired level, it’s ready for shaping. Gently deflate the dough by folding it over onto itself several times, then transfer it to a lightly floured surface or a bread peel. Proceed with shaping the dough into its final form, taking care not to over-work the gluten strands.
Finally, place the shaped dough into a preheated oven or proofing basket, ready for the next stage of the baking process. By following these instructions and creating an ideal environment for rising, you’ll be rewarded with a delicious, authentic Ezekiel bread that’s sure to impress your family and friends.
Cover the bowl with plastic wrap and place it in a warm, draftfree area for about an hour, or until the dough has doubled in size.
When it comes to following instructions, especially when working with yeast-based recipes like the Ezekiel bread recipe, attention to detail and patience are crucial for achieving optimal results.
The instruction in question emphasizes the importance of allowing the dough to rise, which is a critical step in bread making. The process of covering the bowl with plastic wrap serves two purposes: it prevents contamination from external factors, such as dust or other airborne particles, while also creating a humid environment that fosters fermentation.
The placement of the bowl in a warm, draft-free area is essential for facilitating the fermentation process. Yeast thrives in temperatures between 75°F and 85°F (24°C to 30°C), making this temperature range ideal for dough to rise. By placing the bowl away from drafts, the baker can ensure that the heat is retained and not lost due to air circulation.
The time frame of about an hour or until the dough has doubled in size serves as a guide for when the yeast has fully activated and the gluten network has developed sufficiently to hold the dough’s shape. This process is influenced by factors such as the type of flour used, the initial temperature of the dough, and the specific environment in which it is rising.
For bakers working with the Ezekiel bread recipe, understanding these nuances is crucial for achieving a light, airy texture that is characteristic of traditional bread. By covering the bowl with plastic wrap and placing it in a warm, draft-free area, they can create an optimal environment that encourages yeast fermentation and allows the dough to rise as desired.
Preheat your oven to 375°F (190°C).
To begin the process of making Ezekiel bread, it is crucial that you first preheat your oven to a specific temperature. This step sets the stage for the rest of the recipe, and any deviation from this instruction could affect the final product.
Preheating your oven to 375°F (190°C) is essential for achieving the perfect crust on your Ezekiel bread. The heat will help to create a crispy exterior while maintaining a soft interior, giving your finished loaf a delightful texture that complements its unique flavor.
The temperature of 375°F (190°C) allows for an optimal rise and browning of the dough, resulting in a rich, nutty aroma that wafts from the oven as you bake. This is especially important when working with ancient grains like those used in Ezekiel bread, which have a natural sweetness that requires careful attention to detail.
By preheating your oven to 375°F (190°C), you are creating an environment that enables the yeast to ferment the sugars in the dough, producing carbon dioxide gas bubbles. These bubbles will give your bread its characteristic lightness and texture, making it a pleasure to slice and serve.
In short, preheating your oven to 375°F (190°C) is a critical step in producing Ezekiel bread that meets the highest standards of quality and flavor. It allows for the perfect balance of crust and interior texture, resulting in a truly delicious and nutritious loaf.
Punch down the dough and shape it into a round or oblong loaf.
The process of punching down the dough and shaping it into a round or oblong loaf is an essential step in creating a beautiful and delicious Ezekiel bread.
This stage typically occurs after the first rise, where the yeast has started to ferment and the dough has expanded significantly.
To punch down the dough, you will need to gently but firmly press your fingers into the center of the dough, working your way outwards towards the edges in a circular motion.
This action helps to redistribute the yeast cells throughout the dough, preventing them from becoming too concentrated in one area and potentially causing uneven fermentation during the second rise.
As you punch down the dough, be sure to use just enough force to break up any large bubbles that have formed within the dough without tearing or over-working it.
The dough should feel slightly denser and heavier after being punched down, with a more even texture throughout.
Next, you will need to shape the dough into its final form – a round or oblong loaf.
To do this, gently lift the edges of the dough up and over, forming a smooth surface on top and creating a defined shape for your bread.
You can use a combination of gentle tugging and folding motions to shape the dough, working it into the desired form without applying too much pressure.
Take care not to stretch or pull the dough too tightly, as this can cause it to become misshapen or even break apart.
Once you have shaped your dough into a round or oblong loaf, place it onto a baking sheet lined with parchment paper, leaving enough space between each loaf for even expansion during the second rise and baking process.
Allow the shaped loaves to rest for a final time before placing them in the oven to bake, allowing the heat to transform the dough into a delicious and nutritious Ezekiel bread that is perfect for snacking or serving alongside your favorite meals.
Place the shaped dough onto a baking sheet lined with parchment paper.
To create a delicious homemade loaf of Ezekiel bread, it’s essential to carefully follow a series of instructions that guide you through the process of shaping and baking the dough.
Below are some critical steps to be taken when working with the shaped dough:
- Preparation is key: Before proceeding, ensure your baking sheet is properly lined with parchment paper. This will prevent the bread from sticking to the pan and make removal easier after it’s been baked.
Next, let’s focus on the step of placing the shaped dough onto the prepared baking sheet:
- Select the right dough: Choose a section of your kneaded dough that has been rolled out to your desired thickness. The ideal size will depend on the shape and size of bread you wish to create.
Now, let’s move on to placing the dough onto the baking sheet:
- Careful placement: Gently place the selected piece of dough onto the parchment-lined baking sheet. Be sure to handle it with care to avoid stretching or tearing the dough.
Finally, let’s ensure our finished Ezekiel bread is perfectly placed on the baking sheet:
- Position for even baking: Position the dough in a way that allows air to circulate evenly around it. This will help promote even browning and prevent any hotspots from developing during the baking process.
The parchment paper helps to:
- Prevent sticking: By preventing the bread from sticking to the pan, you’ll make the removal process much easier and less prone to damage.
- Ease cleanup: The parchment paper will also aid in a smoother cleaning process after baking, as it can be easily discarded along with any crumbs or debris.
Tips and Variations
Getting the Perfect Crust
To achieve the perfect crust on your Ezekiel bread, it’s essential to understand the factors that contribute to a crispy exterior and a soft interior.
Tips for Achieving the Perfect Crust
- Temperature control: A cooler environment will help slow down the rising process, resulting in a better crust. Aim for a temperature between 70-75°F (21-24°C).
- Moisture level: Excessive moisture can lead to a dense or soggy crumb. Ensure your dough is not too wet, and use a light touch when shaping.
- Sprouting time: The longer you sprout the grains, the better the flavor and texture. Aim for at least 24 hours of soaking and sprouting before milling.
- Flour quality: Use high-quality, freshly milled flours to ensure the best flavor and texture.
Variations on Traditional Ezekiel Bread
- Garlic and Herb Variation: Mix in some minced garlic and chopped fresh herbs like rosemary or thyme for added depth of flavor.
- Cheesy Delight: Add some grated cheese, such as cheddar or parmesan, to create a savory and rich bread.
- Fruited Bread: Mix in some chopped dried fruits like cranberries or raisins for added sweetness and texture.
When it comes to shaping your dough, try using a slower and more gentle approach. This will help prevent the gluten from developing too much, resulting in a denser crumb. Instead, aim for a softer, more pliable dough that can be shaped into a variety of forms.
Preheat your oven to 425°F (220°C) for the first 1520 minutes of baking, then reduce heat to 375°F.
In terms of Tips and Variations for this Ezekiel Bread recipe, it’s worth noting that flexibility is key to achieving a perfect loaf. For one, you can experiment with different types of grains or flours to create unique flavor profiles.
One tip to consider is preheating your oven to 425°F (220°C) for the first 15-20 minutes of baking, then reducing heat to 375°F. This helps to achieve a crispy crust while maintaining an even texture throughout the loaf.
Another variation involves using different sweeteners or oils to enhance the flavor and aroma of your Ezekiel Bread. Some options include maple syrup, honey, olive oil, or coconut oil. Experiment with different combinations to find the perfect balance for your taste buds.
Some bakers also prefer to use a sourdough starter instead of commercial yeast, which can lead to a more complex and tangy flavor in their Ezekiel Bread. If you’re feeling adventurous, try substituting the yeast with a sourdough starter for an added depth of flavor.
An important consideration when making Ezekiel Bread is the importance of using whole grains. This includes not only wheat but also barley, beans, and spices. By incorporating whole grains into your recipe, you’ll be creating a more nutritious and filling loaf that’s packed with fiber and nutrients.
Finally, don’t forget to have fun experimenting with different shapes and sizes of loaves! Ezekiel Bread is just as delicious in a smaller, round shape or even a crusty boule. The possibilities are endless when it comes to this versatile bread recipe!
Brush the top crust with water before baking for a crispy exterior and chewy interior.
The secret to achieving a perfectly balanced texture in your Ezekiel Bread lies in the technique of brushing the top crust with water before baking.
This simple step may seem insignificant, but it makes all the difference in creating a crispy exterior and chewy interior that is characteristic of this ancient grain bread.
The reason why brushing the top crust with water is effective is because it helps to create a Maillard reaction , a chemical reaction between amino acids and reducing sugars that occurs when food is exposed to heat, resulting in the formation of new flavor compounds and browning of the surface.
When you brush the top crust with water, you are essentially creating an environment that promotes this Maillard reaction, which in turn leads to the development of a crispy and golden-brown crust.
At the same time, the interior of the bread remains soft and chewy, thanks to the high moisture content of the dough. This is especially important when making Ezekiel Bread, as it requires a combination of grains that can be slightly more dense than other types of bread.
To implement this tip in your Ezekiel Bread recipe, simply brush the top crust with water before baking, using a clean cloth or brush to avoid introducing any extra moisture into the dough. You can also try using a misting bottle to gently spray the top crust with water for an even more uniform texture.
Remember, the key to achieving this perfect balance of textures lies in striking a delicate balance between crust and interior. Brushing the top crust with water is just one step towards creating that ideal texture, so be sure to experiment with different techniques and ingredients to find what works best for you!
In addition to brushing the top crust with water, there are several other variations you can try to create unique flavor profiles and textures in your Ezekiel Bread:
Herbs and Spices: Try adding different herbs and spices to the dough, such as dried oregano or thyme, to give it a distinctive flavor. You can also use ground spices like cinnamon or nutmeg for added depth.
Grains and Seeds: Experiment with adding different types of grains or seeds to the dough, such as sunflower seeds or pumpkin seeds, for added texture and nutrition. Just be sure to adjust the liquid content accordingly.
Cheese or Nutritional Yeast: Consider adding cheese or nutritional yeast to give the bread a nutty, cheesy flavor that complements the ancient grains perfectly.
Experiment with different types of flour or herbs to create unique flavor profiles.
The key to creating a diverse range of flavor profiles for Ezekiel bread lies in experimenting with different types of flour and herbs. One approach is to replace a portion of the wheat flour with other gluten-containing flours, such as barley or rye flour.
Using these alternative flours adds depth and complexity to the bread’s texture and flavor. For example, adding barley flour contributes a nutty, slightly sweet taste, while rye flour lends a robust, earthy note.
Another option is to incorporate gluten-free flours into the recipe, making it more accessible for individuals with gluten intolerance or sensitivity.
Gluten-free alternatives like almond flour, coconut flour, or rice flour can be used in various proportions to create a delicious and versatile bread that suits different dietary needs.
Incorporating herbs into the Ezekiel bread recipe is an excellent way to add fresh flavors and aromas. Choose from a variety of herbs such as rosemary, thyme, oregano, or basil, which can be added at different stages of the dough formation process.
For example, adding dried rosemary during the initial mixing phase gives the bread a fragrant and herbaceous flavor, while adding fresh basil towards the end of kneading imparts a more delicate, summery taste.
The choice of herbs can also be influenced by regional or cultural preferences. For instance, using Mediterranean herbs like oregano and thyme creates a distinctively Greek-inspired flavor profile.
In addition to incorporating different flours and herbs, experimenting with various spices and seasonings can further enhance the bread’s unique characteristics.
Try adding cinnamon, nutmeg, or cardamom to create sweet bread variations perfect for breakfast or snack time. Alternatively, using cumin, coriander, or smoked paprika adds a rich, savory taste ideal for sandwiches or toast.
Lastly, don’t forget to adjust the yeast and water ratios according to your chosen flour type and herb combination. This will ensure that the dough rises properly and develops the desired texture and crumb structure.
Storing and Serving
To ensure that your Ezekiel bread turns out perfectly, it’s essential to consider various tips and variations for storing and serving.
Tips
One key aspect is to keep your Ezekiel bread away from direct sunlight, as it can cause the bread to become stale quickly. Store it in an airtight container or wrap it tightly with plastic wrap or aluminum foil to preserve its freshness.
Another tip is to freeze the bread if you won’t be using it within a few days. Simply wrap it tightly and place it in a freezer-safe bag or container. When you’re ready to use it, thaw it at room temperature or toast it directly from the freezer.
Variations
You can experiment with different types of grains and flours to create unique flavor profiles and textures. Some options include:
- Adding nuts or seeds for added crunch and nutrition, such as walnuts or sesame seeds.
- Using other types of whole grains like Kamut or spelt for a nuttier flavor.
- Adding dried fruits or herbs to create a sweeter or savory bread.
Serving Suggestions
Ezekiel bread is a versatile bread that can be served in various ways, including:
- Toasting it with avocado or peanut butter for a delicious breakfast or snack.
- Using it as a base for sandwiches, such as BLTs or grilled cheese.
- Serving it alongside soups or stews for dipping.
- In terms of serving temperature, Ezekiel bread can be served at room temperature or toasted. Toasting brings out the natural flavors and adds a crispy texture.
Cool the bread completely on a wire rack before slicing.
To achieve the perfect texture and flavor in your homemade Ezekiel bread, it’s essential to cool it completely on a wire rack before slicing. This step allows for even drying and helps prevent the formation of condensation, which can make the bread soggy or develop off-flavors.
Here are some additional tips and variations for working with this bread recipe:
Tips for Working with Ezekiel Bread
- Use a digital scale to measure ingredients accurately, as small variations in ingredient weight can affect the final product’s texture and flavor.
- Mix the dough thoroughly but gently, being careful not to over-develop the gluten. This will help maintain the bread’s delicate, slightly crispy crust.
- Resist the temptation to over-proof or over-bake the loaf, as this can cause it to become dense and dry.
Variations for Ezekiel Bread
- Nutty Delight: Add chopped nuts (walnuts or pecans work well) to the dough for added texture and flavor.
- Herby Twist: Mix in some dried herbs (such as rosemary, thyme, or oregano) into the dough for a savory, aromatic flavor.
- Spicy Kick: Add some diced jalapeños or red pepper flakes to the dough for an extra kick of heat.
Storage and Freshness
To keep your Ezekiel bread fresh for a longer period, consider the following:
- Store the cooled loaf in an airtight container at room temperature or wrap it tightly in plastic wrap or aluminum foil.
- Keep the bread away from direct sunlight and moisture to prevent mold growth and spoilage.
By following these tips and variations, you’ll be well on your way to creating delicious, homemade Ezekiel bread that’s perfect for sandwiches, toast, or as a side dish.
Store Ezekiel bread in an airtight container at room temperature for up to 5 days.
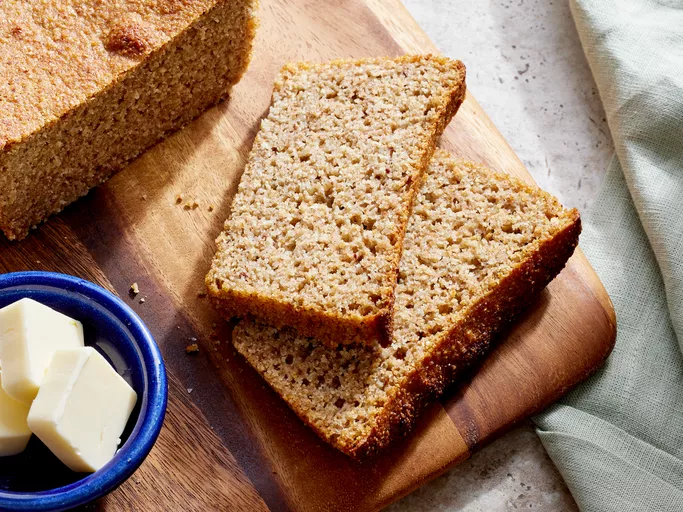
Ezekiel bread, also known as sprouted grain bread, has a unique flavor and texture that sets it apart from other types of bread. When stored properly, Ezekiel bread can be kept for up to 5 days at room temperature.
Here are some tips for storing Ezekiel bread:
- Store the bread in an airtight container: This will help keep moisture out and prevent the bread from becoming stale or moldy. You can use a plastic bag, a glass container with a tight-fitting lid, or even wrap the bread tightly in aluminum foil.
- Keep it away from direct sunlight: Direct sunlight can cause the bread to dry out and become stale more quickly. If you don’t have a dark cupboard, try storing the bread on a high shelf where it won’t be exposed to direct sunlight.
- Store it at room temperature: Ezekiel bread doesn’t require refrigeration, but it’s best stored at room temperature (around 70-75°F or 21-24°C). Avoid storing the bread in a warm or humid environment, as this can cause it to become stale or develop off-flavors.
- Freeze for longer storage: If you won’t be using the Ezekiel bread within 5 days, consider freezing it. Wrap the bread tightly in plastic wrap or aluminum foil and store it in a freezer-safe bag. Frozen Ezekiel bread will keep for up to 2 months.
Variations on the basic storage instructions include:
- Freeze-dried Ezekiel bread: This can be stored for much longer than frozen bread, but it’s best rehydrated before use.
- Cutting the bread into smaller portions: Cutting the bread into smaller slices or cubes can help prevent mold from growing and make it easier to store in a compact space.
- Using a dehydrator: A dehydrator can be used to dry out Ezekiel bread, making it more crispy and long-lasting. However, this method may not be suitable for everyone and requires careful temperature control.
Freeze for longer storage, thaw when needed.
To freeze Ezekiel bread for longer storage, it’s essential to wrap and store it properly. Start by letting the bread cool completely on a wire rack before freezing. This helps prevent moisture buildup and minimizes the risk of freezer burn.
Once cooled, cut the bread into slices or leave it whole, depending on your preference. Place each slice or loaf in an airtight container or freezer bag, making sure to press out as much air as possible before sealing.
Label the container or bag with the date and contents, and store it in the freezer at 0°F (-18°C) or below. Frozen Ezekiel bread can be stored for up to 3-4 months.
To thaw frozen Ezekiel bread, remove it from the freezer bag or container and place it on the counter at room temperature. It may take several hours to thaw completely, depending on the size of the loaf.
Alternatively, you can thaw frozen Ezekiel bread in the refrigerator overnight or use the microwave in short intervals (10-15 seconds) until it’s thawed through. However, note that microwaving can lead to uneven heating and affect the texture of the bread.
When reheating frozen Ezekiel bread, you can toast it lightly before serving or simply let it sit at room temperature for a few minutes to allow it to regain its original texture and flavor.
Some popular variations to the basic Ezekiel bread recipe include adding nuts (walnuts or almonds work well), seeds (such as sesame or sunflower), dried fruits, or herbs like rosemary or thyme. Experimenting with different combinations can result in unique flavors and textures that complement various toppings or spreads.
For an extra crispy crust, try baking the Ezekiel bread at 375°F (190°C) for 5-10 minutes after freezing. This will help restore some of its original crunch and texture.

- Best LeadsGorilla Alternatives for 2025 - April 22, 2025
- Best Leadzai Alternatives for 2025 - April 22, 2025
- Best LeadSwift Alternatives for 2025 - April 21, 2025
