Ingredients and Preparation
Acquiring Fresh Red Currants
To make a delicious red currant jelly, you’ll need to start by acquiring fresh red currants.
There are several ways to obtain fresh red currants:
Farmers’ Markets
Visit your local farmers’ market during the spring and summer months when red currants are in season. You can often find them in abundance at these markets, and you may even be able to talk to the farmer about how they were grown.
Grow Your Own
If you have a garden with a suitable climate, consider growing your own red currant bush. This will not only ensure that you have a steady supply of fresh fruit, but it will also allow you to pick them at the peak of ripeness.
Health Food Stores or Specialty Grocery Stores
Some health food stores or specialty grocery stores may carry fresh red currants in their produce section. Be prepared for a higher price point compared to buying from a farmers’ market or growing your own.
Online Fruit Delivery Services
If you’re unable to find fresh red currants in your local area, consider using an online fruit delivery service that specializes in seasonal fruits and berries. These services often source their products from local farms and will deliver them right to your doorstep.
Once you’ve acquired your fresh red currants, it’s time to prepare them for jelly-making:
Cleaning the Currants
Rinse the red currants gently with cold water to remove any dirt or debris. Gently pat them dry with a paper towel to remove excess moisture.
Weighing and Measuring the Currants
To make jelly, you’ll need 1 pound of fresh red currants. Weigh the currants using a digital kitchen scale or measure them by volume (about 4 cups). Be sure to leave any stems or leaves intact.
Pitting the Currants (optional)
If your currants have seeds, you may want to remove them before making jelly. This is optional, but it will give you a smoother jelly and eliminate the possibility of seeds getting stuck in your teeth.
Now that your red currants are prepared, it’s time to move on to the next step in making red currant jelly: cooking the currants with sugar and pectin. We’ll cover this process in our next section.
Fresh red currants are best obtained from local farmers’ markets or picked directly from bushes in summer months, according to the University of California’s Agricultural and Natural Resources department.
To make a delicious red currant jelly, you will need to start with fresh and high-quality ingredients. Fresh red currants are best obtained from local farmers’ markets or picked directly from bushes in summer months.
This recommendation comes from the University of California’s Agricultural and Natural Resources department, which highlights the importance of sourcing seasonal produce to ensure optimal flavor and nutritional value.
Here is a list of ingredients you will need for this recipe:
- Fresh red currants (about 2 cups)
- Water (about 4 cups)
- Lemon juice (about 1/4 cup)
- Granulated sugar (about 4 cups)
- Pectin (optional, about 1 tablespoon)
For the preparation of red currant jelly, follow these steps:
- Rinse the fresh red currants and remove any stems or leaves. Pat them dry with a paper towel to prevent excess moisture from affecting the jam-making process.
- In a large pot, combine the rinsed red currants, water, and lemon juice. Bring the mixture to a boil over medium heat, stirring occasionally.
- Reduce the heat to low and simmer the mixture for about 10-15 minutes, or until the currants have broken down and released their juices.
- In a separate bowl, mix together the granulated sugar and pectin (if using). Add this mixture to the pot with the red currant mixture and stir well.
- Return the pot to medium heat and bring the mixture to a boil. Then, reduce the heat to low and simmer for another 10-15 minutes, or until the jelly has thickened and passed the “wrinkle test”.
- Remove the pot from the heat and let the jelly cool slightly before transferring it to clean, sterilized jars. Store the jelly in the refrigerator for up to 6 months.
Note: The wrinkle test is a simple method to check if the jelly has set properly. To perform this test, place a small amount of the jelly on a chilled plate and let it cool to room temperature. If the jelly wrinkles when pushed with your finger, it’s ready. If not, continue cooking the jelly for a few more minutes and testing again.
Picking and Preparing Currants
Currants are small, round fruits that come from the currant bush. They are native to Europe and Asia but are now cultivated worldwide for their delicious flavor and nutritional value.
The most commonly used type of currant in cooking is the red currant, which has a sweet-tart taste and a deep red color. Red currants are rich in vitamin C, potassium, and antioxidants.
To prepare currants for use in recipes like the Red Currant Jelly Recipe, you’ll need to pick them at the right time. Look for currants that are plump, firm, and have a deep red color. Avoid any currants that are soft, mushy, or have mold on them.
Picking currants is best done by hand, as they can be delicate and easily bruised. Gently pick the currants from the bush, making sure not to pull too hard and damage the stem or the fruit itself.
Once you’ve picked your currants, it’s time to clean them. Rinse them gently in cold water to remove any dirt, leaves, or debris that may be attached.
After washing, you’ll need to prepare the currants for use in the recipe. This typically involves stemming and chopping the currants into smaller pieces. You can either leave them whole or chop them into quarters, depending on your preference.
To stem a currant, simply pinch off the stem at the top of the fruit. This will help you remove any leaves or debris that may be attached to the stem.
Chopping currants is best done with a sharp knife or a food processor. Be careful not to over-chop, as this can cause the currants to become mushy and lose their texture.
Now that your currants are prepared, you’re ready to make the Red Currant Jelly Recipe. Simply combine the chopped currants with sugar, pectin, and water in a large pot and bring it to a boil over high heat.
Reduce the heat to low and simmer for about 10-15 minutes, or until the jelly has thickened and passed the winter test. Remove from heat and let cool before transferring the jelly to sterilized jars.
Gently pick 23 cups of fresh red currants and rinse them in a fine mesh strainer under cool running water. Discard any wilted or damaged berries.
The first step in preparing for this delicious red currant jelly recipe is to select and clean the fresh red currants. Here are the ingredients and preparation steps you’ll need to follow:
Ingredients:
- 23 cups of fresh red currants
- 1 package of pectin (optional)
- 4 cups of granulated sugar
- 1/4 cup of water
- Lemon juice (optional)
Preparation:
Gently pick 23 cups of fresh red currants and rinse them in a fine mesh strainer under cool running water. Discard any wilted or damaged berries.
Next, remove the stems from the currants and crush them using a fruit press or a potato masher to release their juice. You can also use a food mill or a blender to puree the currants if you prefer a smoother texture.
Transfer the crushed currants to a large pot and add in 4 cups of granulated sugar, 1/4 cup of water, and a package of pectin (if using). Heat the mixture over medium heat, stirring occasionally, until the sugar has dissolved and the mixture comes to a boil.
Reduce the heat to low and simmer the mixture for about 20-25 minutes, or until the jelly has thickened and passed the “sheeting test”. To perform the sheeting test, place a small amount of the jelly on a plate and let it cool to room temperature. If the jelly forms a sheet that holds its shape, it’s ready! If not, continue simmering for a few more minutes and testing again.
Once the jelly has thickened, remove it from heat and stir in some lemon juice (if using) to enhance the flavor. Let the jelly cool slightly before transferring it to clean, sterilized jars. Process the jars in a boiling water bath for 5-10 minutes to ensure they’re properly sealed.
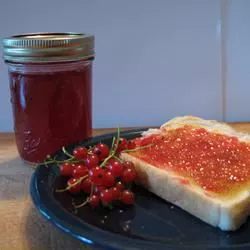
Your delicious homemade red currant jelly is now ready to be enjoyed! Store it in a cool, dark place and enjoy on toast, scones, or as a topping for yogurt or ice cream.
Cooking the Currant Mixture
Simmering Currants with Sugar and Lemon Juice
To cook the currant mixture, it’s essential to create a deliciously sweet and tangy mixture that will eventually transform into the fragrant Red Currant Jelly.
Bearing in mind this goal, start by combining two cups of red currants with one cup of granulated sugar and three tablespoons of freshly squeezed lemon juice in a medium saucepan. The high water content of the berries means it’s crucial to use less liquid to avoid diluting the final jelly.
Place the saucepan over medium heat and bring the mixture to a simmer, stirring occasionally with a silicone spatula or wooden spoon. It’s essential to be patient at this stage as the mixture will take around 10-15 minutes to come to a boil.
Once boiling, reduce the heat to low and let the currant mixture simmer for approximately 20-25 minutes, or until it has thickened sufficiently and passed the ‘wrinkle test’. The wrinkle test involves placing a small amount of the jelly on a chilled plate; if it wrinkles when pushed with your finger, it’s ready. If not, continue to simmer for a further 5 minutes and recheck.
Throughout the cooking process, keep an eye on the mixture as it will reduce in volume significantly. This is a normal occurrence and doesn’t affect the final jelly’s quality or consistency.
Once the currant mixture has thickened to your liking, remove it from the heat source and let it cool slightly before transferring it to a clean glass jar. Store the Red Currant Jelly in an airtight container in the fridge for up to 6 months or freeze it for longer-term storage.
Combine 1 cup of fresh red currants, 1/4 cup granulated sugar, and 1 tablespoon freshly squeezed lemon juice in a medium saucepan. Heat over low heat for about 1015 minutes or until the mixture thickens slightly.
To cook the currant mixture, begin by combining 1 cup of fresh red currants, 1/4 cup granulated sugar, and 1 tablespoon freshly squeezed lemon juice in a medium saucepan. It’s essential to use fresh red currants for this recipe as they will provide the best flavor and texture.
Mix the ingredients well to ensure that the currants are evenly coated with the sugar and lemon juice. You can do this using a spoon or a silicone spatula, whichever you prefer.
Next, place the saucepan over low heat on your stovetop. If you have an electric stove, make sure to use the lowest heat setting available. This will prevent the mixture from cooking too quickly and potentially burning.
Allow the mixture to cook for about 10-15 minutes or until it thickens slightly. You can check the consistency by lifting some of the mixture with your spoon and letting it drip back into the saucepan. If it’s still quite runny, continue to cook for a few more minutes and check again.
It’s worth noting that the currant mixture will thicken further as it cools down, so don’t worry if it seems a bit runny at this stage. The important thing is to achieve a smooth consistency before moving on to the next step of making the jelly.
Strain and Filter the Mixture
To cook the currant mixture, place it in a large saucepan over medium heat and stir occasionally as it begins to simmer.
As the mixture starts to boil, reduce the heat to low and let it simmer for about 20-25 minutes or until the liquid has reduced by half and the flavors have melded together.
During this time, you may need to skim off any excess foam that forms on the surface of the mixture with a spoon.
To strain and filter the mixture:
- Line a large fine-mesh sieve or cheesecloth over a clean saucepan or container. If using cheesecloth, make sure it’s tucked in tightly around the edges of the pan.
- Pour the cooked currant mixture into the prepared strainer or cheesecloth-lined pan.
- Let the liquid drip through the sieve or cheesecloth for about 10-15 minutes, collecting the resulting clear juice in a clean saucepan or container. Discard any solids that remain in the strainer or cheesecloth.
After filtering, you should be left with a smooth and fragrant currant juice that’s free from any seeds or pulp. This is now ready to proceed with making your Red Currant Jelly Recipe.
Strain the cooked currant mixture through a fine mesh strainer into a clean bowl, pressing on the solids to extract as much liquid as possible.
This step is crucial in preparing the currant mixture for jelly making, and it requires a bit of patience and finesse to get it just right.
The cooked currant mixture has probably reached a point where it’s still quite thick and chunky, with visible currants and seeds suspended within. To separate these solids from the liquid, you’ll need to strain the mixture through a fine mesh strainer into a clean bowl.
Place the strainer over the bowl, making sure that the edges are securely positioned to prevent any spills or leaks during the process. Gently pour the cooked currant mixture into the strainer, allowing it to filter through the mesh.
As you do this, try to press down on the solids with a spatula or spoon to help extract as much liquid as possible from the currants and seeds. This will ensure that you don’t miss out on any of the valuable juice that’s trapped within.
Continue pressing until you’ve managed to squeeze most of the liquid through the mesh, leaving behind only a small amount of solids in the strainer. Discard the solids – they won’t be needed for the jelly – and reserve the strained currant mixture in the clean bowl.
At this point, your currant mixture should have been significantly reduced, with a clearer and more liquid consistency than before. This is an important step in preparing it for further processing into the final red currant jelly product.
Before proceeding to the next stage of the recipe – which may involve adding sugar or other ingredients – make sure that you’ve got a clear and accurate understanding of this crucial step in creating your homemade red currant jelly.
Jelly Making and Setting
Pouring Currant Mixture into Jars
The process of making jelly is an art that requires patience, precision, and a bit of chemistry understanding. When it comes to creating a delicious red currant jelly, the journey begins with preparing the fruit and its juice.
After washing and sorting the red currants, they are crushed or pureed to release their juice and flavor. The resulting pulp is then cooked with sugar and water to create a sweet and tangy mixture that will eventually set into a gel-like consistency.
This magical process of setting occurs when the pectin, a naturally occurring substance found in fruit, reacts with sugar and heat. Pectin molecules begin to unwind and form bonds with each other, creating a network of chains that gives the jelly its characteristic texture.
As the mixture continues to boil, the pectin molecules become more complex, forming an intricate web of interconnected strands. This is when the magic happens – the jelly starts to thicken and set, taking on a firm, yet still slightly pourable, consistency.
Pouring the currant mixture into jars at this critical stage is crucial, as it allows the jelly to cool and set evenly. The heat from the mixture needs to be distributed uniformly throughout the jar, ensuring that the pectin chains form correctly and the jelly sets properly.
As the jelly cools and solidifies in the jar, a process called syneresis occurs – the liquid separates from the gel-like substance, leaving behind a clear, flavorful jelly. This is when you know your red currant jelly has reached its full potential – it’s ready to be enjoyed on toast, scones, or as a delicious accompaniment to meats and cheeses.
Pour the strained currant mixture into clean, hot jelly jars, leaving about 1/4 inch of space at the top.
The final step in making red currant jelly is to carefully fill and seal the jars, ensuring that the hot jelly is properly set and ready for storage. To do this, pour the strained currant mixture into clean, hot jelly jars, leaving about 1/4 inch of space at the top.
It’s essential to use clean, sterilized equipment and jars to prevent contamination and ensure the jelly sets properly. Before filling the jars, make sure they are still warm from washing with hot soapy water or steaming them in a large pot for a few minutes.
To remove any air bubbles that may form during pouring, gently run a non-metallic utensil, such as a silicone spatula or spoon, around the inside of the jar and along the edge of the jelly. This helps to eliminate any trapped air pockets and ensures the jelly sets evenly.
After filling each jar, use a clean cloth or paper towel to wipe away any excess jelly from the rim of the jar. This creates a smooth surface for sealing, reducing the risk of spoilage and contamination.
Next, place the sterilized lids and rings onto the filled jars, making sure they are securely tightened but not over-tightened. The rings should be just finger-tight to allow for expansion during canning and storage.
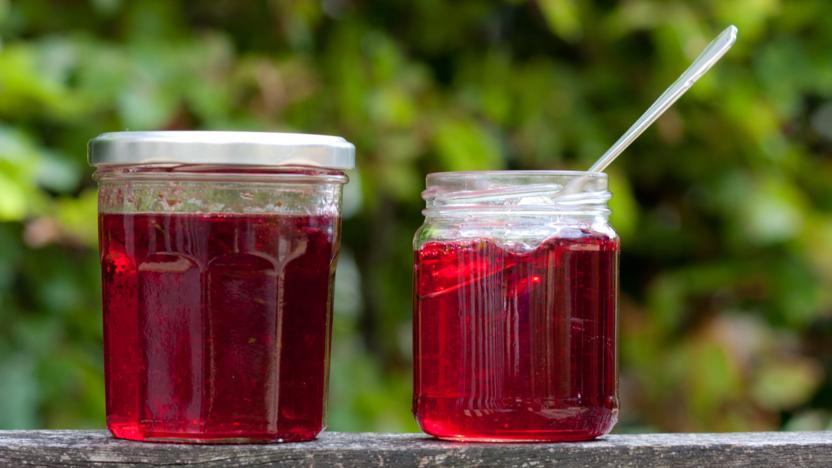
Now that the jars are filled and sealed, it’s time to let them cool and set in a draft-free area. This allows the jelly to firm up properly, creating a clear gel-like consistency that is both visually appealing and safe to eat.
The recommended processing time for red currant jelly is usually 5-10 minutes in a boiling water bath, depending on the altitude and desired level of acidity. During this time, the jars will be subjected to high heat, which helps kill off any bacteria or other microorganisms that may have entered during the canning process.
Once the processing time has elapsed, remove the jars from the pot using a clean towel or tongs, taking care not to touch the hot glass. Let them cool completely on a wire rack or tray before storing in a cool, dark place, such as a cupboard or pantry.
Tips for Successful Jelly Making and Setting:
- Use high-quality ingredients: Fresh red currants and pure sugar are essential for creating a rich, flavorful jelly.
- Sterilize equipment and jars: This is crucial to prevent contamination and ensure the jelly sets properly.
- Monitor temperature and processing time: Keep an eye on the temperature and processing time to ensure the jelly reaches the desired consistency.
- Store in a cool, dark place: Keep the jars away from direct sunlight and heat sources to maintain the quality of the jelly.
Troubleshooting Common Issues:
- Jelly is too runny: Check the pectin content of your currants or add more sugar to balance out the flavor.
- Jelly is too thick: Add a little water to thin it out, but be careful not to add too much, as this can affect the texture and consistency.
Safety Precautions:
- Always use clean equipment and sterilized jars to prevent contamination.
- Follow proper processing times and temperatures to ensure the jelly reaches a safe consistency.
- Store the sealed jars in a cool, dark place to maintain their quality.
Sealing and Cooling the Jellied Currants
Jelly making is a delicate process that requires attention to detail and patience, but with the right techniques, you can create a delicious homemade red currant jelly that will impress anyone who tastes it.
The first step in jelly making is to prepare the ingredients, which in this case are fresh or frozen red currants. Wash the currants thoroughly under cold running water, then drain and pat them dry with paper towels to remove any excess moisture. This step is crucial because excess water can lead to a cloudy or runny jelly.
Next, combine 2 cups of sugar and 1 cup of water in a saucepan and stir until the sugar has dissolved. Add the prepared currants to the mixture, along with 1 tablespoon of lemon juice for every cup of currants you’re using. The acidity of the lemon will help to balance out the sweetness of the jelly.
Bring the mixture to a boil over high heat, stirring occasionally, until the currants have popped and the mixture has reached its boiling point. Reduce the heat to medium-low and simmer for about 20-25 minutes, or until the jelly has thickened and passed the “sheeting test.”
To check if your jelly is set, place a small amount of it on a chilled plate and let it cool to room temperature. If the jelly forms a sheet that holds its shape when pushed gently with your finger, it’s ready. If not, continue simmering for another 5-10 minutes and testing again until you reach the desired consistency.
Once your jelly is set, remove it from the heat and let it cool slightly before straining it through a fine-mesh sieve or cheesecloth to remove any excess pulp or solids. Transfer the strained jelly to a clean glass jar, leaving about 1/4 inch of headspace at the top.
Sealing the jellied currants requires careful attention to ensure that they are properly sterilized and stored in an airtight container to prevent spoilage. To seal the jars, follow these steps:
- Wash the jars, lids, and rings thoroughly in hot soapy water, then dry them with clean towels.
- Sterilize the jars by submerging them in boiling water for 10-15 minutes or by running them through a dishwasher on the sterilizing cycle.
- Fill each jar to the recommended level with the jellied currants, leaving about 1/4 inch of headspace at the top.
- Wipe the rims with a clean cloth or paper towel to remove any excess jelly that may have spilled during filling.
- Apply the sterilized lids and rings tightly, but not too tightly – you want to allow for slight expansion in case of temperature changes.
- Process the jars in a boiling water bath for 5-10 minutes to ensure they are properly sealed and sterilized.
- Remove the jars from the water bath and let them cool to room temperature, undisturbed, for at least 24 hours. This will allow the jelly to set and seal properly.
- After 24 hours, check the seals by pressing on the lids – if they do not move when pressed, the jellied currants are sealed and ready to store in a cool, dark place.
Cover the jelly jars with sterilized lids and bands. Let them cool to room temperature, undisturbed for at least 24 hours before refrigerating or storing in a cool dark place.
The final step in making jelly is setting, which involves allowing the jelly to cool and thicken before filling and sealing the jars. This process is crucial to ensure that the jelly sets properly and remains stable over time.
After cooking the red currants with sugar and pectin, the mixture will be extremely hot and syrupy. To prevent contamination and spoilage, it’s essential to handle the jelly carefully and safely.
Start by pouring the jelly into clean, sterilized jars that have been prepared for filling. Make sure the jars are free from any residues or debris, and wash your hands thoroughly before handling them.
Cover each jar with a sterilized lid, ensuring that it is securely fitted onto the rim of the jar. Then, add a band around the lid to hold it in place. This will help to prevent the lid from coming loose during storage or transportation.
Next, let the jelly cool to room temperature. Avoid disturbing the jars or shaking them, as this can cause the jelly to become cloudy or unevenly set.
Allow the jelly to cool and set for at least 24 hours before refrigerating or storing it in a cool, dark place. This will give the pectin time to fully gel and the flavors to mature and develop.
Once the jelly has set and cooled, you can store it in a cool, dark place or refrigerate it to prolong its shelf life. Always check the jelly for any signs of spoilage before consuming it, such as an off smell, mold, or slime.
If you plan to store the jelly for an extended period, make sure to check on it regularly to ensure that it remains safe and edible. You can also consider canning the jelly using a water bath canner to create a more stable and shelf-stable product.
- Best Datanyze Alternatives for 2025 - April 24, 2025
- Best Hunter.io Alternatives for 2025 - April 22, 2025
- Best Lead411 Alternatives for 2025 - April 22, 2025

