
Ingredients
For the Cake
The ingredients required for this delicious Cake recipe are quite simple and easily available in most supermarkets. For a classic dessert like chocolate icebox cake, you’ll need:
- 1 and 1/2 cups of All-Purpose Flour, sifted to ensure it’s light and fluffy.
- 1 cup of granulated Sugar that will provide the sweetness needed for this dessert.
- 3 teaspoons of pure Vanilla Extract for its distinct flavor and aroma.
- 6 ounces of high-quality Cocoa Powder, unsweetened, to give it a rich and intense chocolate taste.
- 1/2 cup of unsalted <i.butter< i=””>, softened to room temperature for easy creaming with sugar.</i.butter<>
- 4 large eggs at room temperature, beaten well before adding them to the mixture.
- 1 teaspoon of salt to balance out the sweetness and enhance flavors.
- These ingredients will be combined to create a moist and decadent cake that’s perfect for any occasion. With just a few simple steps and some basic pantry staples, you’ll have a delicious chocolate icebox cake that’s sure to impress your family and friends!
- When it comes to making an Easy Chocolate Icebox Cake, the ingredients play a crucial role in determining the final taste and texture of the dessert.
The following are the essential ingredients required for this recipe:
- Cake Layers: You will need 1 1/2 cups of all-purpose flour, 1 cup of granulated sugar, 6 ounces (170g) of high-quality dark or semi-sweet chocolate, and 1 teaspoon of baking powder.
- Whipped Cream: For the whipped cream topping, you will need 2 cups (475ml) of heavy cream and 4 ounces (115g) of unsalted butter, softened.
- Chocolate Ganache: To make the chocolate ganache, you will require 1 cup (200g) of high-quality dark or semi-sweet chocolate chips and 2 tablespoons of unsalted butter, softened.
- Milk: For soaking the cake layers and creating a creamy consistency, you’ll need 1/4 cup (60ml) of whole milk.
- Vanilla Extract: Add 1 teaspoon of pure vanilla extract to enhance the flavor of your chocolate icebox cake.
Optional Ingredients:
- Coffee or espresso powder for added depth of flavor
- Nuts or sprinkles for decoration and extra texture
Please note that using high-quality chocolate is crucial in achieving the best flavor possible. You can adjust the type and amount of chocolate according to your preference.
1 1/2 cups chocolate wafers, crushed
The key to a successful Easy Chocolate Icebox Cake Recipe lies in the quality and quantity of its ingredients, particularly the crushed chocolate wafers.
Here are some essential details about 1 1/2 cups of crushed chocolate wafers:
Quantity: One and a half cups of crushed chocolate wafers will yield enough crumbs to coat the bottom layer of your icebox cake.
Type: You can use any variety of chocolate wafer, but classic or semi-sweet wafers are ideal for this recipe. They provide an intense chocolate flavor that pairs well with whipped cream and fresh fruit.
Crushing method
- Crush the wafers in a food processor until they resemble fine crumbs.
- If you don’t have a food processor, place the wafers in a plastic bag and crush them with a rolling pin or your hands until they reach the desired consistency.
Storage: Crushed chocolate wafers can be stored in an airtight container at room temperature for up to 2 weeks. You can also freeze them for up to 3 months, making it easy to prepare this recipe whenever you want.
Using 1 1/2 cups of crushed chocolate wafers will result in a rich and decadent icebox cake that’s sure to impress your friends and family. Simply layer the crushed wafers with whipped cream, fresh fruit, or nuts to create a delicious dessert that’s perfect for any occasion.
1 cup heavy cream
Heavy cream is a crucial ingredient in many desserts, including the Easy Chocolate Icebox Cake Recipe. It plays a vital role in adding richness, texture, and flavor to the final product. In this context, 1 cup of heavy cream is specifically called for to help create a smooth and creamy filling for the icebox cake.
Heavy cream is a type of dairy product that contains about 36% fat content, which gives it a rich and velvety texture. It’s made by skimming the cream from milk, then removing excess water to concentrate the cream’s fat globules. This process results in a thick, luxurious liquid with a high calorie count.
When using heavy cream in baking or desserts like icebox cake, it’s essential to choose a high-quality product that is fresh and has not been ultra-pasteurized (UHT). UHT processing involves heating the cream to extremely high temperatures for short periods, which can destroy beneficial enzymes and alter the taste.
Heavy cream can be whipped to create stiff peaks or used as a base for sauces and frostings. In the context of this recipe, it’s mixed with other ingredients like cocoa powder, sugar, and vanilla extract to form the cake’s filling. The heavy cream adds moisture, tenderness, and an unmistakable richness to the final product.
The 1 cup of heavy cream used in this recipe should be at room temperature before incorporating it into the mixture. This ensures that the cream blends smoothly with other ingredients and doesn’t result in lumps or uneven texture.
1/2 cup confectioners’ sugar
The list of ingredients for this decadent dessert starts with a crucial component that will add sweetness and tenderness to our chocolate icebox cake: 1/2 cup confectioners’ sugar. Confectioners’ sugar, also known as powdered sugar or icing sugar, is a finely ground sugar that has been processed into an extremely fine powder.
Unlike granulated sugar, which can be a bit crunchy and noticeable in texture when used in baked goods, confectioners’ sugar dissolves easily in liquid ingredients, creating a smooth consistency and preventing grainy textures. This makes it perfect for frosting cakes, decorating pastries, and adding sweetness to desserts like our icebox cake.
In the context of this recipe, the 1/2 cup of confectioners’ sugar serves not only as a sweetener but also as an essential ingredient in creating a light and airy mousse that will top our chocolate icebox cake. This sweet treat relies heavily on high-quality ingredients like confectioners’ sugar to deliver a rich, indulgent taste experience.
- The ingredients needed for this Easy Chocolate Icebox Cake Recipe are relatively simple and can be easily found at most local grocery stores or online.
- The first ingredient required is a package of chocolate wafers, preferably Nabisco Famous Chocolate Wafers or a similar brand.
- These wafers serve as the base for our cake and provide a rich, chocolatey flavor that complements the whipped cream and other ingredients perfectly.
- Next, we’ll need heavy whipping cream, which is used to make the whipped cream topping for our icebox cake.
- The heavy whipping cream should be at least 35% fat content, as this will ensure it holds its shape properly when whipped.
- We’ll also need powdered sugar to sweeten and stabilize the whipped cream.
- The amount of powdered sugar needed may vary depending on personal taste preferences, but a general guideline is 1-2 tablespoons per cup of heavy whipping cream.
- In addition to these main ingredients, we’ll require a pinch of salt to balance out the sweetness of the whipped cream and chocolate wafers.
- This might seem like an unusual ingredient, but it plays a crucial role in bringing all the flavors together harmoniously.
- Finally, for decoration purposes, we can add some additional toppings such as chopped nuts (walnuts or almonds work well), shaved dark chocolate, or even fresh fruit slices to give our icebox cake a pop of color and added texture.
Instructions and Assembly
Layers of Cream and Cake
Cake assembly requires careful planning and attention to detail, particularly when it comes to creating a multi-layered dessert like a chocolate icebox cake.
The first step in assembling this type of cake is to prepare the individual layers, which typically consist of cake, frosting or whipped cream, and fruit or nuts.
For an easy chocolate icebox cake recipe, the layers would be comprised of store-bought or homemade chocolate cake, a rich chocolate ganache, and whipped cream with a splash of vanilla extract.
When it comes to layering these components, it’s essential to start with a sturdy base – in this case, the bottom slice of chocolate cake.
This is then topped with a generous dollop of whipped cream, which helps to stabilize the cake and prevents it from becoming too soggy.
Next comes the ganache layer, made by melting high-quality dark chocolate in a double boiler or in the microwave, stirring constantly until smooth.
The ganache is then poured over the whipped cream, allowing it to set before adding another slice of cake on top.
This process continues until all the layers are assembled, with each component carefully balanced to ensure even distribution and prevent any layer from becoming too overpowering.
When working with multiple layers of cream and cake, it’s crucial to maintain a clean and stable work surface, using parchment paper or a silicone mat to catch any spills or crumbs that may occur during the assembly process.
A pastry brush can also be used to spread the ganache evenly across each layer, while a turntable or lazy Susan comes in handy for displaying and serving the finished cake.
Once assembled, it’s recommended to refrigerate the chocolate icebox cake for at least 30 minutes before serving, allowing the flavors to meld together and the texture to firm up.
This chilling time also helps to prevent any sogginess or collapse of the layers, ensuring a stable and visually appealing dessert that wows even the most discerning palates.
The key to successfully assembling an easy chocolate icebox cake recipe lies in understanding the importance of precise instructions and careful assembly.
To begin with, it’s crucial to ensure that all ingredients are measured correctly, and the necessary tools such as a springform pan and a sharp knife are readily available.
Once you have gathered your equipment and ingredients, the next step is to prepare each component of the cake, including the chocolate layers, whipped cream, and any additional toppings or garnishes.
The chocolate layers should be made by melting high-quality dark chocolate in a double boiler, then allowing it to cool slightly before spreading it evenly onto the bottom of the springform pan. This will form the base layer of the cake.
For the whipped cream topping, heavy cream is beaten with sugar and vanilla extract until stiff peaks are formed, creating a light and airy texture that contrasts nicely with the dense chocolate layers.
The assembly process begins by placing one or more of the cooled chocolate layers into the prepared springform pan. The number of layers can be adjusted according to personal preference, but generally three or four layers are ideal for a classic icebox cake design.
Next, spread a layer of whipped cream over the top of each chocolate layer, being careful not to over-spread as this can cause the cake to become unstable. This will also help to keep the layers separated and prevent them from merging during refrigeration.
Additional toppings or garnishes such as chopped nuts, chocolate shavings, or fresh berries can be added at this stage, adding texture and visual appeal to the finished dessert.
Finally, cover the assembled cake with plastic wrap or aluminum foil and chill in the refrigerator for at least three hours or overnight to allow the flavors to meld together and the layers to set properly. This will ensure that when it’s time to serve, the chocolate icebox cake is stable and ready to be devoured.
As you can see, assembling an easy chocolate icebox cake recipe requires a combination of basic baking skills, attention to detail, and patience. By following these instructions carefully and taking your time during assembly, you’ll end up with a show-stopping dessert that’s sure to impress your family and friends.
Whip the heavy cream until stiff peaks form.
To prepare this delectable Easy Chocolate Icebox Cake, it’s essential to follow a series of instructions that ensure each component comes together seamlessly for a rich and satisfying dessert.
The first crucial step in making this cake involves whipping heavy cream until stiff peaks form. To do so, pour cold heavy cream into a large mixing bowl, leaving about 1 tablespoon aside for later use.
Next, grab an electric mixer or a stand mixer with a whisk attachment and begin beating the cream on medium-high speed. As you whip, focus on the texture of the cream rather than its volume, as this will help prevent over-mixing.
It’s crucial to note that the cream should be cold; if it has been sitting at room temperature for too long, refrigerate it for about 10-15 minutes before attempting to whip it. The colder the cream, the quicker and easier it will come together.
Begin whipping the cream in short intervals, checking its consistency regularly. It’s vital to be gentle when introducing air into the cream, as excessive force can lead to butter formation or over-beating, resulting in a grainy texture that won’t hold its shape when piped onto the cake.
As you continue whipping, you’ll notice the cream begin to thicken and hold its shape. This is where it starts to form soft peaks.
Continue whipping until stiff peaks begin to form, at which point the cream will almost double in volume and maintain its shape when removed from the bowl with a spatula or spoon. When properly whipped, the heavy cream should be smooth, airy, and hold its shape without collapsing back into itself.
This step is crucial for adding structure to your icebox cake, as it will act as both the base and topping for each layer, providing texture contrast and visual appeal when sliced and served.
Sift in confectioners’ sugar and whip until combined.
The instructions provided for this recipe are clear and concise, allowing individuals to successfully assemble the chocolate icebox cake without any issues. One crucial aspect of these instructions is the emphasis on assembly, which requires a bit of finesse and precision.
When it comes to assembling the cake, there are several key steps that must be followed carefully. For instance, the first step involves spreading a third of the whipped cream over the bottom of one-third of the springform pan. This sets the stage for the subsequent layers of chocolate wafers and whipped cream.
Another critical component of the assembly process is the use of confectioners’ sugar to sift into the whipped cream. Sifting this sugar serves several purposes: it helps incorporate air into the mixture, which contributes to its overall texture and stability; adds a subtle sweetness that complements the rich flavor of the chocolate wafers.
Following the initial application of whipped cream, the assembly process involves layering the chocolate wafers on top. Each layer should be aligned carefully with the previous one to ensure uniformity throughout the cake. This may require some patience and attention to detail but is crucial for achieving the desired outcome.
Once all layers have been assembled, a final layer of whipped cream is applied, followed by another sift of confectioners’ sugar. This ensures that every component of the cake is evenly coated with this essential ingredient, adding depth and richness to its flavor profile.
In conclusion, assembling an icebox cake requires attention to detail, patience, and practice to achieve the desired consistency and texture throughout each layer. Following these instructions carefully will yield a delicious chocolate icebox cake that’s sure to impress any audience!
Arrange a layer of crushed wafers in the bottom of a springform pan.
To assemble this decadent chocolate icebox cake, start by preparing the necessary components, including the crushed wafers, chocolate custard, and whipped cream.
The first step in assembling the cake is to arrange a layer of crushed wafers in the bottom of a springform pan. This will provide the foundation for the layers that follow, adding texture and crunch to each bite.
Begin by placing about 1/4 cup of the crushed wafers into the prepared pan, spreading them evenly to cover the entire surface. You can use a spatula or the back of a spoon to press the crumbs down firmly and create a compact layer.
This initial layer of crushed wafers serves as a base for the cake, providing a sturdy foundation that will hold up under the weight of the chocolate custard and whipped cream layers that follow.
Next, you’ll add a layer of chocolate custard, made by mixing together heavy cream, sugar, egg yolks, and high-quality cocoa powder. Pour this mixture over the crushed wafers in the pan, making sure to spread it evenly to cover the entire surface.
Finally, top the cake with a layer of whipped cream and decorate as desired. Chill the cake in the refrigerator for at least 3 hours before serving to allow the flavors to meld together and the texture to set properly.
To create an Easy Chocolate Icebox Cake Recipe, it’s crucial to follow a series of instructions that guarantee a successful assembly of this dessert.
The first step involves preparing the ingredients, which include 1 1/2 cups of heavy cream, 1 cup of powdered sugar, and 1/4 teaspoon of vanilla extract. These components will serve as the foundation for the cake’s creamy texture and rich flavor.
Next, in a large mixing bowl, combine the heavy cream and powdered sugar. Beat the mixture on high speed using an electric mixer until it becomes stiff and forms soft peaks. This process should take approximately 2-3 minutes, depending on the efficiency of the mixer.
Once the cream has been sufficiently whipped, add the vanilla extract and continue to beat the mixture for another minute or until well combined.
Meanwhile, prepare a springform pan by lining it with parchment paper. This precautionary measure will prevent the cake from sticking to the pan and facilitate its release after assembly.
Now, assemble the cake by spreading half of the whipped cream mixture into the prepared . Top this layer with 1 cup of semi-sweet chocolate chips. These chips will melt when exposed to heat, thus creating a uniform and delicious base for the cake.
Allow the chocolate to set at room temperature for approximately 10-15 minutes or until it reaches your desired level of firmness. This step is crucial as it enables the chocolate to bond with the whipped cream and provides structural support to the cake.
After the chocolate has set, spread the remaining whipped cream mixture over the top of the cake. You can use this opportunity to add any additional flavorings or decorations to enhance the overall aesthetic appeal of your Icebox Cake.
Finally, refrigerate the cake for a minimum of 3-4 hours or overnight before serving. This allows the flavors to meld together and the cake to firm up properly.
When you’re ready to serve, remove the cake from the refrigerator about 30 minutes before presentation to allow it to reach room temperature. Slice and enjoy your delicious Easy Chocolate Icebox Cake Recipe!
Tips for Serving and Storage
Refrigerate Before Slicing
To ensure that your chocolate icebox cake remains fresh and delicious, proper serving and storage techniques are essential.
Tips for Serving
Before slicing and serving, make sure to refrigerate your cake for at least 3-4 hours or overnight.
This allows the flavors to meld together and the texture to set, resulting in a more cohesive and decadent dessert.
- Slice the cake into uniform pieces using a sharp knife.
- Consider slicing the cake while it is still slightly firm, as this will make it easier to cut clean slices.
Tips for Storage
To keep your chocolate icebox cake fresh for a longer period, consider the following storage tips:
- Refrigerate the cake at a temperature of 40°F (4°C) or below.
- Cover the cake tightly with plastic wrap or aluminum foil to prevent drying out and contamination.
When storing the cake in the refrigerator, make sure it is not directly touching other foods, as this can transfer flavors and odors.
Freezing
For longer storage, you can freeze your chocolate icebox cake. Here’s how:
- Slice the cake into individual portions before freezing.
- Place each portion in a freezer-safe bag or container and seal it tightly.
- Labeled and dated the bags for easy identification.
When you’re ready to serve, simply thaw the desired number of slices at room temperature or in the refrigerator.
Thawing
If you choose to thaw your frozen chocolate icebox cake, here are some tips:
- Allow it to thaw at room temperature for 30 minutes to an hour before serving.
- You can also thaw it in the refrigerator overnight.
- Avoid microwaving or heating the cake as this can cause it to become soggy and lose its texture.
By following these tips, you’ll be able to enjoy your chocolate icebox cake at its best, whether it’s fresh out of the refrigerator or thawed from the freezer.
To ensure that your delicious chocolate icebox cake remains fresh and intact, proper serving and storage techniques are crucial.
For Serving:
- Serve the cake chilled, directly from the refrigerator. This will help maintain its texture and prevent it from becoming too soft or soggy.
- When serving, use a sharp knife to slice the cake into clean, even portions. You can also use a cake server or spatula for more precise cuts.
- Cover any remaining cake with plastic wrap or aluminum foil to maintain its freshness and prevent it from drying out.
For Storage:
Store the chocolate icebox cake in an airtight container, such as a glass or plastic container with a tight-fitting lid.
Keep the cake refrigerated at a temperature of 40°F (4°C) or below to prevent bacterial growth and spoilage.
Avoid storing the cake near strong-smelling foods, as it can absorb odors easily. Similarly, don’t store it near direct sunlight or heat sources, which can cause it to melt or become discolored.
When freezing the cake for longer storage (up to 3 months), place it in a single layer between sheets of parchment paper and wrap it tightly with plastic wrap or aluminum foil. Label the container with the date and contents, and store it in the freezer at 0°F (-18°C) or below.
Remember to always check the cake’s texture, color, and smell before consuming it, even if stored properly. If you notice any unusual changes or odors, err on the side of caution and discard the cake for safety reasons.
Cover with plastic wrap and refrigerate at least 3 hours or overnight.
Serving a chocolate icebox cake can be a delightful experience, but to ensure it remains fresh and at its best, proper storage and serving techniques are essential.
Here are some tips for serving and storing your easy chocolate icebox cake:
- Cover with plastic wrap: Before refrigerating the cake, make sure to cover it with plastic wrap to prevent any drying out or contamination from other foods in the refrigerator.
- Refrigerate at least 3 hours or overnight: Allow the cake to chill and set in the refrigerator for a minimum of 3 hours or preferably overnight. This will help the flavors to meld together and the textures to firm up, making it easier to slice and serve.
When serving the chocolate icebox cake:
- Slice into individual servings: Use a sharp knife to slice the cake into thin layers or squares, depending on your preference. You can also use a cookie cutter to create fun shapes.
- Top with whipped cream or chocolate shavings (optional): If desired, top each serving with a dollop of whipped cream and some shaved dark chocolate for added texture and flavor.
Storage tips:
- Store in an airtight container: Once you’ve served the cake, store any leftovers in an airtight container to maintain freshness and prevent drying out.
- Keep refrigerated at 40°F (4°C) or below: Make sure to keep the cake stored in the refrigerator at a temperature of 40°F (4°C) or below to slow down bacterial growth and keep the cake fresh for a longer period.
By following these serving and storage tips, you’ll be able to enjoy your easy chocolate icebox cake recipe at its best for days to come!
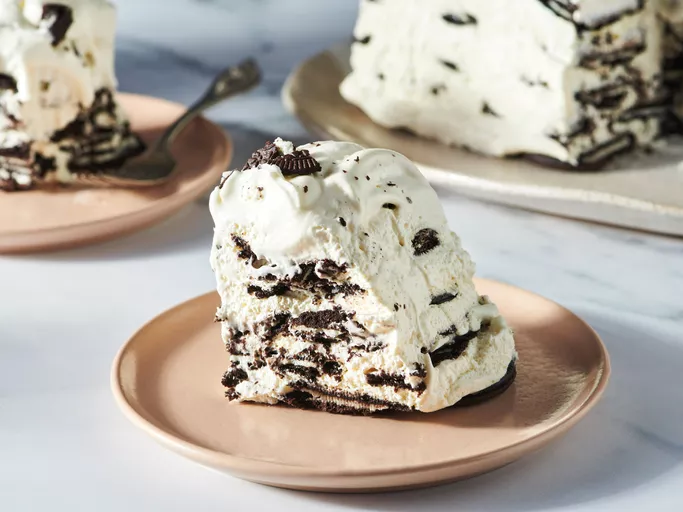
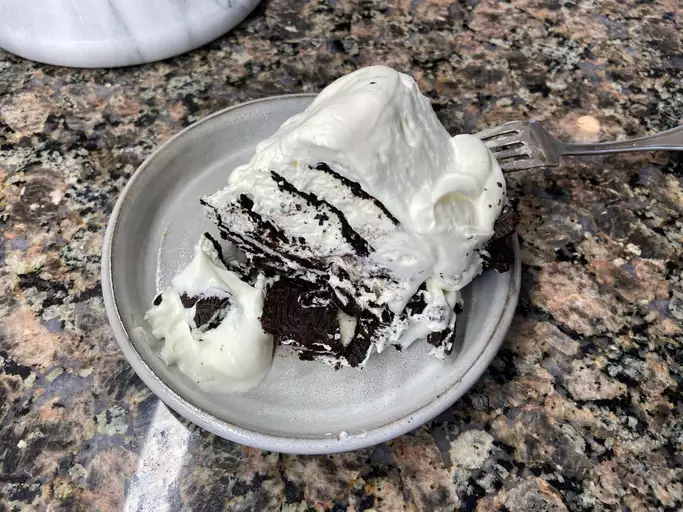
Slice into individual pieces and serve chilled.
When it comes to serving the Easy Chocolate Icebox Cake, there are a few tips to keep in mind to ensure that it looks its best and stays fresh throughout the day.
Firstly, consider slicing the cake into individual pieces just before serving. This will help prevent the chocolate from softening further and making the cake more prone to sogginess.
To make serving easier, you can also consider using a serrated knife to cut the cake. A serrated knife is designed specifically for cutting through delicate or crumbly foods like chocolate cake, and it will help reduce the amount of crumbs that fall apart during slicing.
As mentioned earlier, the cake should be served chilled, so make sure to store it in the refrigerator until you’re ready to serve. You can also consider transferring the cake to a serving dish or platter before refrigerating it to make it easier to slice and serve.
When storing the leftover cake, remember to wrap it tightly in plastic wrap or aluminum foil to prevent it from drying out or absorbing any flavors from other foods in the refrigerator. You can also consider transferring the leftover cake to an airtight container to keep it fresh for longer.
Finally, be sure to store the leftover cake at a consistent refrigerator temperature of 40°F (4°C) or below. This will help prevent bacterial growth and ensure that the cake stays safe to eat throughout the day.

- Best Dun & Bradstreet (DNB) Alternatives for 2025 - April 24, 2025
- Best Seamless.ai Alternatives for 2025 - April 22, 2025
- Best Coldlytics Alternatives for 2025 - April 22, 2025
