
Preparation
Gather Ingredients
To start preparing for this recipe, it’s essential to begin with selecting and preparing a winter squash that can be used to extract seeds.
The types of winter squash commonly used for their seeds include acorn squash, butternut squash, and kabocha squash.
Select a firm, heavy squash with no soft spots or bruises.
Preparing the Squash
- Cut the squash in half lengthwise using a sharp knife or kitchen shears.
- Scoop out the seeds and pulp from each half of the squash, taking care not to damage the seeds.
- Rinse the seeds gently with cool water to remove any remaining pulp or debris.
Gather Ingredients for Roasted Winter Squash Seeds
- Winter squash seeds (approximately 1 cup)
- 2 tablespoons olive oil
- 1/2 teaspoon salt
- 1/4 teaspoon black pepper
- Optional: Additional seasonings such as garlic powder, paprika, or chili powder
Other ingredients needed for this recipe may include:
- 1 tablespoon lemon juice (freshly squeezed)
- Water (for soaking the seeds)
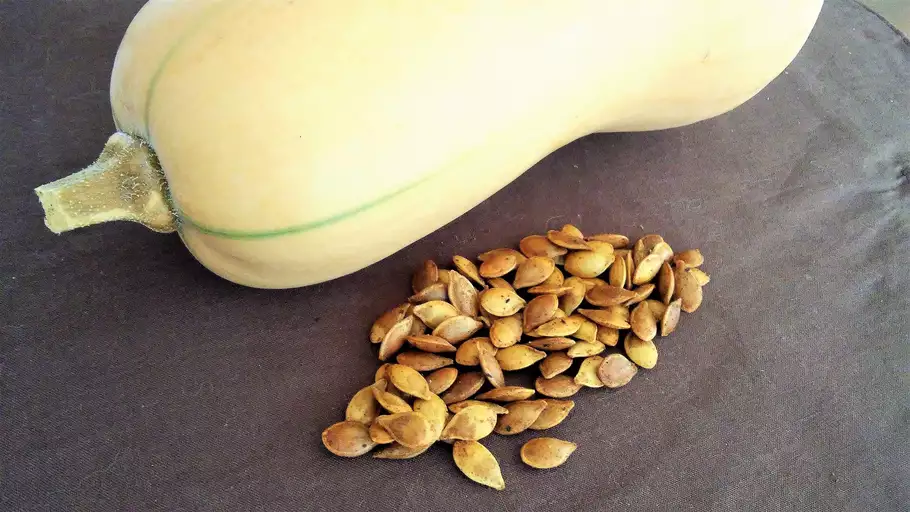
Winter squash (such as acorn or butternut) for seeds
To prepare winter squash for seed harvesting, you will need to follow these steps:
First, select a mature and healthy winter squash fruit from the vine. The fruit should be fully ripe and have a hard rind, indicating that it is ready for harvest.
Next, cut off a portion of the stem, leaving about an inch or two attached to the squash. This will allow you to remove the seeds easily later on.
Carefully cut open the winter squash along one seam, scooping out the stringy pulp and seeds from inside. You can use a spoon or a specialized tool for this purpose.
Continue cutting around the entire circumference of the squash, removing as much of the flesh and membranes as possible. Be careful not to damage the seeds or the rind of the squash.
Rinse the seeds in cold water to remove any remaining pulp or debris. This will help to clean the seeds and prepare them for roasting.
Remove excess moisture from the seeds using a paper towel or cloth. This is an important step, as excess moisture can prevent the seeds from roasting properly.
Once the seeds are dry, they are ready to be roasted according to your recipe. For this roasted winter squash seeds recipe, you will need to toss the seeds with olive oil, salt, and any other desired seasonings before roasting in a preheated oven.
Follow the rest of the recipe as instructed to enjoy delicious roasted winter squash seeds.
Olive oil for roasting
The preparation of olive oil for roasting plays a crucial role in bringing out the rich flavors and aromas of roasted winter squash seeds. When selecting an olive oil for roasting, it’s essential to choose a high-quality oil that complements the nutty flavors of the squash seeds.
A good olive oil should have a distinct aroma and flavor profile that enhances the overall taste experience without overpowering it. For roasting, a mild or medium-intensity olive oil is often preferred as it doesn’t mask the delicate flavors of the squash seeds.
When selecting an olive oil for roasting, look for oils with descriptors such as “arbequina,” “frantoio,” or “picual.” These varieties tend to have milder flavor profiles that pair well with roasted winter squash seeds.
Avoid using very strong or peppery olive oils, such as those labeled as “hot” or “spicy.” Such oils can overpower the delicate flavors of the squash seeds and create an unbalanced taste experience.
For roasting, it’s also essential to use a high-quality olive oil that has been extracted using traditional methods. Cold-pressed or extra-virgin olive oils are ideal as they retain more of the natural flavor and aroma compounds found in the olives.
The acidity level of the olive oil can also impact its performance for roasting. Opt for an olive oil with a low acidity level (less than 0.5%) to prevent the oil from burning or becoming bitter during the roasting process.
Salt for seasoning
To prepare salt for seasoning, also known as sea salt or finishing salt, you’ll want to start with high-quality salt that’s designed specifically for enhancing flavors rather than preserving food.
Look for a fine-grained salt that has a mild flavor and a pleasant texture. Some popular options include Maldon sea salt, Fleur de sel, and Himalayan pink salt.
If you’re using a coarse salt like kosher salt or pickling salt, you can crush it into smaller pieces to make it more suitable for seasoning.
It’s worth noting that different salts have varying levels of sodium content, so be sure to check the nutrition label if you’re concerned about sodium intake.
In terms of preparation, simply place a small amount of salt on your dish, such as roasted winter squash seeds, and season to taste. You can also mix salt with other spices or herbs for added flavor.
When seasoning with salt, it’s better to start with a light hand and add more salt as needed, rather than over-salting the dish initially. This will allow you to achieve the perfect balance of flavors without overpowering the other ingredients.
In the context of the Roasted Winter Squash Seeds Recipe, use salt to enhance the natural sweetness of the squash seeds. Simply sprinkle a small amount of fine-grained salt over the seeds before serving and enjoy the burst of flavor it adds!
Optional: herbs like thyme, rosemary, or parsley for added flavor
To prepare for roasting winter squash seeds, it’s essential to first dry the seeds thoroughly after scooping them out of the squash.
This can be achieved by placing the seeds on a paper towel or clean cloth and allowing them to air dry for several hours or overnight.
Pre-Heat the Oven
Preheat the oven to 375°F (190°C).
Seasoning Options
You can add flavor to your roasted squash seeds with various herbs. Some popular choices include:
- Thyme
- Rosemary
- Parsley
Add 1-2 tablespoons of your chosen herb(s) to the squash seeds and mix well.
You can also use other herbs like dill or garlic powder for a different flavor profile.
Roasting the Seeds
Once the oven is preheated, spread the seasoned squash seeds in a single layer on a baking sheet lined with parchment paper.
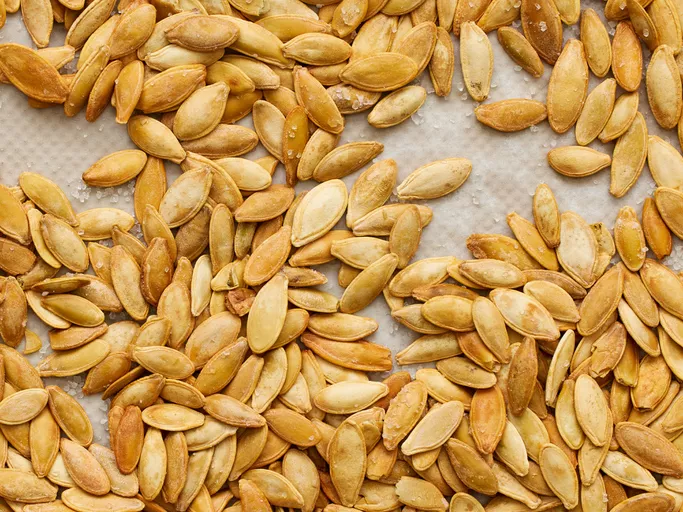
Roast the seeds in the preheated oven for 30-40 minutes or until they’re golden brown and crispy, stirring occasionally to prevent burning.
Tips
Keep an eye on the seeds while they’re roasting as the cooking time may vary depending on your oven’s temperature and the amount of seasoning used.
Roasted squash seeds make a great snack on their own or can be used as a topping for salads, soups, or other dishes.
The Roasting Process
Scrub and Dry the Seeds
The roasting process for winter squash seeds involves several steps to bring out their full flavor and crunchiness. To begin with, preheat your oven to 350°F (180°C). This temperature helps in slowly cooking the seeds without burning them.
Next, remove any debris or pulp from the squash seeds using a fine-mesh sieve. It’s essential to clean the seeds properly before roasting to ensure even browning and prevent any unwanted flavors during the process.
Now, place the seeds in a single layer on a baking sheet lined with parchment paper. Drizzle them with a tablespoon of oil – you can use olive or avocado oil for their distinct flavors. Toss the seeds gently to ensure they are evenly coated with the oil.
After that, add your choice of seasonings to the seeds. You can try using salt and pepper for a basic taste, or experiment with herbs like thyme, rosemary, or garlic powder for added depth. Feel free to get creative with different combinations to suit your preferences!
Finally, roast the seeds in the preheated oven for about 20-25 minutes, flipping them halfway through the cooking time. This will help achieve an even browning and crispiness on both sides.
Once the seeds are roasted, remove them from the oven and let them cool down slightly. You can serve them immediately as a snack or use them as toppings for salads or other dishes. Enjoy your delicious roasted winter squash seeds!
Now, to scrub and dry the seeds properly:
Start by rinsing the seeds under cold running water to remove any remaining pulp or debris. This is essential in preparing them for roasting.
Next, place the seeds on a fine-mesh sieve or strainer and gently scrub them with your fingers to remove any excess fibers or residue. You can also use a small brush to remove stubborn particles.
After scrubbing, pat the seeds dry using a clean kitchen towel or paper towels to remove as much moisture as possible. This step helps prevent steam from building up during roasting and ensures even browning.
Finally, spread the dried seeds out in a single layer on a baking sheet or tray and allow them to air dry for at least an hour before roasting. This step is crucial in ensuring the seeds are completely dry and ready for roasting.
By following these steps, you’ll be able to enjoy deliciously roasted winter squash seeds with a perfect balance of crunchiness and flavor!
Scrub the squash seeds clean with a brush to remove any remaining pulp
To start, carefully scoop out the seeds and pulp from the roasted winter squash, taking care not to damage the delicate seeds.
Next, place the scooped-out seeds in a fine-mesh strainer or a colander under cold running water to remove any excess pulp and fiber.
Use your hands to gently break up any large clumps of pulp that may be clinging to the seeds, making sure to release as much of it as possible.
To thoroughly clean the seeds, use a soft-bristled brush (such as a pastry brush) to gently scrub them under cold running water.
This will help remove any remaining bits of pulp and ensure your seeds are squeaky clean.
Once the seeds are cleaned, use a paper towel or clean dish cloth to pat them dry thoroughly. This helps prevent moisture from interfering with roasting.
Step-by-Step Guide:
- Scoop out the seeds and pulp from the roasted winter squash, taking care not to damage the delicate seeds.
- Place the scooped-out seeds in a fine-mesh strainer or colander under cold running water to remove any excess pulp and fiber.
- Use your hands to gently break up any large clumps of pulp that may be clinging to the seeds, making sure to release as much of it as possible.
- To thoroughly clean the seeds, use a soft-bristled brush (such as a pastry brush) to gently scrub them under cold running water.
- This will help remove any remaining bits of pulp and ensure your seeds are squeaky clean.
Tips:
- Make sure the seeds are completely dry before roasting, as excess moisture can prevent even browning.
- Keep an eye on the seeds while they’re roasting, as they can quickly go from perfectly toasted to burnt.
Pat dry the seeds with paper towels to remove excess moisture
The roasting process is a crucial step in bringing out the full flavor and nutrition potential of winter squash seeds. Before we dive into the details, it’s essential to pat dry the seeds with paper towels to remove excess moisture. This step helps prevent steaming instead of roasting during the cooking process.
To achieve the perfect roast, follow these steps:
- Raise the oven temperature to 350°F (175°C) to ensure a nice and even roast.
- Place the dried winter squash seeds in a single layer on a baking sheet lined with parchment paper.
- Drizzle the seeds with oil, such as olive or avocado oil, and toss gently to coat evenly. You can also add seasonings like salt, pepper, or garlic powder for added flavor.
- Sprinkle any additional seasonings over the seeds and toss again to ensure they’re well coated.
- Bake the seeds in the preheated oven for 30-40 minutes, shaking the baking sheet every 10-15 minutes to prevent burning. The ideal roast time will depend on the specific type of squash seed and your desired level of crispiness.
Here are some general guidelines for roasting different types of winter squash seeds:
- Carnival squash seeds: 35-40 minutes for a crispy texture.
- Acoustic squash seeds: 30-35 minutes for a slightly softer texture.
- Kabocha squash seeds: 25-30 minutes for a delicate and nutty flavor.
Once the seeds are done roasting, remove them from the oven and let them cool completely before storing or using in recipes. Enjoy your delicious roasted winter squash seeds!
Roast the Seeds in Olive Oil
The roasting process involves heating seeds in a pan over medium heat, stirring frequently to prevent burning and promote even browning.
To roast the seeds in olive oil, start by preheating your oven to 350°F (180°C).
Next, prepare the seeds by removing any pulp or stringy bits from the winter squash, then rinsing them thoroughly with cold water to remove any excess debris.
Rinse the seeds a second time, and pat them dry with paper towels to ensure even browning during roasting.
Roasting Method
Toss the seeds with olive oil
In a large bowl, whisk together 2 tablespoons of olive oil with salt and any desired herbs or spices (such as garlic powder, paprika, or dried thyme).
Add the winter squash seeds to the bowl and toss until they are evenly coated with the olive oil mixture.
Spread the seeds on a baking sheet
Line a baking sheet with parchment paper and spread the seed mixture out in a single layer, making sure not to overcrowd the pan.
Roast in the oven
Place the baking sheet in the preheated oven and roast for 30-40 minutes, or until the seeds are lightly browned and fragrant.
Checking for Doneness
To ensure that your roasted squash seeds are done to perfection, check them every 10 minutes after they have been roasting for 20 minutes. They are done when:
- The seeds are lightly browned and fragrant.
- The seeds are dry and crumbly (not sticky or moist).
Once the roasted squash seeds have cooled slightly, they can be seasoned with additional salt and herbs if desired. They can then be stored in an airtight container for up to 2 weeks.
Toss the seeds with olive oil until they are evenly coated
The roasting process for winter squash seeds involves several steps that bring out their unique flavors and textures.
To begin, preheat your oven to 375°F (190°C). This will ensure a consistent heat throughout the cooking process.
Next, remove any excess pulp or fibers from the seeds. You can do this by gently rubbing them between your fingers or using a fine-mesh strainer.
Rinse the seeds in cold water to remove any remaining pulp or debris. This step is crucial in preventing bitterness and ensuring even roasting.
Toss the seeds with olive oil until they are evenly coated. You can use a light hand when applying the oil, as excess can lead to greasiness.
Add any desired seasonings, such as salt, garlic powder, or dried herbs like thyme or rosemary. Toss the seeds again to distribute the flavors evenly.
Spread the seed mixture on a baking sheet lined with parchment paper in a single layer. This will allow for even roasting and prevent overcrowding.
Roast the seeds in the preheated oven for 30-40 minutes, or until they reach your desired level of crispiness. Stir them occasionally to promote even cooking.
The roasting time may vary depending on the type of squash seed you’re using. Some seeds, like those from butternut squash, may require a longer roasting time due to their larger size and harder texture.
Keep an eye on the seeds during the final 10-15 minutes of cooking, as they can quickly go from perfectly toasted to burnt.
Once the seeds are roasted to your liking, remove them from the oven and let them cool completely. This will help them retain their crunchiness and flavor.
You can store roasted winter squash seeds in an airtight container for up to 24 hours. Simply reheat them in the oven or microwave before serving.
Spread the seeds on a baking sheet and roast at 375°F (190°C) for 30 minutes
The roasting process for winter squash seeds is a simple yet effective way to enhance their flavor, aroma, and nutritional value.
To begin with, it’s essential to separate the seeds from the pulp and stringy fibers of the squash. This can be done by scraping out the seeds and rinsing them under cold running water to remove any remaining pulp or debris.
Next, spread the seeds out in a single layer on a baking sheet. This will ensure that they roast evenly and prevent overcrowding, which can lead to steaming instead of roasting.
Now, preheat your oven to 375°F (190°C). While the oven is heating up, place the baking sheet with the seeds inside. The high heat of the oven will cause the seeds to dry out and develop a rich, nutty flavor.
Roast the seeds for 30 minutes, stirring them halfway through the cooking time. This will help ensure that they roast evenly and prevent any hotspots from forming on the baking sheet.
After 30 minutes, remove the baking sheet from the oven and let the seeds cool down completely. You can also speed up the cooling process by spreading the seeds out in a single layer on a paper towel-lined plate or tray.
Once the seeds have cooled down, you can season them with your favorite herbs and spices. Some popular seasoning options for roasted winter squash seeds include salt, pepper, garlic powder, paprika, and dried herbs like thyme and rosemary.
Finally, store the roasted winter squash seeds in an airtight container to maintain their flavor and texture. You can also add them to salads, stir-fries, and other dishes for added crunch and nutrition.
Serving and Storage
Cool and Season the Roasted Seeds
To maintain their flavor and texture, it’s essential to store the roasted winter squash seeds properly after harvesting them from the oven.
The seeds should be cooled down completely before storage to prevent moisture buildup, which can lead to spoilage or rancidity.
Here are some steps to follow for cooling and storing the roasted winter squash seeds:
Cooling the Seeds
- Carefully remove the seeds from the oven and let them cool down on a wire rack.
- This will help prevent any heat from transferring to other parts of the kitchen or surrounding areas.
- Make sure the seeds have cooled down completely before proceeding with storage.
Serving the Seeds
- The roasted winter squash seeds can be served as a snack or added to various dishes for extra flavor and nutrition.
- You can enjoy them plain, seasoned with salt, or mixed with other herbs and spices according to your preference.
Storage Options
- Store the cooled seeds in an airtight container at room temperature for up to 2 days.
- If you won’t be consuming them immediately, consider storing them in the refrigerator or freezer for longer periods.
Air-Tight Containers and Freezer Bags
- Use glass jars with tight-fitting lids or plastic containers to store the seeds at room temperature.
- For freezer storage, place the seeds in a freezer-safe bag or container and label it for easy identification.
Labeling and Date Marking
- Be sure to date the containers or bags with the current day’s date.
- This will help you keep track of how long the seeds have been stored.
Freezing Instructions
- Place the airtight container or freezer bag in the freezer at 0°F (-18°C) or below.
- The seeds will be safe to consume for up to 6 months if stored properly in the freezer.
By following these steps, you’ll be able to enjoy your roasted winter squash seeds for a longer period while maintaining their flavor and nutritional value.
Remove the roasted seeds from the oven and let them cool completely
- Once the roasted seeds have finished cooking, carefully remove them from the oven with a spatula or tongs to avoid burning yourself.
- Place the roasted seeds in a single layer on a wire rack set over a baking sheet or tray to cool completely.
- This step is crucial as it helps prevent the seeds from becoming soggy or developing off-flavors due to excess moisture.
- As the seeds cool, their natural flavor and texture will intensify, making them more palatable and perfect for storage.
Proper Cooling Techniques
- To ensure the seeds cool evenly and quickly, consider spreading them out in a single layer on a paper towel-lined plate or tray.
- This helps to promote airflow around the seeds, accelerating the cooling process and preventing any potential clumping.
Storing Roasted Winter Squash Seeds
- Once the roasted seeds have cooled completely, transfer them to an airtight container, such as a glass jar or plastic container with a tight-fitting lid.
- This will prevent moisture and other contaminants from seeping into the container and spoiling the seeds.
- Label the container with the date and contents, ensuring you can easily keep track of how long they’ve been stored.
Tips for Long-Term Storage
- To maintain the flavor and texture of roasted winter squash seeds, store them in a cool, dry place, such as a pantry or cupboard.
- Avoid storing them near heat sources or direct sunlight, which can cause them to become rancid or develop off-flavors.
Sprinkle with salt and any desired herbs before serving or storing
When it comes to serving and storing roasted winter squash seeds, there are several factors to consider in order to preserve their flavor and texture.
Firstly, if you plan to serve them immediately after roasting, sprinkle them with salt and any desired herbs before doing so. This will enhance the natural flavors of the seeds and add a touch of savory goodness to each bite.
The choice of herbs is entirely up to personal preference, but some popular options for winter squash seeds include thyme, rosemary, and parsley. Simply sprinkle a pinch of salt and your chosen herbs over the roasted seeds, and you’re ready to serve.
If you don’t plan to consume the roasted squash seeds right away, it’s essential to store them properly to maintain their flavor and texture. For best results, place the cooled seeds in an airtight container or zip-top bag, making sure to press out as much air as possible before sealing.
This will prevent moisture from entering the container and causing the seeds to become stale or rancid. You can also add a small piece of parchment paper or a paper towel to the container to absorb any excess moisture.
Label the container with the date and contents, and store it in a cool, dry place. If you live in an area with high humidity, consider storing the seeds in the refrigerator to prolong their freshness.
When you’re ready to eat the roasted winter squash seeds again, simply sprinkle them with salt and any desired herbs before serving as you would when first preparing them. You can also add a squeeze of fresh lemon juice or a drizzle of olive oil to enhance the flavors.

- Best Lusha Alternatives for 2025 - April 22, 2025
- Best Overloop Alternatives for 2025 - April 22, 2025
- Best 6sense Alternatives for 2025 - April 22, 2025
