
Ingredients and Tools
Selecting the Right Ingredients
The key to making perfect homemade doughnuts lies in selecting the right ingredients.
Essential Ingredients
The following are the essential ingredients required for this recipe
- All-purpose flour: This is a must-have ingredient that provides structure and texture to the doughnuts. It’s recommended to use high-quality, unbleached all-purpose flour for the best results.
- Granulated sugar: Sugar adds sweetness to the doughnuts and helps balance their flavor. You can also use brown sugar if you prefer a slightly different taste.
- <strong</strong
- Milk: Milk adds moisture and tenderness to the doughnuts. Whole milk or low-fat milk can be used; however, avoid using skim milk as it may result in a less tender texture.
- Active dry yeast: Yeast is responsible for causing the dough to rise, giving the doughnuts their signature light and airy texture. Use active dry yeast specifically designed for baking.
Pantry Staples
The following pantry staples will come in handy during the recipe
- Vegetable oil: This is used for frying the doughnuts. You can also use other oils like peanut or coconut oil if you prefer.

Selecting the Right Tools
Investing in the right tools will make the process of making homemade doughnuts much easier and enjoyable
- Doughnut pan: A doughnut pan is a must-have for this recipe. You can find these pans online or at baking supply stores.
- Creaming device: A stand mixer with a whisk attachment or a hand mixer will make creaming the butter and sugar easier and faster.
Using High Quality Flour: According to the USDA, using highquality flour is essential for achieving a light and fluffy texture.
To achieve a light and fluffy texture, it’s crucial to use high-quality flour when making doughnuts. The USDA emphasizes the importance of using premium flour for optimal results.
The key characteristics of high-quality flour include
- Higher protein content: High-protein flour, typically with a protein level of around 12-14%, is better suited for yeast-based doughs like those used in doughnuts. This is because the extra protein helps to strengthen the gluten network and create a more robust structure.
- Better milling process: Well-milled flour has a finer texture and fewer impurities, resulting in improved performance and appearance in baked goods.
Some popular types of high-quality flour that can be used for doughnut-making include
- All-Purpose Flour: This is an ideal choice for making doughnuts as it offers a balanced protein content, fine texture, and versatility. Popular brands like Pillsbury or Caputo are well-suited for this application.
- Unbleached Bread Flour: This option is suitable for yeast-raised doughnuts as it has a higher protein content than all-purpose flour, which will help to produce a lighter and airier texture.
- Premium Pastry Flour: For laminated or folded doughs like those used in some doughnut recipes, a premium pastry flour with a lower protein level can provide the desired tenderness and flakiness.
When selecting high-quality flour for doughnuts, be sure to check the ingredient list and packaging for any of the following keywords
- No additives or preservatives
- Naturally bleached (as opposed to chemical bleaching)
- No artificial conditioners or enhancers
Additionally, consider storing high-quality flour in an airtight container and keeping it at room temperature to preserve its quality.
Choosing the Right Sugar
To make delicious homemade doughnuts, it’s essential to choose the right type of sugar for the recipe.
The primary difference between granulated sugar and other types of sugar lies in its crystal size and shape. Granulated sugar is made from refined sugars that have been processed into fine crystals with a uniform shape and size. This makes it ideal for baking, as it dissolves quickly and evenly in recipes.
There are several other types of sugar you may come across when making homemade doughnuts
- Brown sugar: This type of sugar is made by adding molasses to refined sugar. It has a distinct flavor and can add depth to your doughnut recipe, but be aware that it contains more moisture than granulated sugar.
- Raw sugar: Also known as turbinado or Demerara sugar, this type of sugar is less refined than granulated sugar and retains some of its natural molasses. It has a larger crystal size and can add a subtle flavor to your doughnuts.
- Confectioners’ sugar (also known as powdered sugar): This type of sugar is made by grinding granulated sugar into a fine powder. It’s often used for decorating doughnuts with glazes or frostings, but it can be used in the dough itself as well.
- Cane sugar: This type of sugar is derived from sugarcane and has a slightly distinct flavor compared to granulated sugar. However, its crystal size and shape are similar to those of granulated sugar, making it suitable for baking.
When choosing the right sugar for your homemade doughnut recipe, consider the following factors
- Type: If you want a classic, traditional doughnut flavor, go with granulated sugar. For a more complex flavor, try using brown sugar or raw sugar.
- Moisture content: Keep in mind that brown sugar and cane sugar have higher moisture levels than granulated sugar, which can affect the texture of your doughnuts.
raw sugar or cane sugar.
Ultimately, the choice of sugar will depend on your personal preference and the flavor profile you’re aiming to achieve in your homemade doughnuts.
The American Heart Association suggests choosing sugar that is free from additives and artificial flavorings.
To create delicious homemade doughnuts, you’ll need a combination of essential ingredients and specialized tools.
Ingredients
The American Heart Association recommends choosing sugar that is free from additives and artificial flavorings.
Sugars:
- Caster or granulated sugar
- Brown sugar
- Molasses (optional)
When selecting sugars, opt for unrefined varieties like turbinado, muscovado, or coconut sugar to avoid additives.
Flour and leavening agents
- All-purpose flour
- Baking powder (aluminum-free)
- Salt
Avoid using self-raising flour, as it can contain added preservatives.
-
- Other ingredients
- Eggs
- Milk or buttermilk
- Vegetable oil for frying (or air fryer)
- Flavorings (vanilla, nutmeg, etc.)
Tools
To achieve perfect doughnuts, you’ll need a few specialized tools.
Frying equipment:
- Cast-iron or stainless steel frying pan with at least 3-4 inches of depth
- Thermal oil thermometer (optional but recommended)
Doughnut-making tools
- Doughnut cutter or cookie cutter (various sizes)
- Piping bag and tip for glaze or icing
- Remember to always handle hot equipment with care, and never leave frying unattended.
Pantry Essentials and Preparation
Mixing and Kneading the Dough: A study published in the Journal of Food Engineering notes that overmixing can lead to a tough dough, so it’s essential to mix and knead carefully.
The key to making perfect homemade doughnuts lies not only in the recipe itself but also in preparing, mixing, and kneading the dough correctly. To start with pantry essentials, you will need all-purpose flour, yeast, sugar, salt, eggs, milk, butter or oil, and any desired flavorings such as vanilla extract.
When it comes to preparation, the order in which you combine your ingredients makes a difference. In most recipes, including this Easy Homemade Doughnuts Recipe, the dry ingredients are first mixed together, followed by the wet ingredients. This helps ensure that the yeast is not activated too quickly and can lead to an uneven rise.
Mixing the dough thoroughly is crucial to develop the gluten in the flour, which gives your doughnuts structure and texture. However, overmixing can have adverse effects as noted above – leading to a tough dough that may result in dense or hard doughnuts upon frying. To avoid this, use a low speed when mixing and stop once all the ingredients are combined.
Kneading is a step often overlooked but it’s vital for working out any air pockets or unevenness introduced during the mixing stage. By gently kneading your dough on a lightly floured surface, you can redistribute the yeast evenly throughout the mixture and ensure that your doughnuts rise consistently when cooked. This process should be brief, as excessive kneading can still cause the dough to become tough.
The final step in preparing the dough is allowing it to rest or proof. This is where the magic happens – as yeast ferments the sugars present in the mixture and produces carbon dioxide gas bubbles within the dough. These bubbles are responsible for causing the doughnuts to rise during frying, giving them their characteristic lightness and texture.
For any recipe, following these steps for mixing and kneading is crucial for achieving a perfect homemade doughnut. Remembering that less is often more when it comes to overmixing can save you from disappointment in your final product.
Proofing and Rising
To create delicious homemade doughnuts using an easy recipe, it’s essential to have a well-stocked pantry with necessary ingredients and supplies.
Pantry essentials for this recipe include all-purpose flour, baking powder, salt, granulated sugar, whole milk, large eggs, and unsalted butter. Additionally, you’ll need active dry yeast, which is crucial for the proofing process that helps your doughnuts rise.
Before beginning the recipe, make sure you have a clean and organized workspace with ample space to knead and shape the dough.
For preparation, in a large mixing bowl, whisk together 2 cups of flour, 1/4 cup granulated sugar, and 1 teaspoon salt. Set this mixture aside as we progress through the recipe.
To activate the yeast for proofing, combine 1/2 cup warm milk (around 105°F to 115°F) with 1 teaspoon active dry yeast in a separate bowl. Mix gently to dissolve the yeast completely and let it sit for approximately 5-10 minutes or until the mixture becomes frothy.
Next, add 3 large eggs and 2 tablespoons unsalted butter, softened, to the warm yeast mixture and mix well to combine.
The proofing process typically lasts about an hour. You should see a noticeable rise in your dough as it absorbs more of the air inside it, forming tiny bubbles that help it expand. Keep checking on the dough periodically to monitor its progress.
When ready to shape your doughnuts, punch down the dough and divide it into smaller portions for better control when shaping each individual doughnut. On a lightly floured surface, use a rolling pin to roll out each portion of dough into a circle or desired shape.
Using a doughnut cutter or the rim of a glass, cut the center hole from each doughnut circle and transfer them onto a baking sheet lined with parchment paper or greased. Make sure not to overcrowd the tray as they will expand further during the proofing and rising processes.
To achieve perfectly raised doughnuts, cover your baking sheet lightly with plastic wrap or damp cloth, trapping the heat in and helping your doughnuts rise evenly.
The University of WisconsinMadison recommends allowing the dough to proof for at least an hour to achieve optimal rising.
To create delicious homemade doughnuts, you’ll need a few essential pantry items and to prepare the ingredients properly.
The following are some must-haves in your pantry
- Sugar: This is an essential ingredient for sweet treats like doughnuts.
- Flour: All-purpose flour is ideal for making doughnut dough. You’ll need all-purpose flour, whole wheat flour, and cake flour to create a well-rounded dough.
- Baking powder and baking soda: These two leavening agents help the dough rise and give your doughnuts a light texture.
- Salt: A small amount of salt enhances the flavor and helps control yeast growth.
- Milk, eggs, and butter or oil: You’ll need these basic wet ingredients to bring moisture and richness to your dough.
- Yeast: Active dry yeast is necessary for fermentation, giving your doughnuts a light and airy texture.
Other essentials that will come in handy during the baking process include
- A mixing bowl: A large, sturdy bowl for creaming butter and sugar, and mixing wet ingredients.
- A stand mixer: An electric mixer is helpful for beating eggs, milk, and other wet ingredients together.
- Measuring cups and spoons: These are necessary for accurately measuring dry and liquid ingredients.
- Baking sheets and parchment paper: For lining the baking sheet with parchment paper to prevent doughnuts from sticking during frying.
Now, let’s discuss preparation of the recipe
- Mix dry ingredients: Combine flour, sugar, baking powder and baking soda in a bowl. In another bowl, mix wet ingredients together until well combined.
- Add yeast to the wet ingredients: Once you’ve mixed your wet ingredients together, add active dry yeast. This will help activate the fermentation process.
- Combine wet and dry ingredients: Pour the dry mixture into a large mixing bowl with the wet ingredients and mix on low speed until combined.
- Add egg yolks: Mix in egg yolks and continue to combine on low speed for 2-3 minutes, until smooth.
- Beat in milk and butter or oil: Once you’ve added your dry and wet ingredients together with the egg yolks, gradually add in milk and melted butter or oil. The mixture should come together quickly.
At this point, you’ll need to allow your dough to proof for at least an hour before proceeding
- Transfer the dough to a lightly floured surface and knead gently. Use your hands to feel for smoothness.
- Form balls from the dough: Once you’ve kneaded, roll out the dough on a light flour dusted surface until it reaches about an inch in thickness.
- Roll individual portions into balls: Divide the rolled-out dough into smaller pieces and roll each piece between your palms to create smooth spheres.
This allows time for fermentation to begin
The University of Wisconsin-Madison recommends allowing the dough to proof for at least an hour to achieve optimal rising.
Cooking and Decorating
Deep-Frying Techniques: The FDA advises using a thermometer to ensure that the oil reaches a safe temperature for frying.
Cooking and decorating doughnuts can be an enjoyable process, but it’s crucial to follow safe deep-frying techniques. The FDA recommends using a thermometer to ensure that the oil reaches a safe temperature for frying.
The ideal temperature for frying doughnuts is between 350°F (175°C) and 375°F (190°C). If the oil is too hot, it can burn the outside of the doughnut before the inside is fully cooked. On the other hand, if the oil is too cold, the doughnut will absorb excess oil and be greasy.
Here’s a step-by-step guide to deep-frying doughnuts safely
Step 1: Prepare the Oil
- Select a high-smoke-point oil with a neutral flavor, such as peanut or vegetable oil.
- Clean and dry the pot thoroughly before filling it with the selected oil.
- Add the recommended amount of oil to the pot (usually around 3-4 inches deep).
Step 2: Heat the Oil
- Place the pot over medium-high heat and bring the oil to the desired temperature.
- Use a thermometer to monitor the temperature, making sure it doesn’t exceed 400°F (200°C).
Step 3: Fry the Doughnuts
- Carefully place a few doughnut balls into the hot oil, being mindful of the splashing oil.
- Fry for about 2-3 minutes or until golden brown on both sides.
- Remove the doughnuts from the oil with a slotted spoon and place them on paper towels to drain excess oil.
Once you’ve mastered the art of deep-frying, it’s time to think about decorating your doughnuts. Here are some popular topping ideas
Doughnut Topping Ideas
- Cinnamon sugar
- Glaze with powdered sugar and milk
- Chocolate glaze made from melted chocolate and heavy cream
- Sprinkles, chopped nuts, or shredded coconut
Remember to have fun with your doughnut creations and experiment with different toppings and flavors. With practice and patience, you’ll be well on your way to becoming a master doughnut maker!
Dusting with Confectioner’s Sugar
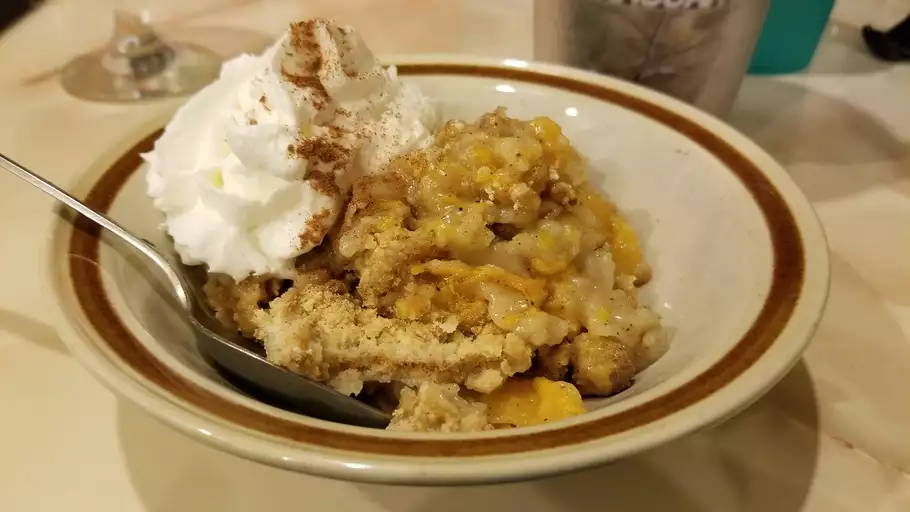
Cooking and decorating doughnuts can be a delightful experience, but it requires attention to detail and precision. One essential step in decorating doughnuts is dusting them with confectioner’s sugar. This simple process can elevate the appearance of your homemade doughnuts and make them more visually appealing.
Confectioner’s sugar, also known as powdered sugar, is a type of sugar that has been ground into a fine powder. It is often used in baking to add sweetness and texture to various desserts. When it comes to dusting doughnuts with confectioner’s sugar, the goal is to create a delicate and even layer of powder on top of each doughnut.
To achieve this, you will need a small sifter or a fine-mesh strainer. Place a single doughnut on a wire rack or a serving plate, and hold the sifter or strainer over the doughnut. Gently tap the side of the sifter or strainer to release a thin layer of confectioner’s sugar onto the doughnut.
The key to successfully dusting doughnuts with confectioner’s sugar is to use just the right amount of powder. Too little powder, and the doughnut will appear bare and unfinished; too much powder, and it can become overwhelmed by a thick layer of sweetness. To achieve the perfect balance, start by sifting a small amount of confectioner’s sugar onto the doughnut, and then add more as needed.
Another important consideration when dusting doughnuts with confectioner’s sugar is to handle them gently to prevent damaging their delicate surface. Doughnuts are typically fragile and can break easily if handled roughly or dropped. To avoid this, use a gentle touch when placing the doughnut on the wire rack or serving plate, and make sure to support it carefully as you dust it with confectioner’s sugar.
Finally, keep in mind that the type of confectioner’s sugar used can also affect the appearance and texture of your decorated doughnuts. Look for a high-quality powdered sugar that is fresh and has not been sitting on a shelf for too long. This will ensure that it produces an even layer of powder on top of each doughnut.
With these tips in mind, you should be able to create beautifully decorated homemade doughnuts using confectioner’s sugar. Remember to handle your doughnuts with care and attention to detail to achieve the best results, and enjoy experimenting with different flavors and decorations to find your favorite combination!
A study published in the Journal of Culinary Science & Technology notes that dusting doughnuts with confectioner’s sugar just before serving helps preserve their texture and appearance.
The art of cooking and decorating doughnuts requires a delicate balance between aesthetics and culinary expertise. In the realm of baked goods, few treats evoke as much excitement and delight as freshly baked doughnuts.
When it comes to preparing doughnuts at home, the process can seem daunting, but with the right approach and attention to detail, anyone can create a batch of delicious homemade doughnuts that are sure to impress.
The Importance of Texture and Appearance
A study published in the Journal of Culinary Science & Technology highlights the significance of preserving the texture and appearance of doughnuts. Dusting with confectioner’s sugar just before serving is shown to help maintain their freshness and prevent them from becoming stale.
Key Tips for Preserving Doughnut Texture and Appearance
- Store doughnuts in an airtight container: To maintain the texture and appearance of doughnuts, store them in an airtight container to prevent exposure to air, moisture, and other contaminants.
- Dust with confectioner’s sugar just before serving: Dusting with confectioner’s sugar not only adds flavor but also helps to preserve the texture and appearance of doughnuts by preventing them from becoming stale.
- Avoid over-handling: Handle doughnuts gently to prevent them from losing their shape or developing creases that can affect their appearance.
- Use fresh ingredients: Ensure you are using the freshest ingredients possible, including yeast and baking powder, to produce a light and fluffy texture in your doughnuts.
The Art of Decorating Doughnuts
Doughnuts provide a blank canvas for creative expression through decorating. The art of decorating doughnuts requires patience, skill, and attention to detail.
Popular Decorating Techniques
- Cream and glaze frosting: Use cream and glaze frosting in various flavors and colors to create intricate designs and patterns on your doughnuts.
- Sprinkles and toppings: Add sprinkles, chopped nuts, or shredded coconut to create a colorful and playful touch.
- Candy melts and chocolate shavings: Use candy melts and chocolate shavings to create stripes, swirls, and other creative designs.
In conclusion, cooking and decorating doughnuts requires a combination of culinary expertise, creativity, and attention to detail. By following the tips outlined above, anyone can create a batch of delicious homemade doughnuts that are both visually appealing and mouth-wateringly tasty.

- Best Dun & Bradstreet (DNB) Alternatives for 2025 - April 24, 2025
- Best Seamless.ai Alternatives for 2025 - April 22, 2025
- Best Coldlytics Alternatives for 2025 - April 22, 2025
