
Ingredients and Equipment
Essential Ingredients
- The following are the essential ingredients required for a delicious Fried Ice Cream recipe:
- 1 pint of vanilla ice cream
- 1 cup of all-purpose flour
- 1/2 teaspoon of salt
- 1/4 cup of granulated sugar
- 1/2 cup of milk
- 2 large eggs, beaten
- 1/4 teaspoon of ground cinnamon (optional)
As for the equipment needed, you will require:
- A deep frying pan or a fryer
- A thermometer to monitor the temperature of the oil
- A slotted spoon or skimmer for removing the coated ice cream balls from the oil
- A tray or plate lined with paper towels for draining excess oil
- A bowl or container for rolling the coated ice cream balls in the flour mixture
- A freezer-safe container or bag to store the fried ice cream
- It’s essential to note that using the right equipment and following proper safety precautions is crucial when working with hot oil.
- The ideal temperature for frying the ice cream is between 350°F (175°C) and 375°F (190°C).
- This will help in achieving a crispy exterior while keeping the inside scoop of ice cream frozen and delicious.
Cold ice cream of your choice (homemade or storebought)
For this Fried Ice Cream recipe, you will need a few key ingredients and some specific equipment to achieve the perfect crispy exterior and creamy interior.
The base ingredient for our Fried Ice Cream is cold ice cream, which can be either homemade or store-bought. It’s essential that your ice cream is extremely cold, as this will help it hold its shape when coated in batter.
You’ll also need a variety of coatings to achieve the perfect fried ice cream. Some popular options include flour, cornstarch, or bread crumbs. You can use one type of coating or experiment with different combinations for unique flavors.
An egg wash is also necessary to help the batter adhere to the ice cream. Whisk together an egg and a small amount of water until well combined, then set it aside for later use.
In terms of equipment, you’ll need a frying pan or deep fryer to heat your oil to the perfect temperature. A thermometer is also crucial in ensuring that your oil reaches 375°F (190°C), which is ideal for frying ice cream.
A slotted spoon and a plate lined with paper towels are necessary for removing and draining the fried ice cream after it’s cooked. Be careful when handling the hot and fragile dessert.
Crushed cookies, wafers, or other crunchy elements for garnish
To create a visually appealing and deliciously contrasting garnish for your Fried Ice Cream, you’ll need the right combination of ingredients and equipment.
Ingredients
The key to creating a crunchy garnish that complements the creamy ice cream is to use crushed cookies, wafers, or other crunchy elements. Here are some options:
Crushed cookies
- Chocolate chip cookies work particularly well, as their sweetness pairs perfectly with the cold ice cream.
- You can also use oatmeal raisin or peanut butter cookies for added texture and flavor.
Crushed wafers
- Vanilla wafers are a classic choice, as they’re light and add a sweet, cookie-like crunch to the dish.
- Chocolate sandwich cookies or mint chocolate chips can also be crushed for added flavor.
Other crunchy elements you can use include: chopped nuts (almonds, pecans, walnuts), candy pieces (M&M’s, chopped peanut butter cups), cookie crumbs, cereal pieces (Froot Loops, Cinnamon Toast Crunch), or even potato chips!
Equipment
You’ll need a few simple tools to crush and process the ingredients. Here are some essential equipment:
Food processor
- This is the most convenient tool for crushing cookies, wafers, or other crunchy elements.
- Just place them in the food processor and pulse until they’re crushed into fine crumbs.
Rolling pin
- This is a good alternative to a food processor if you don’t have one, or if you want to get creative with different textures.
Ziplock bags or containers
- Store your crushed ingredients in airtight containers or ziplock bags to keep them fresh and prevent them from getting stale or soggy.
You can also store them in glass jars with tight-fitting lids if you have one!
Tips and Variations
Feel free to get creative with your garnish! You can mix and match different ingredients, use different types of cookies or wafers, or add a pinch of salt to balance out the sweetness. Experiment with various flavor combinations and find your favorite!
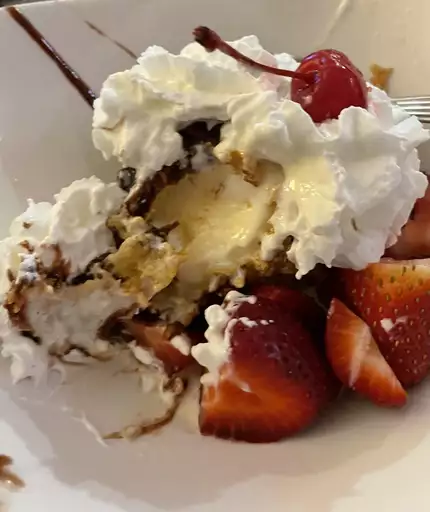
Fresh fruits (optional) strawberries, blueberries, or raspberries work well
The ingredients and equipment needed for a delicious fried ice cream recipe can vary depending on personal preferences, but here are some essentials:
Ingredients:
- Frozen vanilla or strawberry ice cream (the choice is yours!)
- Cinnamon sugar mixture (a blend of granulated sugar and cinnamon)
- Cream or half-and-half (for a rich and creamy coating)
- Egg wash (beaten egg mixed with water, for egg wash coating)
- Flour (all-purpose flour or cornstarch work well as a dusting agent)
Fresh Fruits (optional):
- Strawberries: sliced or whole strawberries can be used as a topping or mixed with the ice cream before coating
- Blueberries: these tiny berries are perfect for sprinkling on top of the fried ice cream
- Raspberries: fresh raspberries can be used as a topping, but be aware they may make the ice cream more fragile during handling
Equipment:
- Frying pan or deep fryer (for frying the ice cream)
- Cooling rack or plate (for draining excess oil and cooling the fried ice cream)
- Ice bath (a large container filled with ice and water, for chilling the coated ice cream before serving)
- Whisk or fork (for mixing egg wash and other ingredients)
- Parchment-lined baking sheet (for cooling the fried ice cream after frying)
Preparation and Assembly
Melting the Ice Cream
To prepare for making fried ice cream, it’s essential to have all the necessary ingredients and equipment ready.
Here’s a list of what you’ll need:
- Vanilla ice cream
- Heavy cream or half-and-half
- Caster sugar
- Unsalted butter, melted
- Vegetable oil for frying (about 2-3 inches deep in a pan)
- A plate or tray lined with parchment paper
- A thermometer to monitor the temperature of the oil
- An ice bath or a large bowl filled with ice cubes and water
- Optional toppings: fresh fruits, nuts, chocolate sauce, whipped cream, etc.
Now, let’s move on to preparing the ingredients:
- Take the vanilla ice cream out of the freezer and place it in the refrigerator for about 10-15 minutes to soften slightly. This will make it easier to shape into balls.
- In a separate bowl, mix together the heavy cream or half-and-half with the caster sugar until dissolved.
Assemble the ingredients as follows:
- Scoop the softened ice cream into small balls using an ice cream scoop or a spoon. You should end up with about 12-15 balls.
- Place each ice cream ball onto the parchment-lined plate or tray and put it in the freezer to harden for at least 10 minutes.
- Meanwhile, prepare the melted butter mixture by whisking together the melted butter and the heavy cream mixture until well combined. Set aside.
Melt the ice cream as follows:
- Heat about 2-3 inches of vegetable oil in a deep frying pan over medium heat until it reaches a temperature of around 375°F (190°C). You can use a thermometer to check the temperature.
- Once the oil is hot, carefully drop 4-5 ice cream balls into the oil. Do not overcrowd the pan.
- Cook the ice cream for about 10-15 seconds on each side or until they’re golden brown and crispy. Repeat with the remaining ice cream balls.
Scoop cold ice cream into a shallow container and place it in the freezer for about 1015 minutes to firm up.
To prepare and assemble the Fried Ice Cream, it’s essential to start by firming up the ice cream. Scoop cold ice cream into a shallow container and place it in the freezer for about 10-15 minutes to allow it to firm up. This step is crucial as it will help you achieve the perfect texture when frying the ice cream.
During this time, prepare your dredging station by placing the following ingredients in separate bowls or containers: beaten eggs, flour mixed with a pinch of salt and granulated sugar (depending on the flavor profile you’re aiming for), and crushed cookies or wafers. If you’re using a specific type of cookie or wafer, such as chocolate sandwich cookies or Biscoff cookies, make sure to crush them into fine crumbs.
Once the ice cream is firm enough, remove it from the freezer and scoop it into balls or shapes that fit your desired presentation. For this recipe, we’re using round scoops of ice cream, about 1-2 inches in diameter.
Gently dip each ball of ice cream into the beaten eggs to coat evenly, making sure to fully cover all sides of the ice cream ball. This egg wash will help the coating adhere to the ice cream.
Next, roll the egg-coated ice cream ball in the flour mixture to coat evenly. Be gentle when rolling the ice cream to avoid applying too much pressure and causing it to break apart.
Immediately place the coated ice cream ball onto a plate or tray lined with parchment paper. Repeat this process for each scoop of ice cream, making sure not to overcrowd the plates.
Once all the ice cream balls are coated and placed on the prepared trays, refrigerate them for about 10-15 minutes to set the coating before frying. This step is crucial in achieving a crispy exterior while keeping the interior frozen.
Once firm, scoop small balls of ice cream using an ice cream scoop or spoon.
Preparation and Assembly of Fried Ice Cream are crucial steps to ensure a crispy, golden exterior gives way to a smooth, creamy interior.
The process begins with preparing the ice cream for scooping:
- Select your favorite flavor of ice cream, preferably one that can hold its shape well when frozen solid.
- Remove the ice cream from the freezer and let it sit at room temperature for about 10-15 minutes to soften slightly. This will make it easier to scoop into balls.
Next, assemble the scoops of ice cream:
- Once firm but still yielding to pressure, scoop small balls of ice cream using an ice cream scoop or spoon.
- The size of each ball will depend on your preference and the desired size for serving. For most desserts, about 1-inch (2.5 cm) in diameter is ideal.
Now that you have your scoops of ice cream assembled:
- It’s time to prepare the coating mixture for frying. You can use a variety of ingredients such as breadcrumbs, crushed nuts, or even cereal flakes for added texture and flavor.
- Coat each ball of ice cream in the prepared coating mixture, pressing gently to adhere evenly. Be careful not to apply too much pressure, which could cause the ice cream to crack or break apart.
The final step is frying the coated ice cream balls:
- Heat about 2-3 inches (5-7.5 cm) of oil in a large skillet over medium-high heat until it reaches around 375°F (190°C).
- Gently place the coated ice cream balls into the hot oil and fry for about 30 seconds to 1 minute, or until golden brown.
Cooking Techniques and Tips
Tempering the Ice Cream
The art of cooking involves a variety of techniques and tips to achieve perfection, especially when it comes to tempering ice cream for a dish like fried ice cream. Tempering ice cream is a process that requires finesse and attention to detail to ensure the perfect balance between flavor and texture.
Creamy Ice Cream is the star of the show in this recipe, and getting it right is crucial. To temper ice cream effectively, start by freezing it to -20°C (around 0°F) to harden it. This will make it easier to coat with the crispy shell.
Once your ice cream is frozen, remove it from the freezer and let it sit at room temperature for about 10-15 minutes. This step, called tempering, allows the ice cream to soften slightly and become more pliable.
To achieve the perfect fried shell, you’ll need a light batter made from ingredients like flour, cornstarch, and egg whites. The key is to use a light touch when coating the ice cream balls to avoid applying too much pressure, which can cause the ice cream to break.
When frying the ice cream, use a deep fryer or a large pot with at least 5-7 cm (2-3 inches) of oil. Heat the oil to around 180°C (356°F), and once it reaches temperature, carefully place the coated ice cream balls in the hot oil.
It’s essential to not overcrowd the pot, as this can lower the oil temperature and result in a less crispy exterior. Fry the ice cream for about 2-3 minutes or until golden brown, then remove with a slotted spoon and drain on paper towels.
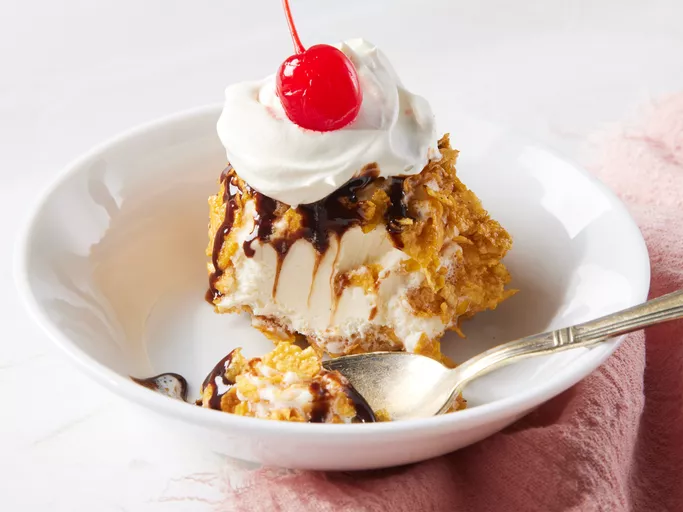
The final touch is to top your fried ice cream with a variety of ingredients like chocolate sauce, whipped cream, chopped nuts, or fruit. The possibilities are endless!
Melt a small amount of chocolate in the microwave or over low heat, then drizzle it over the ice cream balls to create a smooth, even coat.
Cooking techniques and tips are essential when preparing desserts like fried ice cream. One crucial aspect is working with chocolate, as it’s often used for drizzling over the finished product. Melting chocolate requires attention to temperature and time to achieve a smooth consistency.
To melt a small amount of chocolate, consider using either the microwave or low heat on your stovetop. The microwave is convenient because it allows precise control over the melting process. Place the chocolate in a microwave-safe bowl and heat it for 10-second intervals until it’s almost completely melted. Be cautious not to overheat as this can cause the chocolate to seize up, resulting in an unusable texture.
Alternatively, you can melt the chocolate over low heat on your stovetop. This method allows for more visual monitoring of the melting process, giving you greater control. Simply place the chocolate in a double boiler or a heatproof bowl set over a pot of simmering water. Stir occasionally until the chocolate is fully melted and has reached your desired consistency.
Once the chocolate has been melted to perfection, it’s ready for drizzling over your fried ice cream balls. This will not only add flavor but also create a visually appealing finish. To ensure an even coat, it’s a good idea to place a sheet of parchment paper or a silicone mat under the chocolate for easy cleanup.
Remember that the key to successfully melting chocolate is temperature control. If you’re working with high-quality chocolate, this process should take only a few minutes at most. Always keep an eye on the temperature and stir the chocolate occasionally to prevent it from becoming too hot or seizing up.
A final tip when drizzling melted chocolate over fried ice cream balls is to be patient and allow each piece to set before serving. This ensures that the flavors meld together harmoniously and the texture of the chocolate remains smooth and creamy.
Repeat the process with other flavors like caramel or Nutella for added variety.
The art of cooking involves a range of techniques that can elevate any dish to new heights, and when it comes to fried ice cream, mastering these techniques is crucial for success. Here are some essential tips and methods to achieve a perfectly crispy exterior and a creamy interior:
Tempering the Cream
- To create the perfect fried ice cream, it’s essential to temper your cream mixture correctly.
- This involves heating the mixture to around 90°F (32°C) before chilling it to below freezing temperatures.
- This process breaks down the fat molecules in the cream, allowing them to re-emulsify and create a stable mixture.
Frying Techniques
- For frying the ice cream, you’ll need a thermometer that can accurately read temperatures up to 350°F (177°C).
- Heat your oil to around 325-330°F (165-166°C) before adding the fried ice cream.
- Carefully drop small balls of tempered ice cream into the hot oil and fry for about 30 seconds on each side, until golden brown.
Flavor Variations
- To add variety to your fried ice cream recipe, consider using different flavors like caramel or Nutella as the base for your ice cream mixture.
- For a caramel fried ice cream, mix together heavy cream, granulated sugar, and fleur de sel before tempering and freezing it.
- To create a Nutella fried ice cream, combine cocoa powder with the tempered cream mixture for added richness and depth of flavor.
Tips for Achieving Success
- When making fried ice cream, it’s essential to not over-fry the balls of ice cream as they can quickly become greasy and lose their structure.
- To prevent this from happening, keep a close eye on the frying time for each batch.
- Carefully drain excess oil before serving your fried ice cream to avoid any mess or accidents.
Coat the ice cream balls evenly with crushed cookies, wafers, or other crunchy elements for garnish.
- Cooking Techniques and Tips for a Delicious Fried Ice Cream
- To create a truly decadent fried ice cream, it’s essential to master several key techniques and tips.
Coating the Ice Cream Balls Evenly
The first step in creating an exquisite fried ice cream is to coat each scoop of ice cream with a crunchy layer. This can be done using crushed cookies, wafers, or other crunchy elements as garnish.
How to Coat the Ice Cream Balls Evenly
- Create a well in the center of a plate of cookies, wafers, or other crunchy elements. This will act as a reservoir for the ice cream balls.
- Remove the ice cream from the freezer and let it sit at room temperature for about 2-3 minutes to soften slightly.
- Dip each ice cream ball into the crushed cookies, wafers, or other crunchy elements, pressing gently to ensure even coating.
Alternative Methods
If you find it challenging to coat the ice cream balls evenly using the traditional method, consider the following alternatives:
- Dip each ball of ice cream in a bowl of crushed cookies, wafers, or other crunchy elements. This will allow for an even distribution of the coating.
- Use a fork to dip the ice cream balls into a plate of crushed cookies, wafers, or other crunchy elements. This method provides more control over the amount of coating applied.
Freezing the Coated Ice Cream Balls
Once the ice cream balls are evenly coated with the desired garnish, it’s essential to freeze them for at least 30 minutes to firm up the coating and prevent it from melting when frying.

- Best Datanyze Alternatives for 2025 - April 24, 2025
- Best Hunter.io Alternatives for 2025 - April 22, 2025
- Best Lead411 Alternatives for 2025 - April 22, 2025
