
Ingredients
For the Pickling Liquid
The pickling liquid is an essential component in making homemade pickled ginger, also known as Gari. The ingredients used to make the pickling liquid play a crucial role in giving the pickled ginger its distinctive flavor and texture.
For the pickling liquid, you will need:
1 cup of water
1/2 cup of granulated sugar
1/4 cup of salt
1 tablespoon of grated fresh ginger (optional but recommended)
1 tablespoon of sake or dry white wine (optional)
1 teaspoon of rice vinegar
1/2 teaspoon of Japanese cooking sake or mirin (optional)
The water, sugar, salt, and grated ginger are the core ingredients of the pickling liquid. The ratio of these ingredients can be adjusted to suit your personal taste preferences.
The sugar helps to balance out the acidity of the vinegar and adds a touch of sweetness to the pickled ginger. The salt enhances the flavor and helps to preserve the gari.
Grated fresh ginger is optional, but it adds an extra layer of depth and warmth to the pickling liquid. If you choose to use it, be sure to strain the pickling liquid before using it, as the grated ginger can become quite pungent.
Sake or dry white wine are also optional ingredients that add a slightly sweet and nutty flavor to the pickling liquid. They help to balance out the acidity of the vinegar and enhance the overall flavor of the gari.
Rice vinegar is essential in making the pickling liquid, as it provides a tangy and slightly sweet flavor to the pickled ginger.
Japanese cooking sake or mirin are optional ingredients that add a rich and savory flavor to the pickling liquid. They help to balance out the acidity of the vinegar and enhance the overall flavor of the gari.
The star of the show for our homemade pickled ginger recipe is, of course, _ginger_. You’ll need fresh ginger, preferably with a thick, knobby texture and a sweet aroma.
For this recipe, we recommend using fresh ginger rather than dried or ground ginger to get the best flavor and texture.
You can use either white or yellow ginger, but white ginger is generally considered more neutral in taste.
If you want to make your pickled ginger with a bit of spice, feel free to add some sliced garlic cloves and/or grated fresh horseradish
For the brine, you’ll need:
- Water (1 cup): You can use tap water or filtered water for this recipe.
- Rice vinegar_ (2 cups): This is a key ingredient that gives pickled ginger its unique flavor and helps preserve it. You can find rice vinegar in most Asian grocery stores or online.
- Sugar (1/4 cup)
- Sea salt_ (2 tablespoons): This is a coarser, flakier salt that helps bring out the flavor of the ginger and adds texture to the brine.
- Pickling spice blend_ (1 tablespoon)
Additional ingredients you might want to consider:
- Green tea leaves or Japanese tea bags: These can be added to the brine for extra flavor and a hint of herbal sweetness.
- Pickled ginger syrup_ (optional): This is a sweet, spicy liquid that’s perfect for topping pickled ginger slices. You can find it in some Asian grocery stores or online.
Now that you have all your ingredients and supplies ready to go, let’s get started with our homemade pickled ginger recipe!
1 cup water
To prepare the pickling liquid for our homemade pickled ginger, we will need a simple ingredient that serves as a base for the brine solution.
The key ingredient here is water, which may seem straightforward but its quantity is crucial in determining the consistency of the final product.
For this recipe, we are using one cup or approximately 240 milliliters of water to create our pickling liquid.
1/2 cup rice vinegar
Rice vinegar is a fundamental ingredient in Japanese cuisine, particularly when it comes to pickling vegetables and making condiments like _gari_, or pickled ginger.
The key characteristic of rice vinegar that makes it suitable for pickling is its acidity level, which is lower than other types of vinegar such as apple cider vinegar or white wine vinegar.
Rice vinegar has a mild flavor and aroma, which won’t overpower the taste of the other ingredients in your _gari_ recipe.
In this case, we’re using 1/2 cup of rice vinegar to marinate our ginger slices.
This amount is sufficient to create a balanced flavor profile that complements the natural sweetness and spiciness of the ginger without overpowering it.
You can adjust the amount of rice vinegar according to your personal taste preferences, but keep in mind that using too much can make the pickled ginger too sour.
1 tablespoon granulated sugar
The key to making delicious and authentic homemade pickled ginger, also known as Gari in Japanese, lies not only in its preparation method but also in the quality and selection of ingredients used.
One crucial ingredient in this recipe is 1 tablespoon granulated sugar. This may seem like a small amount, but it plays a significant role in balancing the flavor profile of the pickled ginger. Granulated sugar serves to counteract the acidity from the vinegar, creating a harmonious balance that enhances the overall taste experience.
In Japanese cuisine, Gari is traditionally served as an accompaniment to sushi and sashimi dishes, providing a sweet and tangy contrast to the savory flavors of the raw fish. The sugar content in Gari helps to cut through the richness of these dishes, making it an integral component of this culinary tradition.
Using high-quality granulated sugar ensures that your homemade pickled ginger has a smooth, velvety texture and a deep, rich flavor. It’s essential to choose a sugar that is free from additives and artificial ingredients, as these can negatively impact the taste and nutritional value of your Gari.
The combination of sugar, vinegar, salt, and other key ingredients in this recipe creates a flavor profile that is both refreshing and invigorating. The acidity from the vinegar helps to preserve the ginger, while the sugar contributes to its distinctive sweetness and balance.
1 teaspoon salt
A key ingredient in many Japanese dishes, including the homemade pickled ginger recipe, is salt. The use of salt not only enhances flavors but also plays a crucial role in preserving food.
One teaspoon of salt is used in this recipe to create an ideal balance between flavor and preservation. When selecting a salt for this purpose, it’s essential to choose a fine or granulated salt that dissolves easily.
The reason for using _fine_ or _granulated salt_ is to ensure even distribution throughout the pickled ginger slices. This allows the flavors to penetrate uniformly, contributing to the desired taste and texture of the final product.
1/4 teaspoon ground white pepper
Ground white pepper is a key ingredient used to add depth and warmth to various dishes, including homemade pickled ginger or Gari.
In its powdered form, ground white pepper is made from the dried and processed seeds of the white peppercorn, which comes from the Piper nigrum plant.
Ground white pepper has a milder flavor compared to regular black pepper, with a slightly sweet and nutty taste that complements other ingredients well.
The use of ground white pepper in recipes helps to enhance the overall flavor without adding any harsh or overpowering notes, making it an excellent choice for delicate dishes like pickled ginger.
When using 1/4 teaspoon of ground white pepper in a recipe, it is essential to note that this amount can be adjusted based on personal preference and the desired level of spiciness in the final product.
In the context of homemade pickled ginger, the addition of ground white pepper helps balance out the acidity from the vinegar and sugar, creating a harmonious and refreshing flavor experience for the consumer.
The ingredients used to make homemade pickled ginger, also known as Gari in Japanese, are relatively simple and accessible.
Main Ingredients
- Fresh Ginger: This is the primary ingredient for making pickled ginger. Choose a firm and plump piece of fresh ginger root with minimal blemishes or wrinkles.
Secondary Ingredients
- Rice Vinegar: This is the primary acidic component used to give pickled ginger its signature tanginess. Japanese rice vinegar, such as Kurozu or Shinsui, can be found at most Asian markets.
- Sugar: A small amount of granulated sugar helps balance out the acidity and adds a touch of sweetness to the pickling liquid.
- Salt: Kosher salt or sea salt is used to enhance flavor and help preserve the ginger. However, be mindful not to over-salinate as it can make the pickled ginger too salty.
- Water: A small amount of water helps to dissolve the sugar and salt, creating a balanced pickling liquid.
Avoid or Optional Ingredients
- Sushi-grade or Preserved Ginger: While not essential, these can be added for an extra layer of umami flavor and texture. However, note that this may alter the overall taste and character of your homemade pickled ginger.
It’s worth noting that some recipes may call for additional ingredients, such as sake or mirin, but they are not essential for creating a basic, authentic-tasting homemade pickled ginger.
Instructions
Curing the Ginger
The art of curing ginger is a delicate process that requires attention to detail and patience. To produce high-quality pickled ginger, it’s essential to follow proper instructions.
Cleaning the Ginger
Start by selecting fresh ginger roots with no signs of sprouting or decay. Wash the ginger under cold running water to remove any dirt or impurities. Scrub gently to avoid damaging the skin, which can lead to mold formation during curing.
Cutting and Peeling
Peel the ginger using a vegetable peeler, taking care not to apply too much pressure, which can cause bruising. Slice the peeled ginger into thin rounds or strips, depending on your desired shape for the pickled ginger.
Soaking in Brine
In a large bowl, mix 1 cup of kosher salt with 4 cups of water to create a brine solution. Stir until the salt is dissolved, then add the sliced ginger and let it soak at room temperature for at least 2 hours or overnight. This step helps to soften the ginger and remove excess moisture.
Washing and Curing
Rinse the soaked ginger under cold running water to remove excess salt and any remaining impurities. Pat dry with paper towels to remove excess moisture, which is crucial for preventing mold growth during the curing process.
Curing in a Sugar Syrup
To create the sugar syrup, combine 2 cups of granulated sugar with 1 cup of water in a saucepan. Heat the mixture over medium heat, stirring until the sugar dissolves. Remove from heat and let cool slightly before using.
Assembling the Pickled Ginger
In a large bowl or container, combine the washed ginger slices with enough sugar syrup to cover them completely. Let it cure in the refrigerator for at least 2 days or up to 1 week, shaking the jar occasionally to distribute the syrup evenly.
Notes and Tips
For optimal flavor, use a combination of granulated and brown sugars for the sugar syrup. This will help to balance out the sweetness and create a more complex taste profile.
Avoid overcrowding the jar, as this can lead to mold growth and affect the quality of the pickled ginger. If you plan to store it for an extended period, consider using an acidic ingredient like vinegar to preserve the flavor and prevent spoilage.
Instructions for following a recipe like Homemade Pickled Ginger (Gari) require attention to detail and adherence to specific steps to achieve the desired outcome.
The first step in making pickled ginger involves selecting the right type of ginger, typically Japanese or Chinese, which is known for its thin skin and mild flavor.
After peeling the ginger, it must be sliced into thin strips to ensure even cooking and to prevent the ginger from becoming too dense or fibrous.
The next step is to prepare a brine solution by combining water, salt, and sugar in a saucepan. The ratio of water to salt to sugar can vary depending on personal preference, but a general guideline is 4:2:1.
Bring the brine solution to a boil, then reduce the heat and let it simmer for about 5 minutes, or until the sugar has dissolved and the mixture reaches its desired consistency.
While the brine is cooking, prepare the ginger strips by placing them in a clean glass jar. The jar should be sterilized beforehand to prevent contamination and spoilage.
Once the brine has cooled slightly, carefully pour it over the ginger strips, making sure they are completely submerged. If necessary, weight down the ginger with a clean plate or lid to keep it under the surface of the liquid.
Allow the pickled ginger to sit at room temperature for 24-48 hours, shaking the jar occasionally, before refrigerating it. This initial period allows the flavors to meld and the ginger to become slightly fermented.
After a few days in the refrigerator, the pickled ginger will be ready to eat. It can be stored in the fridge for several weeks or even months, depending on personal preference and the acidity level of the brine solution.
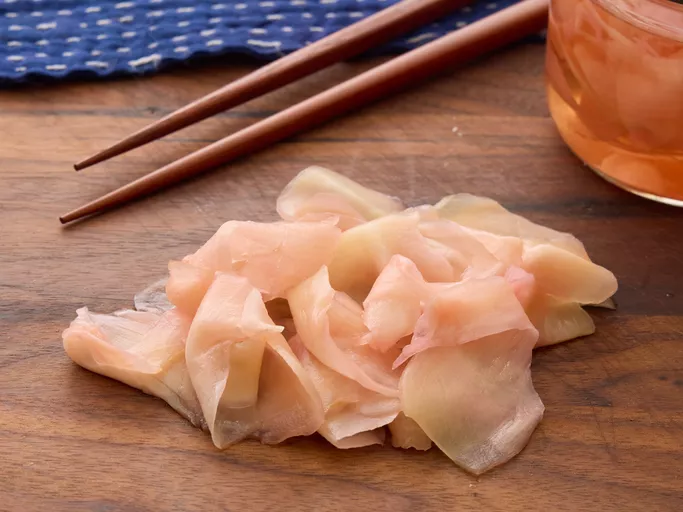
The resulting Homemade Pickled Ginger (Gari) should have a tangy, slightly sweet flavor and a crunchy texture that complements various dishes, including sushi, salads, and noodles.
Peel the ginger and slice it thinly into rounds or strips.
To peel the ginger effectively, start by selecting a fresh and firm piece of ginger. You can choose either young or mature ginger, depending on your preference for flavor and texture.
Next, lay the ginger on its side and locate the skin at one end. Hold the ginger firmly in place with one hand, then use a vegetable peeler to gently peel away the skin from top to bottom. Continue this process until you’ve peeled the entire length of the ginger.
Once the ginger is peeled, trim both ends off using a sharp knife. This will help remove any woody or fibrous parts that can be tough to chew.
To slice the ginger into thin rounds or strips, lay it flat on a cutting board and position your knife at an angle of about 45 degrees. Cut the ginger in one direction only, applying gentle pressure to avoid crushing the slices. You want to aim for even and uniform slices that will be easy to layer in your pickling jar.
For rounds, try to cut each slice as close to the size of a nickel or quarter as possible. This will ensure they cook evenly and have enough room to spread out in the jar.
For strips, aim for thin slices that are about 1/8 inch (3 mm) thick and around an inch (2.5 cm) long. You can adjust these dimensions based on your preference for texture and presentation.
As you cut each line of ginger, place them in a clean bowl or tray to keep them organized and prevent them from sticking together. This will make it easier to layer them in the pickling jar later.
Mix together sugar, salt, and water in a saucepan to make a brine solution.
To create the brine solution for making homemade pickled ginger, you will need to combine sugar, salt, and water in a saucepan. This step is crucial as it helps to preserve the ginger and adds flavor to the final product.
First, measure out the correct amounts of each ingredient according to your recipe. A common ratio for a brine solution is 1 part sugar, 2 parts salt, and 4 parts water. For example, if you are making a small batch of pickled ginger, you might use 1 cup of sugar, 2 cups of salt, and 8 cups of water.
Next, place the saucepan over medium heat on your stovetop. Once the heat is turned up, add the measured amounts of sugar and salt to the saucepan. The high heat will help to dissolve the two dry ingredients quickly and easily.
Once the sugar and salt have dissolved, add the water to the saucepan. Stir gently to combine all three ingredients, ensuring that no lumps form in the solution.
As you stir the brine solution, pay close attention to its temperature. The mixture should be heated until it reaches a simmer, but not boil. A gentle simmer is ideal for dissolving any remaining solids and creating a smooth, even liquid.
Once the brine has reached a simmer, reduce the heat to low and allow it to cook for about 10 minutes, or until the flavors have melded together and the solution has thickened slightly. This step helps to enhance the flavor of the pickled ginger and creates a more stable environment for preservation.
After the brine has cooled slightly, you can use it to make your homemade pickled ginger by slicing thin pieces of fresh ginger and submerging them in the solution. Allow the pickled ginger to sit at room temperature for 2-3 hours or refrigerate it overnight before serving.
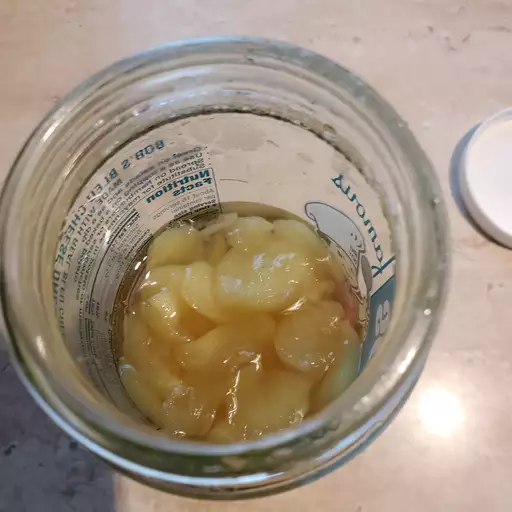
Pack the ginger slices tightly into a clean glass jar.
To start making your own homemade pickled ginger, begin by _packing_ the sliced ginger tightly into a clean glass jar.
The jar should be free from any residual flavors or aromas that may interfere with the taste and smell of the pickled ginger. This is especially important if you plan on using the jar for other purposes in the future.
Begin by placing one layer of sliced ginger at the bottom of the jar, followed by another, and continue this process until all of the ginger slices are used up.
It’s essential to pack the ginger tightly into the jar, as this will help create a brine solution that permeates through each slice evenly.
This process also helps to prevent any air pockets from forming between the ginger and the jar, which could cause spoilage or other issues with the pickled ginger’s quality.
Once the ginger is packed into the jar, you can proceed with creating the brine solution, which will be used to soak the ginger slices in order to give them their characteristic flavor and texture.
Instructions play a crucial role in ensuring that tasks are completed successfully, efficiently, and with minimal errors. Clear instructions provide clarity on what needs to be done, how it should be done, and why certain procedures are followed. This is particularly important when dealing with recipes, as the end product’s quality heavily relies on accurate execution of each step.
When writing instructions for a homemade pickled ginger recipe like Gari, it is essential to break down the process into manageable steps that cater to various skill levels and learning abilities. This can be achieved by using simple language, providing visual aids where necessary, and including clear headings or subheadings to separate different stages of preparation.
Effective instructions should cover the basic requirements for making pickled ginger, which include selecting quality ingredients such as fresh ginger, vinegar, salt, sugar, and water. Instructions on how to properly slice the ginger without causing too much waste is also important, as well as steps for creating a brine solution that balances flavor and preservation.
Moreover, instructions should address potential pitfalls or common mistakes home cooks may encounter during this process. This includes tips on maintaining sterility when handling ingredients, ensuring that the pickling liquid reaches the appropriate temperature to prevent spoilage, and how to store the finished product to maintain its freshness.
A good set of instructions will also highlight the nutritional benefits of homemade pickled ginger, such as higher vitamin C content compared to commercially available products, which may have added preservatives or sugars. Additionally, discussing the versatility of pickled ginger in various recipes can encourage home cooks to experiment and find new uses for this ingredient.
Finally, providing variations or suggestions on how to customize the recipe to suit individual tastes is a great way to engage users and make the instructions more inclusive. This could involve using different types of vinegar, spices, or even sweeteners to create unique flavor profiles, all while maintaining the basic structure and guidelines for making traditional pickled ginger.
Tips and Variations
Additional Flavorings
To make homemade pickled ginger, also known as gari, you can experiment with various tips and variations to create unique flavor profiles. Here are some suggestions:
- Spice it up: Add a pinch of cayenne pepper or red pepper flakes to give your pickled ginger an extra kick.
- Herbal infusions: Try infusing your pickled ginger with fresh herbs like mint, basil, or lemongrass for added depth and fragrance.
- Fruit and spice pairings: Combine pickled ginger with sliced citrus fruits like oranges or grapefruits, along with a sprinkle of cinnamon or nutmeg for a sweet and tangy blend.
- Sweet and savory: Add a drizzle of honey or maple syrup to balance out the acidity in your pickled ginger.
You can also experiment with different types of vinegar, such as balsamic, apple cider, or rice vinegar, to create distinct flavor profiles. For example:
- Balsamic glaze: Use balsamic vinegar and reduce it to a thick glaze for a rich and intense pickled ginger.
- Apple cider vinegar: Add a splash of apple cider vinegar for a fruity and refreshing twist on traditional pickled ginger.
- Rice vinegar: Use Japanese rice vinegar for an authentic and slightly sweet take on homemade pickled ginger.
In terms of additional flavorings, you can try the following:
- Ginger juice: Add fresh ginger juice to your pickling liquid for a more intense ginger flavor.
- Garlic and chili: Mix in minced garlic and chili peppers for an added depth of flavor.
- Cucumber slices: Add sliced cucumbers to your pickled ginger for a refreshing and light twist on traditional pickles.
These are just a few examples of the many tips and variations you can try when making homemade pickled ginger. Feel free to experiment and come up with your own unique flavor combinations!
Gari, also known as homemade pickled ginger, is a crucial condiment in Japanese cuisine that serves multiple purposes in various dishes.
To elevate your gari-making experience and achieve unique flavors, try incorporating these tips and variations:
Experiment with different types of vinegar: Instead of using traditional white vinegar or rice vinegar, you can substitute it with apple cider vinegar, balsamic vinegar, or Japanese sake to create distinct flavor profiles.
Add aromatics for added depth: Incorporate sliced onions, minced garlic, grated ginger (differing from pickled ginger), or even star anise for a fragrant and complex taste experience.
Multiply the flavors with spices and herbs: Mix in some cayenne pepper for a spicy kick, cilantro for freshness, basil for a herbal flavor, or use ground black pepper to create a piquant gari.
Change the sweetness level: Add brown sugar, honey, or maple syrup to balance out acidity and introduce natural sweetness to your homemade pickled ginger.
Mix in other ingredients for unique textures
Crunchy texture: Try adding chopped nuts (walnuts, almonds), crispy fried shallots, or sesame seeds to add a satisfying bite to each piece of gari.
Chewy and refreshing: Add dried cranberries or cherries for a fruity twist, or try mixing in shredded coconut for added tropical flavors.
Fibrous texture: Include chopped fresh herbs like parsley, mint, basil (Thai), or lemongrass to infuse freshness and fiber into your homemade pickled ginger.
Create a variation by altering the cooking method
Pickling in different temperatures: Experiment with cold storage versus refrigeration for different textures and preservation methods.
Cooking with liquid smoke: Try infusing your pickled ginger with a smoky flavor using liquid smoke, creating an interesting twist on traditional flavors.
Pressure-cooking the gari: Use pressure cooking to speed up the cooking and preservation process of your homemade pickled ginger while retaining its freshness and natural colors.
These variations can open doors to novel and unique flavor profiles that will take your homemade pickled ginger, or Gari, to the next level in Japanese cuisine and beyond!
Add sliced daikon radish or carrot to the jar for added flavor.
To take your homemade pickled ginger (gari) to the next level, consider adding sliced daikon radish or carrot to the jar for added flavor and texture.
Tips
Here are some additional tips to enhance your gari-making experience:
- Add a few slices of fresh ginger to the brine before transferring it to the jar, as this will infuse the liquid with an intense ginger flavor.
- For a spicy kick, add some grated fresh horseradish or wasabi paste to the brine. This will not only add heat but also depth to your gari’s flavor profile.
- Experiment with different types of vinegar, such as rice vinegar, apple cider vinegar, or white wine vinegar, to find the one that suits your taste preferences.
Variations
Here are some creative variations on traditional pickled ginger (gari) recipe:
- Sweet Gari: Add a sweetener like honey or sugar to the brine for a sweeter take on gari.
- Miso-Gari: Mix miso paste into the brine for added umami flavor.
- Spicy-Gari: Increase the heat by adding more wasabi or hot sauce to the brine.
Feel free to get creative and experiment with different combinations of ingredients and flavors to develop your own signature gari recipe!
Use different types of vinegar, such as apple cider vinegar or white wine vinegar.
Varying the type of vinegar used can result in distinct flavor profiles for homemade pickled ginger, also known as Gari.
Balsamic Vinegar: Balsamic vinegar adds a rich and slightly sweet taste to pickled ginger.
- Combine with soy sauce, sugar, and chili peppers for a sweeter and spicier flavor profile.
White Wine Vinegar: White wine vinegar contributes a crisp acidity to the dish.
- Mix with wasabi paste and sesame oil for an Asian-inspired flavor combination.
- Add sliced scallions and grated ginger for added texture and depth of flavor.
Apple Cider Vinegar: Apple cider vinegar provides a fruity and slightly sweet taste to pickled ginger.
- Combine with honey, mustard seeds, and chopped fresh dill for a unique and tangy flavor profile.
Rice Vinegar: Rice vinegar is commonly used in Japanese cuisine and adds a subtle acidity to pickled ginger.
- Mix with soy sauce, mirin, and sugar for a traditional Japanese flavor combination.
- Add sliced shiitake mushrooms and grated daikon radish for added texture and depth of flavor.
White Distilled Vinegar: White distilled vinegar is a neutral-tasting vinegar that can be used to create a lighter pickled ginger flavor profile.
- Combine with chopped fresh herbs like parsley or basil for a bright and refreshing flavor combination.
Incorporating tips and variations into homemade pickled ginger can elevate its flavor and texture. To start, using fresh ginger rather than jarred or dried is crucial for achieving authentic taste.
The type of sugar used in the brine can greatly affect the final product’s sweetness level. Brown sugar provides a deeper caramel-like flavor compared to white sugar.
Adding slices or chunks of citrus fruits like orange, lemon, or lime to the pickling jar with ginger not only adds tanginess but also a hint of their respective flavors.
Using a mixture of vinegar types such as rice vinegar and apple cider vinegar creates a well-balanced taste. Rice vinegar provides a subtle sweetness while apple cider vinegar contributes a rich, slightly sweet flavor.
The ratio of water to brine ingredients can be adjusted according to personal preference for the desired level of spiciness or saltiness.
For an extra spicy kick, add more chili flakes or sliced hot peppers into the pickling jar.
Incorporating other spices like cinnamon sticks, whole cloves, or star anise adds depth and warmth to the ginger’s flavor. This is particularly suitable for a more complex brine.
To create a visually appealing presentation, arrange slices of pickled ginger on a decorative platter, garnished with edible flowers or herbs like basil leaves.

- Best LeadsGorilla Alternatives for 2025 - April 22, 2025
- Best Leadzai Alternatives for 2025 - April 22, 2025
- Best LeadSwift Alternatives for 2025 - April 21, 2025
