Ingredients
Squash Variety Selection
In preparing for a pickled squash recipe, selecting the right ingredients and choosing a suitable squash variety are crucial steps that will impact the final flavor and texture of your dish.
When it comes to ingredients, you’ll want to choose a combination of sweet, savory, and slightly bitter elements to create a balanced taste experience. A classic pickling brine typically includes:
- Water
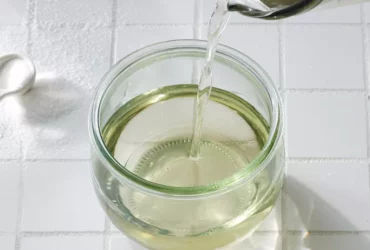
- Vinegar, such as white wine vinegar or apple cider vinegar, which adds acidity and helps preserve the squash
- Sugar or honey, to balance out the acidity and add sweetness
- Salt
For the squash variety, you have several options to choose from. The most common types of squash used in pickling are:
- Courgette, also known as zucchini, which is a popular choice due to its high water content and mild flavor
- Butternut squash, with its sweet and nutty flavor, making it an excellent option for those who prefer a sweeter pickled squash
- Acorn squash, with its slightly bitter and earthy taste, adding depth to the final product
- Spaghetti squash, with its mild and slightly sweet flavor, making it suitable for both sweet and savory pickling recipes
When choosing your squash variety, consider factors such as texture, flavor profile, and personal preference. For example, if you prefer a sweeter pickled squash, butternut or spaghetti squash might be the best choice.
Ultimately, the key to creating a successful pickled squash recipe lies in balancing the ingredients and choosing a suitable squash variety. Experiment with different combinations to find your perfect blend of flavors and textures!
Choose a variety of summer squash, such as zucchini or yellow crookneck, that is high in water content to help create a tangy pickling liquid.
In order to prepare a refreshing and crunchy side dish for the summer, we need to choose the right variety of summer squash that will complement our pickling liquid. A good option would be to select a variety like zucchini or yellow crookneck, as they are not only rich in water content but also offer a delicate flavor profile.
When selecting a summer squash for pickling, it’s essential to consider the sweetness and moisture level of the vegetable. Zucchinis and yellow crooknecks have a higher water content compared to other varieties like pattypan or acorn squash. This characteristic is crucial in creating a tangy and well-balanced pickling liquid.
The high water content in zucchini and yellow crookneck squash also contributes to their ability to absorb flavors quickly, making them ideal for quick pickling processes. Additionally, these summer squashes have a mild flavor that will allow the tanginess of our pickling liquid to shine through without overpowering the vegetable itself.
For those who may be wondering about other varieties of summer squash, it’s worth noting that pattypan and acorn squash can also be used for pickling. However, they have a slightly higher sugar content compared to zucchini and yellow crookneck, which might affect the flavor profile of our pickled squash.
Overall, selecting a variety like zucchini or yellow crookneck as your summer squash will result in a deliciously tangy and crunchy side dish that’s perfect for hot summer days. The high water content in these vegetables helps create a well-balanced pickling liquid, while their mild flavor allows the flavors of our recipe to shine through.
Consider the flavor profile you want to achieve and select a squash that complements it.
The key to creating a delicious pickled squash recipe lies in selecting the right type of squash, one that will not only hold its shape and texture during the pickling process but also enhance the overall flavor profile.
When it comes to choosing a squash for pickling, you have several options. The most common types are winter squash, such as acorn squash, butternut squash, and spaghetti squash. Each of these varieties has its own unique characteristics that can impact the final flavor and texture of your pickled squash.
For example, if you want to create a sweet and slightly spicy pickled squash, consider using a butternut squash or an acorn squash. These types of winter squash have a naturally sweet flavor profile, which pairs well with spices like cumin and coriander.
If you prefer a tangier pickled squash, look for a spaghetti squash. This variety has a milder flavor than other winter squashes, making it an excellent choice when combined with brightening agents like lemon juice or vinegar.
Another factor to consider is the moisture content of your chosen squash. Drier squash will result in a crunchier texture after pickling, while more watery squash may end up too soft and soggy.
Ultimately, the best type of squash for pickling depends on your personal taste preferences and what flavors you want to achieve. By selecting a squash that complements your desired flavor profile, you can create a delicious and unique pickled squash recipe.
Preparation
Squash Preparation
Cut the squash into 1-inch cubes to ensure even pickling. The type of squash used can vary, but acorn squash and zucchini are popular choices for their sweet flavor and firm texture.
Remove any seeds or pulp from the squash pieces, as they can create an unpleasant texture in the finished pickle. This step is essential for a smooth and consistent pickling experience.
Rinse the squash cubes under cold water to remove any remaining impurities or debris. Pat them dry with paper towels to prevent excess moisture from affecting the pickling process.
Mix together a brine solution of water, vinegar, salt, and spices in a large bowl or container. The ratio of water to vinegar can be adjusted according to personal preference, but a classic combination is 1 part vinegar to 3 parts water.
Add the squash cubes to the brine solution and ensure they are fully submerged. If necessary, add more water or vinegar to achieve complete submersion.
Cover the bowl or container with plastic wrap or a lid to create a sterile environment for the pickling process to begin. The longer the squash sits in the brine, the more flavorful it will become.
Wash and slice the squash into 1/4inch thick rounds or strips, depending on your desired shape.
To prepare the squash for pickling, it’s essential to select a suitable variety that’s firm and not too soft or fibrous.
For this recipe, you can use any type of summer squash such as zucchini, yellow crookneck, or green or yellow straight neck squash. Avoid using winter squashes like acorn or butternut as they’re not ideal for pickling.
To prepare the squash, follow these steps:
- Wash the squash under cold running water to remove any dirt or debris.
- Gently scrub the surface of the squash with a soft brush to remove any stubborn bits.
Rinse the squash thoroughly and pat it dry with a clean towel or paper towels to remove excess moisture.To cut the squash into the desired shape, use a sharp knife and follow these steps:
- If you want to create round slices, place the squash on its side and slice it into 1/4 inch thick rounds. You can do this by placing the squash on its side and cutting parallel slices.
- Alternatively, if you prefer strips, cut the squash into long strips, about 1-2 inches in length. This will create a more rustic and textured appearance.
Remember to work carefully and gently when handling the squash, as it can be delicate and prone to breaking.
Remove any seeds or pulp from the center of the squash slices.
- To prepare the squash for pickling, it’s essential to remove any seeds or pulp from the center of the slices.
- The first step is to cut the squash into thin slices, about 1/4 inch thick, using a sharp knife.
- Next, place the squash slices on a clean cutting board and inspect each piece for any visible seeds or pulp.
- Use a paring knife to carefully remove any seeds or pulp from the center of each slice, working gently to avoid damaging the surrounding flesh.
- This process may require some patience, but it’s crucial in achieving the desired texture and flavor of the pickled squash.
- As you work through the squash slices, consider removing the seeds and pulp from the edges as well, where they tend to accumulate.
- This will help create a clean and even surface for the pickling process, ensuring that your finished product is visually appealing and free of unwanted texture.
- The removed seeds and pulp can be saved for use in another recipe, such as roasting or making squash puree.
In a large bowl, combine the sliced squash with enough salt to create a brine.
The first step in making pickled squash is to prepare it for the pickling process. This involves creating a brine that will help to draw out excess moisture from the squash and add flavor to it.
To create this brine, combine 1-2 cups of water with 1-2 tablespoons of kosher salt in a large bowl. The ratio of water to salt can be adjusted depending on your personal preference for the level of saltiness you want to achieve.
Next, add sliced squash to the bowl, making sure that it is fully submerged under the brine. You can use any type of squash you like, such as zucchini, yellow crookneck, or acorn squash.
Mix the squash and brine together until the squash is evenly coated with the salt solution. It’s essential to make sure that all surfaces of the squash are in contact with the brine so that they can absorb the flavors.
Allow the squash to sit for 30 minutes to an hour, depending on the size and type of squash you’re using. This will give the squash time to release its excess moisture and become tender.
After the squash has sat in the brine for a while, use a paper towel or clean cloth to gently pat it dry. This will help remove any excess moisture from the surface of the squash and prevent the pickling liquid from becoming too watery.
Cooking and Storage
Pickling Liquid and Cooking
Cooking and storage play crucial roles when preparing a pickled squash recipe. It’s essential to understand how different cooking methods affect the texture, flavor, and shelf life of the final product.
One key factor in cooking for pickling is sterilization. This process involves heating the ingredients and containers to kill off any bacteria that may be present, ensuring the pickled squash remains safe to eat.
The choice between using a water bath canner or a pressure canner depends on the type of pickling liquid being used. A water bath canner is suitable for high-acid recipes, such as those containing vinegar or lemon juice, whereas a pressure canner is required for low-acid recipes.
A well-made pickling liquid can make all the difference in a pickled squash recipe. The basic components of a pickling liquid include water, vinegar (such as white vinegar or apple cider vinegar), and various spices, herbs, and seasonings.
The role of sugar in a pickling liquid is often misunderstood. While it may seem counterintuitive to add sweetness to an acidic pickle, the sugar serves several purposes. It helps to balance out the flavors and provide a sense of depth to the pickled squash.
One common mistake when preparing pickles is not using canning salt. Unlike table salt, which can impart a bitter flavor to the pickled squash, canning salt is designed specifically for use in preserving and does not contain additives that may affect the texture or flavor of the final product.
Finally, it’s essential to understand how different storage methods impact the quality and shelf life of the pickled squash. Fridge storage is ideal for short-term preservation, while canning provides long-term storage options. When storing pickled squash in a canning jar, be sure to leave enough space at the top for the lid to seal properly.
Overall, mastering cooking and storage techniques for pickling will greatly enhance your ability to prepare delicious and healthy pickled squash recipes.
Combine vinegar, sugar, garlic, and spices in a saucepan and bring to a boil.
To make this delicious pickled squash, you’ll need to combine vinegar, sugar, garlic, and spices in a saucepan and bring it to a boil.
This recipe yields approximately 2 cups of pickling liquid, which is perfect for pickling a medium-sized squash or several small ones. Here’s the ingredient list:
- 1 cup (250 ml) vinegar (white wine, apple cider, or white distilled)
- 1/2 cup (125 g) granulated sugar
- 3-4 cloves of garlic, peeled and minced
- A pinch of salt
- A few whole spices like black peppercorns, mustard seeds, dill seeds, or coriander seeds (optional)
To prepare the pickling liquid:
- Combine the vinegar, sugar, garlic, and salt in a medium-sized saucepan.
- Add any desired whole spices to the saucepan.
- Bring the mixture to a boil over high heat, stirring occasionally.
While the pickling liquid is boiling:
- Prepare your squash by slicing it into thin rounds or cubes.
- Mix the prepared squash with any additional seasonings you like (e.g., dried herbs, grated ginger).
Once the pickling liquid has reached a rolling boil:
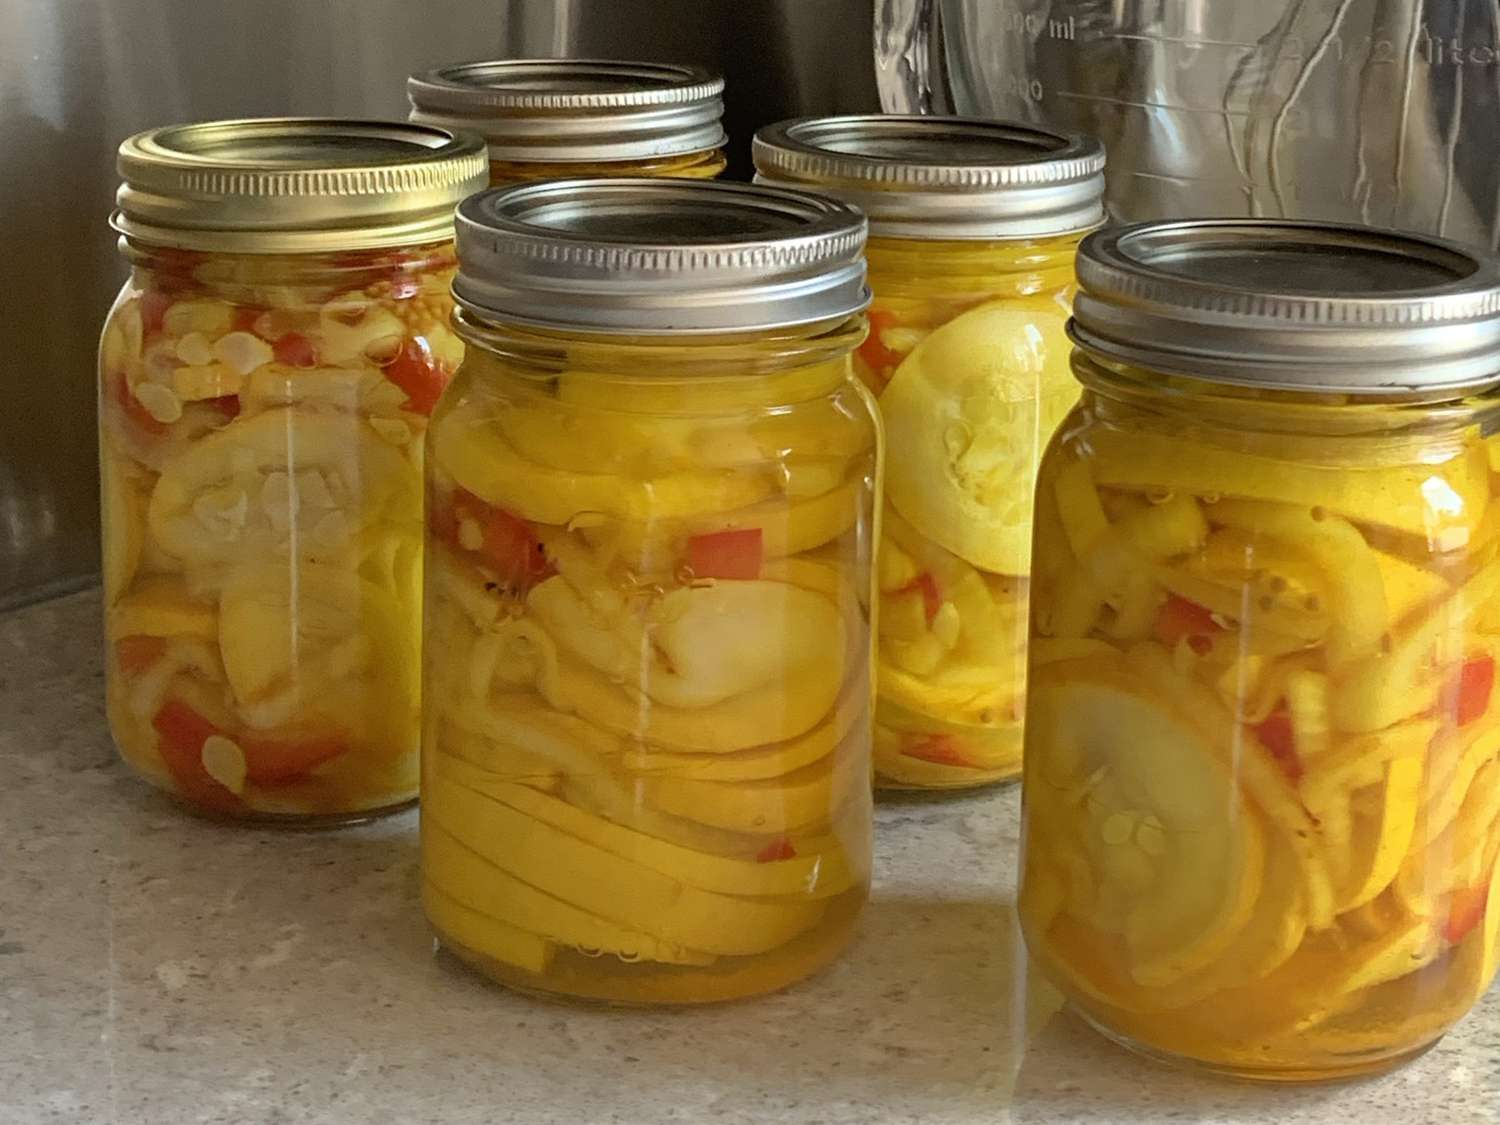
- Pack the squash mixture tightly into clean glass jars or containers.
- Pour the hot pickling liquid over the squash, making sure that each piece is completely covered.
- Allow the jar to cool slightly before sealing it with a tight-fitting lid. Store the sealed jar in the refrigerator.
This recipe allows you to customize the flavor and texture of your pickled squash according to your preferences. Experiment with different spices, herbs, or seasonings to create unique flavor combinations.
When stored properly in an airtight container in the fridge, this pickled squash will keep for several weeks. Simply transfer it to a clean glass jar once a week or whenever you notice signs of mold or spoilage.
Pack the prepared squash into clean glass jars, leaving 1/4 inch headspace.
To pack the prepared squash into clean glass jars, you will need to follow some key steps to ensure that your pickled squash remains fresh and safe to eat.
The first step is to sterilize your glass jars in boiling water for about 10-15 minutes. This will ensure that they are free from any bacteria or other contaminants.
While the jars are still warm, carefully place them on a clean towel to prevent any moisture from accumulating inside the jar.
Next, pack the prepared squash tightly into each of the sterilized jars, leaving about 1/4 inch headspace. This is crucial in order to create space for the brine liquid to cover the squash completely and to allow for expansion during fermentation.
Once you have packed all of the squash into the jars, make sure that each jar has at least 1-2 tablespoons of the pickling spice mixture on top. This will help to flavor the squash and prevent any mold from growing.
Using a clean utensil, such as a wooden skewer or a plastic spatula, gently press down on the squash to remove any air pockets and ensure that it is packed tightly in the jar.
After you have finished packing each jar, use a clean cloth or paper towel to wipe away any excess moisture from the rim of the jar. This will help to prevent any bacteria from entering the jar during storage.
Finally, secure the lids on each jar and store them in the refrigerator at a temperature of 39°F (4°C) or below. It’s recommended to consume the pickled squash within 3-6 months for optimal flavor and texture.
Pour the hot pickling liquid over the squash, making sure that all slices are covered.
Once you have prepared the slices of squash according to the recipe, it’s time to move on to the fun part – pickling! The pickling liquid plays a crucial role in giving the squash its distinctive flavor and texture.
The first step is to make sure that all of your equipment is ready. You’ll need a large bowl or container with a lid to hold the pickling liquid, as well as a spoon or other utensil for stirring. It’s also essential to have some clean jars or containers on hand to store the pickled squash in.
Next, you’ll want to prepare your pickling liquid according to the recipe. This typically involves mixing together a combination of water, vinegar, sugar, and spices. The exact proportions will depend on the specific recipe you’re using, so be sure to follow it carefully.
Once you have your pickling liquid ready, it’s time to pour it over the squash slices. Make sure that all of the squash is covered by the liquid – you can do this by gently stirring the slices with a spoon or by tilting the bowl slightly.
Now that the squash is coated in the pickling liquid, let it sit at room temperature for several hours or overnight. This will allow the flavors to meld together and the squash to absorb all of the delicious flavors.
After the squash has sat in the pickling liquid for a few hours, you can transfer it to your storage containers. Be sure to leave about an inch of space at the top of each container to allow for expansion during refrigeration.
Store the pickled squash in the refrigerator, where it will keep for several weeks or even months. You can also consider canning or freezing the squash if you want to store it for longer periods of time.
Before serving, make sure that the pickled squash has been refrigerated for at least a few hours or overnight. This will allow the flavors to mellow out and the squash to become even more tender.
- Best Datanyze Alternatives for 2025 - April 24, 2025
- Best Hunter.io Alternatives for 2025 - April 22, 2025
- Best Lead411 Alternatives for 2025 - April 22, 2025

