Ingredients
Pickling Liquid Ingredients
To make delicious refrigerator dill pickles, you’ll need the following ingredients for the pickling liquid:
Cucumbers
Choose fresh, firm cucumbers with no signs of soft spots or mold. You can use either slicing cucumbers (like “Hothouse” or “English”) or pickling cucumbers (like “Kirby” or “Sour Pickles”). For this recipe, you’ll need about 4-6 medium-sized cucumbers.
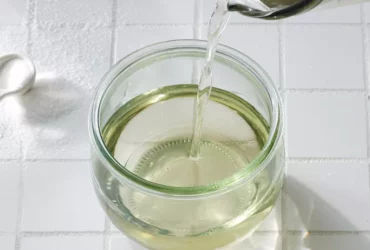
Water
Use fresh, cold water from your tap. Aim for a ratio of 1 part kosher salt to 2 parts water by weight. So if you’re using 1 cup of kosher salt (about 200g), use about 400ml or 1.7 cups of water.
Kosher Salt
This type of salt has a coarser texture and smaller crystals, making it perfect for pickling. Use the right amount to help draw out excess moisture from the cucumbers and create a brine that inhibits bacterial growth. The ratio mentioned above is essential.
Granulated Sugar
A small amount of sugar will balance the acidity of the vinegar and enhance the flavor of the pickles. Use about 1/4 cup or 50g for every 2 cups (400ml) of water.
White Vinegar
White vinegar is a crucial ingredient that provides acidity to the pickling liquid, helping preserve the pickles and create a tangy flavor. Use about 1/4 cup or 50g for every 2 cups (400ml) of water.
Whole Black Peppercorns
These add a subtle peppery flavor to your pickles without overpowering them. Use about 6-8 whole black peppercorns per quart (about 1L) of pickling liquid.
Dill Heads or Fresh Dill Weed
Choose fresh, fragrant dill heads with bright green stems and leaves. You can use either fresh dill weed or dried dill seeds for this recipe. For every 4-6 cucumbers, you’ll need about 2 sprigs of fresh dill (or 1/4 teaspoon of dried dill seeds).
The art of crafting delicious refrigerator dill pickles involves selecting the right ingredients, which are essential for achieving that perfect balance of flavors and textures.
Here’s a comprehensive breakdown of the key components required for this recipe:
Essential Ingredients
- 1 cup of fresh dill weed (or 1 tablespoon of dried dill weed)
- 4 cups of thinly sliced cucumbers (any variety, but Kirby or pickling cucumbers work best)
- 1/2 cup of kosher salt
- 1/4 cup of granulated white sugar
- 1/4 cup of white vinegar
- 1/4 cup of water
- 1 tsp of black pepper, freshly ground
- Optional: garlic, whole cloves or minced (2-3 cloves)
Suggested Ingredients for Enhanced Flavor
- Red pepper flakes or sliced red peppers (for added heat)
- Lemon juice or slices (1-2 tablespoons)
- Celery seeds (1 teaspoon)
- Onion, thinly sliced (about 1/4 cup)
When choosing cucumbers for pickling, it’s essential to select those that are specifically labeled as ‘pickling’ or ‘Kirby.’ These varieties have a higher water content and are more compact, making them ideal for creating crunchy pickles.
The kosher salt is crucial in drawing out the moisture from the cucumber slices, allowing them to become tangy and crisp. White sugar balances the acidity of the vinegar, while white vinegar provides that characteristic pickle flavor.
Don’t be afraid to experiment with additional ingredients to create unique flavor profiles for your refrigerator dill pickles. The beauty of this recipe lies in its versatility and adaptability to different taste preferences!
Cider vinegar
Cider vinegar is a crucial ingredient in many recipes, including the classic Refrigerator Dill Pickles Recipe.
Here are some key characteristics and uses of cider vinegar:
- Vinegar type: Cider vinegar is a type of acetic acid that is made from fermented apple cider.
- Taste and smell: Cider vinegar has a distinctive tangy flavor and aroma, with hints of apple.
- Acidity level: Cider vinegar has a pH level of around 2.4-3.0, making it a strong acid.
- Culinary uses: Cider vinegar is commonly used in cooking and baking, particularly for its flavor and preservative properties.
- Preservation: The acidity in cider vinegar helps to preserve food by inhibiting the growth of bacteria and other microorganisms.
In the context of the Refrigerator Dill Pickles Recipe, cider vinegar plays several important roles:
- Flavor enhancement: Cider vinegar adds a tangy flavor to the pickles that complements the dill and other ingredients.
- Pickling agent: The acidity in cider vinegar helps to create an environment that is inhospitable to bacteria and other microorganisms, allowing the pickles to preserve.
- Texture: Cider vinegar can also help to preserve the texture of the pickles by preventing them from becoming too soft or mushy.
In order to use cider vinegar effectively in this recipe, it’s essential to:
- Choose a high-quality cider vinegar that is made from fermented apple cider and has not been filtered or pasteurized.
- Use the correct ratio of cider vinegar to water: typically 1-2 cups of cider vinegar per gallon of water.
- Add the cider vinegar to the pickling liquid after it has cooled, as high temperatures can damage the acidity and flavor of the vinegar.
Water
The key to making delicious refrigerator dill pickles lies not only in the recipe itself, but also in the quality and selection of ingredients used.
When it comes to these tangy treats, water plays a crucial role in achieving that perfect balance of flavor, crunch, and texture. Water is essentially the medium through which all other ingredients interact, affecting how they combine, how flavors develop, and ultimately, how the final product tastes.
Here’s what you need to know about water in the context of this refrigerator dill pickle recipe:
Quality of Water
The quality of water is often overlooked but is essential for making great pickles. Use fresh, cold water, preferably filtered or bottled, to eliminate any chlorine taste and other impurities.
Amount of Water
While the amount of water may seem insignificant at first glance, it significantly impacts the pickle’s texture and flavor. Too little water can result in a salty, vinegar-rich pickled product that lacks crunch, while too much water might lead to a soft or overly briny taste.
Role of Water in Fermentation
During fermentation, water acts as a catalyst for the lactic acid bacteria to convert sugars into lactic acid. This process gives the pickles their characteristic sour taste and crunchy texture. Proper hydration also ensures that these beneficial bacteria are able to multiply effectively, thereby enhancing flavor.
Mineral Content in Water
The mineral content of water can also impact the taste of your refrigerator dill pickles. Hard water with higher mineral content (like calcium and magnesium) may give a more complex, deeper flavor compared to soft water with fewer minerals. However, excessive minerals can sometimes result in an unpleasant aftertaste.
Preservative Role
Water not only enhances the taste but also acts as a natural preservative in pickling liquid by preventing bacterial growth. By maintaining a high enough salt and acidity level, the water content helps preserve the pickles and extend their shelf life.
Salt
Salt plays a crucial role in the preservation process of dill pickles, as it helps to draw out moisture from the vegetables and creates an environment that inhibits the growth of bacteria and other microorganisms. When choosing salt for this recipe, it’s essential to select a type that is suitable for pickling.
Table salt, or sodium chloride, is not ideal for pickling because it has additives such as iodine, which can affect the flavor and texture of the pickles. Instead, opt for kosher salt or sea salt, which have larger crystals that dissolve more slowly in water, creating a cleaner-tasting pickle.
The amount of salt needed for this recipe will depend on the size of the cucumbers and personal preference for salinity. A general rule is to use 1 tablespoon of salt per cup of pickling liquid. However, some people prefer their pickles more or less salty, so adjust accordingly.
It’s also worth noting that using a salt that has been flavored with ingredients like dill or garlic can enhance the flavor of the pickles without needing additional seasonings. For example, some artisanal salts may contain herbs and spices that complement the flavors in this recipe.
In addition to providing flavor, salt helps to preserve the texture of the cucumbers by drawing out excess moisture. This is especially important when making refrigerator dill pickles, as the lack of heat from a traditional canning process means that the pickles are more susceptible to spoilage.
To ensure that your pickles turn out properly, it’s essential to use enough salt to create an environment where microorganisms cannot thrive. A general guideline for salt concentration in pickling liquid is 6-7%, which can be achieved by dissolving the right amount of salt in water according to the recipe.
Ultimately, the choice and quantity of salt will depend on personal taste preferences and the specific requirements of this refrigerator dill pickles recipe. However, by using a suitable type of salt and following these guidelines, you can create delicious and safely preserved pickles that will add flavor and crunch to your meals for weeks to come.
Sugar
Sugar is an essential ingredient in many recipes, including condiments and pickling solutions. In the case of refrigerator dill pickles, sugar serves several purposes. Firstly, it helps to balance out the acidity from the vinegar and creates a more balanced flavor profile for the pickles.
The amount of sugar used can vary depending on personal taste preferences and regional traditions. Some pickle recipes use a significant amount of sugar, while others may only use a small amount or omit it altogether. However, in most cases, a small to moderate amount of sugar is sufficient to achieve the desired balance of flavors.
Sugar also plays a role in the pickling process by helping to inhibit the growth of bacteria and other microorganisms that can cause spoilage. The exact mechanism by which sugar achieves this effect is not fully understood, but it is believed to involve interactions with other ingredients and environmental factors.
When selecting sugar for use in refrigerator dill pickles, consider using a granulated or caster sugar that dissolves easily and quickly. This type of sugar will help to distribute evenly throughout the pickling liquid and create a smooth texture.
Other types of sugar, such as brown sugar, honey, or maple syrup, may be used in place of refined white sugar depending on personal taste preferences and desired flavor profiles. However, keep in mind that these alternatives may introduce additional flavors or textures that could impact the overall character of the pickles.
In summary, sugar is an important ingredient in refrigerator dill pickle recipes, serving to balance flavors, inhibit bacterial growth, and contribute to texture and appearance. When selecting a type of sugar, consider its solubility and potential impact on flavor profiles to ensure optimal results.
Dill seed
- Dill seed is an essential ingredient in many traditional recipes, including the classic refrigerator dill pickles recipe.
- The seeds come from the dill plant (Anethum graveolens) and have a distinctive flavor that is often described as warm, sweet, and slightly bitter.
- There are two main types of dill seed: whole seeds and ground seeds.
- Whole dill seeds are typically used in pickling recipes, as they provide the best flavor and texture.
- Ground dill seeds can also be used, but they will add a slightly different character to the dish.
- To use whole dill seeds, simply add them to the recipe along with the other ingredients. The recommended amount is about 1/4 cup of dill seeds per quart of pickles.
Here are some key characteristics and uses for dill seed:
- Dill seed is high in antioxidants, which can help protect against cell damage and inflammation.
- The flavor of dill seed pairs well with vinegar, garlic, and other spices commonly used in pickling recipes.
- Whole dill seeds can be stored for up to 2 years in a cool, dry place.
When purchasing dill seed, look for whole seeds that are free of moisture and have a light, earthy aroma. If the seeds appear dark or moldy, they may not be fresh and should be avoided.
Some popular brands of dill seed include:
- Morton & Bassett
- Schilling
- Danver
The ingredients used to make refrigerator dill pickles are simple yet essential to achieving the perfect flavor and texture. The core components include:
Cucumbers
These should be fresh and of high quality, preferably locally sourced or homegrown for optimal flavor. They can vary in length but typically range from 6 to 8 inches.
Vegetable salt or pickling salt
This type of salt is specifically designed for use in food preservation due to its finer crystals that prevent the growth of unwanted bacteria and other microorganisms. Regular table salt should be avoided as it may contain additives that can affect the flavor of the pickles.
Granulated sugar
Although dill pickles are traditionally savory, a small amount of sugar is necessary to balance out the flavors and help preserve the cucumbers.
Dill seeds or fresh dill weed
The quintessential component that gives these pickles their signature taste. Fresh or dried dill seeds can be used, but fresh dill weed provides an unmatched depth of flavor.
Garlic
Like sugar, garlic is optional and added to provide a pungency that complements the dill flavor. It’s essential not to overdo it as excessive garlic can overpower the other flavors.
Fresh black peppercorns or ground pepper
A pinch of pepper adds depth without overpowering the other flavors, but it’s crucial not to add too much as pepper can be quite potent.
Water or vinegar (optional)
The pickling liquid typically consists of a brine solution made with water and salt. However, some recipes may include vinegar for added preservative qualities and flavor. Always use a food-grade vinegar specifically designed for use in food preservation.
Optional ingredients to enhance the recipe can include:
- Bay leaves – For an earthy undertone that complements the dill
- Celery seeds or fresh celery – Adding a fresh, green flavor and texture to the pickles
- Turmeric or red pepper flakes – To add color and a touch of warmth
- Before starting, ensure all ingredients are clean, sanitized, and stored in a well-ventilated area. Always follow safe food handling practices to avoid contamination and maintain the quality of your refrigerator dill pickles.
Cooking and Pickling Process
Cucumber Preparation
Cooking and pickling are two distinct processes involved in making a delicious batch of refrigerator dill pickles, but they require some preparation to get started with cucumbers.
The first step in preparing cucumbers for cooking is to select the right ones. You want to choose fresh and firm cucumbers that are about 4-6 inches long. Avoid selecting cucumbers that are too small or too large, as they might not pickle evenly.
Cut off both ends of each cucumber with a sharp knife or slicer. This will help to remove any bitter flavor from the tip and also make it easier for you to pack them tightly into the jar.
Next, slice the cucumbers into your desired thickness. Traditionally, pickles are cut into spears or slices. However, feel free to experiment with other shapes like wedges or chunks if you prefer.
To help prevent browning and make it easier for the pickling liquid to penetrate the cucumber flesh, sprinkle both sides of the cucumbers with salt. Let them sit in a colander for 10-15 minutes, allowing excess moisture to be drawn out before rinsing off the salt under cold water.
This step is crucial because it helps remove any impurities and creates an ideal environment for the pickling process to occur. Pat the cucumbers dry with paper towels or clean kitchen cloths after washing them to remove excess moisture.
Cooking and pickling are two distinct processes used to preserve food, especially vegetables and fruits. In the case of a Refrigerator Dill Pickles Recipe, both steps are crucial in creating tangy and crunchy pickles.
Cooking
Before starting the pickling process, some ingredients like cucumbers need to be cooked to remove excess water content and make them more receptive to the brine solution. This step is usually done by blanching or steaming the vegetables. In a refrigerator dill pickle recipe, cooking can also involve boiling the jar and its contents for a specified amount of time to kill off any bacteria that may have developed.
Pickling
Once the ingredients are cooked and prepared, it’s time to create the pickling solution, which is typically a brine made from water, salt, sugar, vinegar, and spices. In the case of refrigerator dill pickles, white vinegar or apple cider vinegar can be used as the primary acidulant to give the pickles their characteristic flavor.
The pickling process involves several stages:
Acidification
The brine solution is created by mixing salt and sugar with water. Vinegar is added to lower the pH level, which helps preserve the food by inhibiting the growth of bacteria and other microorganisms.
Inoculation
Dill weed or fresh dill seeds are added to the pickling liquid to introduce beneficial lactic acid bacteria that will help ferment the pickles. This step is optional but highly recommended for enhancing flavor and preserving quality.
Fermentation (optional)
In traditional pickling, fermentation occurs naturally due to the presence of wild yeast and bacteria on the vegetables. However, in a refrigerator dill pickle recipe, this step may not be necessary as the pickles will still turn out delicious without it.
Refrigeration
The final stage involves storing the pickled cucumbers in the refrigerator at a temperature below 40°F (4°C). This helps slow down the fermentation process and extends the shelf life of the pickles.
By following these steps, anyone can create delicious refrigerator dill pickles with minimal equipment and effort. The result is a tangy, crunchy snack that’s perfect for any occasion!
Select fresh cucumbers for the recipe, ideally from a local garden or a nearby farm.
Cooking and pickling are two separate processes that can be used to preserve vegetables like cucumbers, but they serve different purposes and produce distinct end products.
Cooking typically involves heating food in order to kill bacteria or other microorganisms that may cause spoilage, break down connective tissues, or enhance the flavor. However, cooking cucumbers will not help them stay crunchy, which is a desirable characteristic in pickles.
On the other hand, pickling is a process of preserving food by soaking it in brine (a solution of water, salt, and sometimes sugar), vinegar, or lactic acid, which inhibits the growth of bacteria and extends its shelf life. Pickling can be done using various techniques, such as fermentation or quick pickling.
When it comes to making dill pickles, the pickling process involves creating a brine solution that includes water, salt, sugar, white vinegar, garlic, and fresh or dried dill weed. The brine is then poured over sliced cucumbers in a jar, and the mixture is refrigerated to allow the pickling process to occur.
Selecting the right cucumbers for pickling is crucial in achieving the desired flavor and texture. Ideally, you want to use fresh cucumbers from a local garden or a nearby farm because they will be less likely to have been sprayed with pesticides or other chemicals that can affect their flavor or nutritional value.
Choose cucumbers that are dark green, firm, and free of bruises or soft spots. For refrigerator pickles, you can also use English or Kirby cucumbers, which are small and round in shape.
Once you have selected your cucumbers, wash them thoroughly with cold running water to remove any dirt or debris. Pat the cucumbers dry with a clean kitchen towel before slicing them thinly for pickling.
The next step is to create the brine solution. In a medium saucepan, combine 1 cup of water, 2 cups of white vinegar, 1/2 cup of granulated sugar, and 1 tablespoon of salt. Bring the mixture to a boil over high heat, stirring until the sugar and salt have dissolved.
Remove the brine from the heat and add in 4-6 cloves of minced garlic and a few sprigs of fresh dill weed. Let the mixture cool slightly before pouring it over the sliced cucumbers in a jar.
Refrigerate the pickles for at least 2 hours or overnight to allow them to develop their flavor and texture. Once they are chilled, you can store them in the refrigerator for up to 6 weeks.
The result is a tangy, crunchy dill pickle that is perfect as a snack on its own or added to sandwiches, salads, and other dishes for a burst of fresh flavor.
Wash the cucumbers thoroughly to remove any dirt and bacteria.
Cooking and pickling are two essential steps involved in creating a delicious batch of refrigerator dill pickles.
Here’s a step-by-step guide to help you through the process:
Step 1: Washing the Cucumbers
- Cucumbers are typically picked with dirt, bacteria, and other contaminants.
- To remove these impurities, wash the cucumbers thoroughly under cold running water to clean their surface.
- Use a soft brush or vegetable brush to gently scrub the skin, removing any remaining dirt or debris.
- Rinse the cucumbers again under cold water to ensure they are completely free of contaminants.
Step 2: Preparing the Cucumbers for Pickling
- Cut off both ends of each cucumber using a sharp knife.
- Slice or spear the cucumbers to your desired length and thickness.
- Remove any stem or blossom end, as these areas can be bitter.
Step 3: Preparing the Pickling Brine
- Combine water, salt, granulated sugar, and white vinegar in a saucepan, whisking to dissolve the ingredients.
- Add sliced fresh dill weed or dill seeds to the pickling brine for added flavor and aroma.
- Heat the mixture over medium heat, stirring occasionally until the sugar and salt have dissolved completely.
- Remove from heat and let cool to room temperature before refrigerating.
Step 4: Assembling the Pickles
- In a large glass or ceramic container with a tight-fitting lid, combine the cooled pickling brine and sliced cucumbers.
- Pack the cucumbers tightly into the container to ensure they are completely submerged in the pickling liquid.
Step 5: Refrigerating and Fermenting the Pickles
- Refrigerate the pickles at a temperature below 40°F (4°C), allowing them to ferment and develop their flavor.
- The fermentation process typically takes several hours or overnight, after which time the pickles will be tangy, sour, and deliciously flavored.
The art of cooking and pickling is a labor of love that involves several stages, from preparation to preservation.
Preparation
- Cucumbers are the primary ingredient for pickling, but other vegetables like carrots, beets, and green beans can also be used.
- To start, select fresh cucumbers with a tender skin and few seeds, as they will yield better results.
Pickling Process
The pickling process involves soaking the cucumbers in a brine solution that helps to preserve them while adding flavor.
Preparing the Brine
Create a brine solution by mixing 1 cup of salt, 1 cup of water, and 1/4 cup of granulated sugar in a saucepan.
Cooking the Brine
Heat the brine mixture over medium heat until the sugar has dissolved, then remove it from the heat and let it cool to room temperature.
Slicing and Packing
Cut the cucumbers into your desired shape or leave them whole, depending on how you plan to use them in your recipe.
Pack the sliced cucumbers tightly into a clean glass jar or container with a tight-fitting lid, leaving about 1 inch of space at the top for the brine solution.
Adding Flavor and Sealing
- Add fresh dill weed, garlic, or other seasonings to the pickling liquid to give it flavor and aroma.
- Pour the cooled brine over the cucumbers, making sure they are completely covered. Seal the jar or container with a tight-fitting lid.
Refrigeration
- Place the sealed jar in the refrigerator, where it will be stored and allowed to ferment for several hours or overnight.
- The pickles will be ready to eat after they have been refrigerated for at least 24 hours, but they can keep for weeks with proper storage and handling.
Tips and Variations
- For a sweet pickle recipe, reduce the amount of salt in the brine solution or omit it altogether.
- For a spicy pickle recipe, add red pepper flakes or sliced jalapeños to the pickling liquid for extra heat.
Tips and Variations
Cooking Methods
Tips for Achieving Perfectly Spiced Refrigerator Dill Pickles
When it comes to creating refrigerator dill pickles, the key to achieving that perfect balance of flavors lies in the details. Here are some essential tips to keep in mind:
Select the Right Cucumbers
Opt for pickling cucumbers or Kirby cucumbers as they have a smaller size and thinner skin, making them ideal for quick pickling. These varieties typically range from 2-4 inches in length and are usually sold specifically for pickling.
Choose the Right Jar
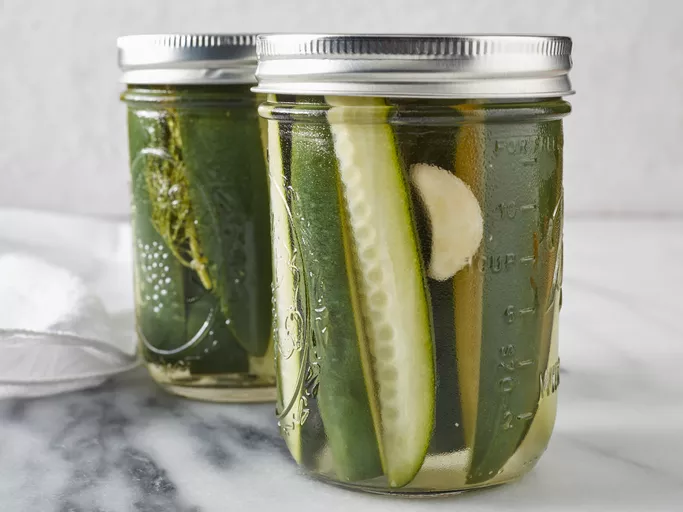
Select a clean glass jar with a wide mouth to make it easier to pack the cucumbers tightly and remove them later. Mason jars or any other type of glass jar with a lid will work well for this recipe.
Mix the Brine Correctly
The brine is the liquid mixture that you soak your pickles in, and it’s crucial to get the proportions just right. Aim for 1 cup (250 ml) of water, 1/2 cup (125 ml) of white vinegar, and 1/4 cup (60 g) of granulated sugar for every 4 cups of cucumber slices.
Don’t Overcrowd the Jar
Leave about 1 inch (2.5 cm) of space at the top of the jar to allow for expansion during the pickling process. If you pack the cucumbers too tightly, they may become over-fermented and develop an unpleasant flavor.
Allow Time for Fermentation
- Fermentation is what gives your refrigerator dill pickles that tangy, sour taste. Let them sit at room temperature (around 70°F/21°C) for 24 to 48 hours before storing them in the refrigerator.
- Variations of Refrigerator Dill Pickles
- While traditional refrigerator dill pickles are delicious on their own, you can experiment with different variations to suit your taste preferences:
Add Some Heat
If you like a little spice in your life, add 1-2 teaspoons (5-10 ml) of hot sauce (such as Tabasco or Frank’s RedHot) to the brine for an extra kick.
Get Creative with Herbs
Add fresh herbs like dill, parsley, or tarragon to the jar along with the cucumber slices for added flavor. You can also use dried herbs if you prefer.
Try Different Acidity Levels
If you prefer a less sour pickle, reduce the amount of white vinegar in the brine. Alternatively, add 1-2 tablespoons (15-30 ml) of lemon juice to give your pickles a brighter, more citrusy flavor.
Make Them Smaller or Bigger
Want to make bite-sized dill pickles? Use smaller cucumbers and adjust the brine accordingly. Or, if you prefer larger pickles, use bigger cucumbers and increase the brine proportions.
With these tips and variations in mind, feel free to experiment and find your perfect recipe for refrigerator dill pickles!
To make refrigerator dill pickles that are truly exceptional, it’s worth exploring some tips and variations on the classic recipe.
For a tangier pickle, you can increase the amount of vinegar in the brine. Some people swear by using white vinegar, while others prefer apple cider or white wine vinegar for its milder flavor.
If you’re looking to add more depth to your pickles, try adding some fresh dill seeds or dried dill weed to the brine during the first day of soaking. This will infuse the pickles with a richer, more complex dill flavor.
To give your pickles a bit of heat, add some sliced jalapeños or red pepper flakes to the jar before pouring in the brine. You can also use whole cayenne peppers for an even spicier kick.
For a sweet and sour pickle, try adding some granulated sugar to the brine along with the vinegar and spices. This will balance out the tanginess of the pickles and make them perfect for snacking or as a topping for sandwiches.
If you’re looking to get creative with your pickle flavors, consider adding some other ingredients like garlic, mustard seeds, coriander seeds, or even fresh herbs like parsley or cilantro to the brine.
One variation on the classic recipe is to make “bread and butter” pickles by adding some sugar and spices to the brine along with a bit of chopped onion and celery. This will give your pickles a sweeter flavor and a firmer texture that’s perfect for snacking or as a topping for burgers.
Another variation is to make “half-sour” pickles by allowing them to ferment for only 24 hours before refrigerating them. This will give the pickles a tangy, sour flavor that’s similar to traditional New York-style dill pickles.
Finally, consider experimenting with different types of cucumbers or using other vegetables like carrots, cauliflower, or bell peppers to make unique and delicious pickled versions.
Use a traditional pickling method involving boiling the pickling liquid before filling the jar.
The art of making refrigerator dill pickles involves a simple yet effective method that yields delicious and crunchy results. One traditional approach to this process includes boiling the pickling liquid before filling the jar, which not only ensures a clean environment for the pickles to develop but also allows for the creation of a rich and tangy flavor profile.
To begin, it’s essential to prepare the necessary ingredients, including fresh dill, garlic, salt, sugar, and vinegar. The most common types of vinegar used in this recipe include white distilled vinegar or apple cider vinegar, each providing a distinct taste and aroma.
When using the boiling method, start by combining the pickling liquid components – such as water, vinegar, salt, and sugar – in a large saucepan. The mixture should be brought to a rolling boil over high heat, ensuring all ingredients are fully dissolved and the liquid reaches its desired consistency.
Once the pickling liquid has boiled and cooled slightly, it’s time to prepare the cucumber slices for canning. Fresh cucumbers are typically sliced or speared into uniform pieces before being placed in a sterilized glass jar with added dill sprigs and any other flavor enhancers.
To ensure proper sealing and storage, follow standard canning procedures by processing the jars through a boiling water bath for 10-15 minutes to create a vacuum seal. This method prevents bacterial growth and maintains the pickles’ freshness over time.
Some popular variations on this basic recipe include experimenting with different spices or herbs like black pepper, mustard seeds, coriander, or even smoked paprika for added depth of flavor. The addition of sliced onions, bell peppers, or other vegetables can also enhance texture and taste.
Another notable variation involves using a brine made from fermented vegetables such as sauerkraut juice or kimchi puree to create an Asian-inspired take on traditional dill pickles. These experiments not only showcase the adaptability of refrigerator dill pickle recipes but also allow for continuous innovation and improvement within home canning traditions.
Overall, mastering a reliable refrigerated dill pickle method through boiling the pickling liquid before filling the jar ensures success with both novice and experienced canners alike while providing endless opportunities for experimentation and creativity in your kitchen.
Explore alternative cooking methods, such as using a water bath canner for highacid foods like pickles, according to guidelines from the USDA and other food safety authorities.
The art of making refrigerator dill pickles can be explored and experimented with, resulting in unique flavors and textures. Alternative cooking methods, such as using a water bath canner, are an excellent way to explore new techniques while ensuring the safety of high-acid foods like pickles.
A water bath canner is a kitchen essential for home canning enthusiasts. It provides a safe and controlled environment for cooking low-acid foods, such as meats and vegetables, to an internal temperature of 212°F (100°C). When it comes to high-acid foods like dill pickles, the acidity levels are naturally sufficient to kill off bacteria, making them safe for canning without a pressure canner.
The USDA recommends using a water bath canner for pickling and other high-acid foods. This method involves submerging the jars in boiling water for a specified amount of time to ensure that the food reaches a safe internal temperature. The key is to follow established guidelines from the USDA and other reputable food safety authorities to avoid contamination and spoilage.
To explore alternative cooking methods, consider using different types of dill or experimenting with various spices and herbs. For example, you could try using fresh tarragon or sage for added depth of flavor. Another option is to add a splash of vinegar or beer to give your pickles an extra kick.
Cooking methods can also vary depending on personal preference and equipment availability. For instance, some home canners may prefer using a steamer basket for delicate foods like vegetables and herbs, while others might opt for the convenience of a microwave-safe jar.
The beauty of experimenting with new techniques lies in the fact that there is no one-size-fits-all approach. Home canners can explore various methods, from traditional canning to modern pressure cookers, and even alternative cooking methods like using a wok or instant pot.
In conclusion, exploring alternative cooking methods for high-acid foods like dill pickles can lead to exciting discoveries and new flavors. By following guidelines from reputable food safety authorities and experimenting with different techniques, home canners can unlock the full potential of their kitchen creativity.
The art of making refrigerator dill pickles is not just about following a recipe, but also about experimenting with different techniques and ingredients to create unique flavor profiles.
One key aspect of making great refrigerator dill pickles is choosing the right type of cucumbers. For this recipe, you can use traditional pickling cucumbers or even English cucumbers, which have a sweeter flavor and tender skin.
To add extra depth to your pickles, try using different types of vinegar, such as white wine vinegar, apple cider vinegar, or balsamic vinegar. Each will give your pickles a distinct taste and character.
Spices can also be added to enhance the flavor of your pickles. Consider adding some dried dill weed, garlic powder, or onion powder for an extra boost of flavor.
For those who prefer their pickles sweeter, try using more sugar or honey in the brine mixture. This will balance out the acidity and create a tangy-sweet flavor profile.
Cutting your cucumbers into different shapes can also add visual interest to your pickles. Try cutting them into spears, slices, or even coins for a unique presentation.
Experimenting with different brine recipes is another great way to mix things up. You can try using beer or kombucha as the base of your brine for a fizzy twist on traditional pickle-making.
Another fun variation is adding some heat to your pickles by incorporating hot peppers, such as jalapeños or habaneros, into the brine mixture.
Finally, don’t be afraid to get creative with your pickling liquid. Try using ingredients like ginger, lemongrass, or citrus zest to create a truly unique flavor profile.
The possibilities are endless when it comes to making refrigerator dill pickles! Experiment with different techniques and ingredients to find the perfect combination that suits your taste buds.
- Best Datanyze Alternatives for 2025 - April 24, 2025
- Best Hunter.io Alternatives for 2025 - April 22, 2025
- Best Lead411 Alternatives for 2025 - April 22, 2025

