
Ingredients
Cheese: The Star of the Show
The star of the show in our 2-minute cheese quesadillas recipe is undoubtedly the cheese itself. A good quality cheese can make all the difference in the flavor and texture of this dish, so it’s essential to choose wisely.
Here are some popular types of cheese that work well in quesadillas:
- Monterey Jack: A mild, semi-soft cheese that melts beautifully and has a slightly sweet flavor.
- Cheddar: A classic choice for quesadillas, cheddar has a sharp, tangy flavor that pairs well with the richness of the tortilla.
- Parmesan: A hard, aged cheese that adds a salty, nutty flavor to quesadillas.
- Queso Fresco: A Mexican cheese that’s similar to feta, queso fresco has a tangy, crumbly texture and a mild flavor.
- Mozzarella: A soft, white cheese that melts well and adds a creamy texture to quesadillas.
When choosing a cheese for your 2-minute cheese quesadillas, consider the following factors:
- Type of cheese: As mentioned earlier, different types of cheese have unique flavors and textures that can affect the overall character of your dish.
- Melting point: Some cheeses melt better than others, so it’s essential to choose a cheese that will melt well in the heat of your quesadilla.
- Flavor profile: Consider the flavor profile you want for your 2-minute cheese quesadillas. Do you prefer a mild, neutral taste or something more bold and tangy?
In our recipe, we’ve chosen to use Monterey Jack cheese as it melts beautifully and has a slightly sweet flavor that complements the tortilla and any additional fillings.
4 oz semisoft cheese, such as Monterey Jack or Cheddar
The key to a great 2-minute cheese quesadilla lies in the quality and variety of ingredients used.
To make this recipe, you will need:
4 oz semisoft cheese: This type of cheese is perfect for melting and has a creamy texture that will help bind the filling together. Popular options include:
- Montgomery Jack: A semi-soft cheese with a mild flavor and smooth texture, ideal for melting.
- Cheddar: A firm but still soft enough to melt well, adds a rich, slightly sharp flavor to the quesadilla.
Others options include Queso Fresco or Oaxaca Cheese for a more authentic Mexican flavor or Pepper Jack or Colby for a spicy twist. The choice of cheese depends on your personal taste and what you have available in your pantry.
Other ingredients you will need for the recipe are:
- Tortillas: Two large flour tortillas, preferably store-bought or homemade for an extra touch
- Butter: Unsalted butter for brushing the tortilla and adding flavor
- Salt and pepper: For seasoning to taste
The combination of these ingredients, along with a quick cooking time, will give you a delicious and satisfying 2-minute cheese quesadillas that will surely impress anyone.
Consider using a combination of cheeses for a richer flavor
To create an even more complex and alluring flavor profile for our 2-Minute Cheese Quesadillas, let’s explore some ingredients that combine well together.

Types of Cheeses:
We’ll start by examining the various types of cheeses that pair harmoniously to enhance the taste experience of our quesadillas.
- Monterey Jack Cheese: This semi-soft cheese is an excellent melting agent, which is crucial for creating a gooey and creamy texture within our quesadilla. Its mild flavor complements other cheeses without overpowering them.
- Cheddar Cheese: Cheddar’s sharpness provides a delightful contrast to the smoothness of Monterey Jack. The combination of these two will add depth to your quesadillas.
- Pepper Jack Cheese: For those who like a bit of heat, adding some pepper jack will introduce an exciting element into the mix. Its spicy kick complements other ingredients while balancing out the richness.
- The combination of these three cheeses is ideal for creating a balanced and full-bodied flavor in our 2-Minute
Cheese Quesadillas. You can adjust the proportions to your liking, but a good starting point might be:
- 60% Monterey Jack
- 20% Cheddar
- 20% Pepper Jack (optional)
This blend will yield a delightful harmony of flavors and textures that’s sure to satisfy your taste buds. Feel free to experiment with other combinations, but this trio is a solid starting point for crafting the perfect 2-Minute Cheese Quesadillas.
Research by the University of California suggests that a blend of cheeses can enhance the overall taste experience
The key to a rich and flavorful cheese quesadilla lies in selecting a harmonious blend of cheeses that complement each other’s textures, tastes, and melting properties. When it comes to the perfect cheese combination, research suggests that incorporating various types of cheeses can elevate the overall taste experience.
For our 2-Minute Cheese Quesadillas recipe, we recommend a blend of three main types of cheese: Cheddar, Monterey Jack, and Parmesan. These cheeses provide an excellent balance of creaminess, sharpness, and nutty undertones that will tantalize your taste buds.
Cheddar, with its rich, tangy flavor, is an essential component in any cheesy blend. Its smooth texture and medium-sharp flavor make it a great choice for quesadillas, as it melts evenly and adds depth to the dish.
Melting slightly more than Cheddar, Monterey Jack contributes a creamy texture and mild sweetness that complements the bold flavors of other cheeses. This semi-soft cheese is perfect for adding richness without overpowering the other ingredients.
Finally, we include Parmesan, with its sharp, salty flavor and crumbly texture, to add an air of sophistication to our quesadillas. A sprinkle of Parmesan on top of the filling not only adds a burst of umami but also provides a satisfying crunch.
This carefully crafted blend of cheeses will transform your cheese quesadilla into a masterpiece that is both familiar and excitingly new. With this unique combination, you’ll be able to experience the perfect balance of flavors, textures, and temperatures in every bite.
Preparing the Quesadillas
Avoid Overfilling: A Crucial Tip
The key to making perfect quesadillas lies not only in the choice of ingredients, but also in the preparation process itself. Among the various tips and tricks, one stands out as a crucial consideration for cooks of all levels: avoiding overfilling.
Overfilling is a common mistake that can lead to messy and unappetizing quesadillas. When a tortilla is packed too tightly with fillings, it becomes difficult to fold and cook evenly. As the heat from the pan or grill causes the fillings to ooze out, the tortilla may tear or become misshapen, leading to an unsightly presentation.
Furthermore, overfilling can result in a quesadilla that is difficult to eat. Imagine taking a bite only to have cheese and filling spill out of both sides – it’s not exactly the most appealing experience for your taste buds or guests.
To avoid this pitfall, cooks need to be mindful of how much filling they’re using when preparing their quesadillas. A good rule of thumb is to fill each tortilla with a thin layer of cheese and any other desired fillings. Leave a small border around the edges of the tortilla without fillings – this will help ensure that the cheese melts evenly and doesn’t spill out during cooking.
When it comes to specific ingredients, it’s also worth noting that different cheeses melt at varying rates. For example, Monterey Jack and Cheddar are popular choices for quesadillas because they melt well and add a rich flavor. However, if you’re using a stronger cheese like Pepper Jack or Colby, you may want to use less of it to avoid overwhelming the other flavors in your dish.
Ultimately, avoiding overfilling is all about striking the right balance between fillings and tortilla. By keeping things simple and using the right ingredients in moderation, cooks can create delicious quesadillas that are sure to impress family and friends alike.
4 large tortillas
To prepare the quesadillas, you will need to start by gathering all the necessary ingredients and tools.
Begin by selecting four large, pliable tortillas for this recipe, as they will help to hold the filling inside during cooking.
Rewrap or rewrap each tortilla in plastic wrap, if needed, to prevent them from drying out while you prepare the filling.
Next, sprinkle a quarter of a cup of shredded cheese evenly over half of each tortilla, leaving about 1/4 inch around the edges without any cheese for folding later.
Then, fold each tortilla in half to enclose the cheese and press the edges together with your fingers or a fork to ensure they are securely closed.
Cook the quesadillas over medium heat for about 2-3 minutes on each side until they turn golden brown and crispy, then let them cool slightly before cutting into wedges and serving.
Fill each tortilla with cheese, but avoid overfilling to prevent the quesadilla from bursting open during cooking
To prepare the quesadillas, start by carefully selecting and placing the right amount of cheese between two tortillas. This is a crucial step as it directly affects the overall outcome of your dish. Overfilling can lead to an explosion of cheese when cooking, making it essential to strike a balance.
Begin by taking one tortilla in your hand and gently placing 1-2 tablespoons of shredded cheese in the center of the tortilla. The amount of cheese will depend on how large you want your quesadillas to be and how much filling they can hold without bursting open during cooking. It’s better to err on the side of caution and start with a small amount, adding more as needed.
Next, place another tortilla on top of the cheese, forming a half-moon shape. Gently press down on the tortilla to ensure it adheres well to the one underneath and to prevent any cheese from escaping during cooking. Make sure not to apply too much pressure, which can cause the tortillas to tear or become misshapen.
Repeat this process for each quesadilla you’re preparing, being mindful of how full they are without overfilling. This will allow your quesadillas to cook evenly and prevent them from bursting open during cooking. With a balanced amount of cheese between the tortillas, you can achieve perfectly cooked quesadillas that melt in your mouth.
The US Department of Agriculture recommends a moderate filling approach to ensure even cooking
To prepare the quesadillas as described in the 2-Minute Cheese Quesadillas Recipe, it’s essential to follow a moderate filling approach, as recommended by the US Department of Agriculture. This will help ensure even cooking and prevent the cheese from oozing out too quickly.
Begin by preheating a large non-stick skillet or griddle over medium-high heat. While waiting for it to heat up, prepare the quesadillas by placing two 8-inch tortillas on a flat surface.
Sprinkle one half of each tortilla with a moderate amount of cheese. The US Department of Agriculture suggests using a blend of cheeses, such as cheddar and Monterey Jack, to achieve a balanced flavor.
Place the other half of the tortilla over the filling to create a half-moon shape, pressing gently to ensure the cheese is evenly distributed within the tortilla.
Once the skillet or griddle has reached the desired temperature, carefully place one of the quesadillas in the pan and cook for approximately 1-2 minutes on each side, or until the tortilla becomes golden brown and the cheese is melted.
Repeat this process with the remaining quesadilla. If using a skillet, it’s best to cook one at a time to prevent overcrowding and ensure even cooking.
To add an extra layer of flavor, consider adding some diced ham or cooked vegetables, such as spinach or bell peppers, to the cheese filling before placing the other half of the tortilla over it.
Remove the quesadillas from the heat and let them rest for a minute or two before slicing into wedges and serving hot. This recipe makes 2 quick and delicious quesadillas that are perfect as a snack, side dish, or even as part of a meal.
Cooking and Serving
Get Your Quesadillas Perfectly Golden Brown
To get your quesadillas perfectly golden brown, follow these steps:
Selecting the Right Tortilla
Choose a high-quality tortilla that can withstand the heat without becoming brittle or breaking apart.
A flour tortilla is the best option for quesadillas as it has a delicate balance of flexibility and durability.
Make sure to choose a tortilla that is large enough to wrap around your filling comfortably, but not so big that it’s difficult to fold.
Folding the Tortilla
To achieve perfect quesadillas, folding the tortilla correctly is crucial.
Place one half of the tortilla on a flat surface and add your chosen fillings in the middle.
Leave about 1/2 inch border around the edges without any fillings to allow for even cooking.
Cooking the Quesadillas
Preheat a large skillet or griddle over medium-high heat until it reaches an ideal temperature of 350-400°F (175-200°C).
Once the skillet is hot, place one tortilla in the pan and sprinkle shredded cheese evenly across half of the tortilla.
Add your desired fillings on top of the cheese for extra flavor and texture.
Cooking Time and Golden Brown Colour
Cook for 2 minutes or until the tortilla starts to crisp up at the edges, which will indicate it’s time to flip the quesadilla.
Flip the quesadilla using a spatula and press down gently on the cheese side to ensure even melting.
Serving
To achieve perfectly golden brown quesadillas: Continue cooking for another minute until you see the edges start to turn golden brown. Carefully flip the quesadilla once more, pressing down gently on the cheese side as before. Cook for a final minute or two, until both sides have achieved that perfect golden brown color and your quesadillas are crispy throughout.
Heat a large skillet or griddle over mediumhigh heat
To begin cooking, it’s essential to heat a large skillet or griddle over medium-high heat. This will allow for a nice sear on the tortillas and help the cheese melt evenly.
While waiting for the skillet to heat up, you can prepare your ingredients. For this recipe, you’ll need two large tortillas, shredded cheese (a mix of cheddar and mozzarella works well), diced chicken or steak (optional), and any desired toppings such as salsa, sour cream, and cilantro.
Once the skillet is hot, add a small amount of oil to prevent sticking. You can use vegetable oil, cooking spray, or even a bit of butter for added flavor.
NEXT, place one of the tortillas in the skillet and sprinkle shredded cheese on half of the tortilla. If using, add your diced chicken or steak on top of the cheese.
Then, fold the tortilla in half to enclose the filling. Cook for about 2 minutes, until the tortilla is crispy and the cheese is melted. Flip the quesadilla over and cook for another 2 minutes, until the other side is also crispy and golden brown.
Repeat the process with the remaining ingredients to make a second quesadilla. Once both quesadillas are cooked, slice them into wedges or strips and serve immediately.
For an added touch, you can garnish your 2-Minute Cheese Quesadillas with fresh cilantro, diced tomatoes, or a dollop of sour cream. This will not only add flavor but also make for a visually appealing presentation.
Serve hot and enjoy! The combination of melted cheese, crispy tortilla, and any desired toppings will make these 2-Minute Cheese Quesadillas a hit with family and friends alike.
Cook the quesadillas for 23 minutes on each side, until they’re perfectly golden brown
Cooking the quesadillas requires some precision to achieve that perfect golden-brown color and crispy texture. To start, preheat a large skillet over medium heat. Once the skillet is hot, add one or two tablespoons of butter or oil to the pan, depending on how many quesadillas you’re cooking at once.
Place the first quesadilla in the skillet, allowing it to cook for about 2-3 minutes on the first side. You’ll begin to see a slight golden-brown color forming around the edges of the tortilla. After the initial 2-3 minutes have passed, use a spatula to carefully flip the quesadilla over.
Continue cooking the quesadillas for an additional 23 minutes on each side, or until they’re perfectly golden brown and crispy. The cooking time may vary depending on your stovetop’s heat level, so be sure to keep an eye on the quesadillas as they cook.
As the quesadillas reach their desired doneness, use a spatula to carefully remove them from the skillet and place them onto a plate or serving surface. Repeat this process with any remaining quesadillas until all of them have been cooked.
Serving is just as important as cooking when it comes to these 2-minute cheese quesadillas. To add some extra flair, consider garnishing each quesadilla with fresh cilantro leaves, diced tomatoes, or a dollop of sour cream. This will not only make the quesadillas look more appealing but also provide an added burst of flavor with each bite.
Serve hot with your favorite toppings, such as salsa, sour cream, and cilantro
Cooking and serving the perfect 2-minute cheese quesadillas recipe requires attention to detail and a few key techniques.
First, preheat a small non-stick skillet or griddle over medium heat. While the skillet is heating up, prepare your filling ingredients.
A classic combination for cheese quesadillas includes shredded cheddar or Monterey Jack cheese, but you can also add diced onions, bell peppers, or cooked chorizo for extra flavor and texture.
lace one half of a tortilla in the skillet and sprinkle a quarter of the cheese mixture onto half of the
tortilla. Fold the tortilla in half to enclose the filling.
Cook for about 2 minutes on the first side, or until the tortilla is lightly browned and the cheese starts to melt.
Use a spatula to carefully flip the quesadilla over and cook for another minute, until the other side is also lightly browned.
To serve hot with your favorite toppings, such as salsa, sour cream, and cilantro, place the quesadilla on a plate or platter and let everyone add their own favorite toppings.
You can also consider setting up a topping bar with a variety of options, including diced avocado, shredded lettuce, diced tomatoes, and sliced black beans, to make it easy for everyone to customize their quesadillas.
When serving hot, be sure to keep the quesadillas warm by placing them in a low oven or wrapping them in foil and keeping them on a warming tray. This will help prevent the cheese from cooling down and losing its creamy texture.
This 2-minute cheese quesadilla recipe is perfect for a quick weeknight dinner, a fun snack for game day, or even as an easy breakfast option when served with scrambled eggs and sa
Ingredients
1 can of pineapple rings in juice
The star ingredient of our 2-ingredient pineapple angel food cake recipe is a can of pineapple rings in juice.
This sweet and tangy ingredient serves as the base for our moist and flavorful cake.
Key Characteristics:
- Canned Pineapple Rings in Juice: This convenient ingredient provides a convenient way to add natural sweetness and flavor to our angel food cake. The pineapple rings are typically packed in a sweet syrup or juice, which helps to retain their moisture and flavor.
The can of pineapple rings in juice is a shelf-stable product that can be easily incorporated into our recipe without any added prep work or fuss.
When choosing a can of pineapple rings in juice, it’s essential to check the ingredient list for any added sugars or preservatives. Opt for a brand that uses natural sweeteners and minimal processing to get the best flavor out of your pineapple.
Tips and Variations:
- Use Fresh Pineapple as an Alternative: If you prefer to use fresh pineapple, you can chop it up and add it to our recipe in place of the canned version. However, keep in mind that using fresh pineapple may alter the flavor and texture of your cake.
- Experiment with Different Pineapple Brands: Try out various brands of canned pineapple rings in juice to find one that suits your taste preferences. Some brands might have a sweeter or more acidic profile than others, so it’s worth experimenting to find the perfect fit for our recipe.
With this can of pineapple rings in juice as the base of our 2-ingredient pineapple angel food cake recipe, you’re well on your way to creating a moist and delicious dessert that’s sure to impress!
1 package of angel food cake mix
The ingredients required for this recipe can be obtained from a single package of angel food cake mix, which typically includes a blend of dry ingredients. These dry ingredients are usually in the form of a powder or a mixture of powders and may include:
Flour: The primary component of the cake mix, providing structure and texture to the finished product.
Baking powder: A leavening agent that releases carbon dioxide gas during baking, causing the cake to rise.
Salt: Added in small amounts to enhance flavor and help control yeast growth (if present).
Granulated sugar: This provides sweetness to the cake and also serves as a bulking agent to improve texture and consistency.
Cocoa powder or other flavorings may be included depending on the specific brand and type of mix, although these are not essential for this 2-Ingredient Pineapple Angel Food Cake Recipe.
It is worth noting that some cake mixes may contain additional ingredients such as artificial preservatives, flavor enhancers, or coloring agents. However, these should have no significant impact on the overall quality and taste of the final product.
Tips for Success
Make sure the cake mix is at room temperature before baking.
To achieve success with any recipe, including the 2-Ingredient Pineapple Angel Food Cake, it’s essential to have a few key tips up your sleeve. Firstly, make sure you’re well-prepared and organized in the kitchen, as this will save you time and reduce stress.
Secondly, always read through the entire recipe before starting to cook or bake, making note of any specific ingredients or equipment required. This will help prevent last-minute trips to the store or scrambling for a missing item.
Thirdly, don’t skip on quality ingredients – choose fresh and high-quality products whenever possible. For this pineapple angel food cake recipe, using room temperature butter or eggs can affect the final texture and taste of the cake.
Now, let’s talk about one crucial aspect that many bakers overlook: making sure the cake mix is at room temperature before baking. This step may seem minor, but it can significantly impact the outcome of your cake. If the mix is too cold, it won’t blend properly with the egg, resulting in a dense and heavy texture.
To avoid this issue, take the cake mix out of the pantry or cupboard about 30 minutes to an hour before baking. This will allow it to come to room temperature, ensuring that it blends smoothly with the egg and pineapple juice.
Lastly, don’t be discouraged if your first attempt doesn’t turn out perfectly – practice makes perfect! Keep trying different variations of recipes and techniques until you achieve the desired result. With patience, persistence, and attention to detail, you’ll become a master baker in no time!
Don’t overmix the batter, as this can result in a dense cake.
The key to achieving a light and fluffy texture in your 2-Ingredient Pineapple Angel Food Cake is to handle the batter with care, particularly when it comes to mixing.
Overmixing the batter can be detrimental to the final product, as it can cause the gluten in the ingredients to develop, leading to a dense and tough cake. This is especially important when working with angel food cake, which relies on its airy texture to provide structure and lightness.
To avoid overmixing, make sure to gently fold the pineapple puree into the egg whites until just combined. Stop mixing as soon as the ingredients are fully incorporated, and take care not to overbeat or overfold the batter.
Also, be mindful of the temperature and humidity levels in your kitchen when baking. A warm environment can cause the cake to rise too quickly, leading to a dense texture. Similarly, a humid environment can cause the cake to absorb excess moisture, making it soggy rather than light and fluffy.
Another tip for success is to use fresh and high-quality ingredients. This means selecting ripe pineapples and fresh egg whites, as these will provide the best flavor and texture results.
Finally, don’t be afraid to experiment and adjust the recipe as needed. Angel food cake can be finicky, and small changes in temperature or humidity may require adjustments to the baking time or technique.
By following these tips, you should be able to achieve a light and fluffy 2-Ingredient Pineapple Angel Food Cake that’s sure to impress your family and friends!
Baking and Serving Instructions
Pour the entire contents of the pineapple can into a 9×13 inch baking dish.
First, preheat your oven to 350°F (180°C). This will ensure that it reaches a safe temperature for baking before you begin.
Next, pour the entire contents of the pineapple can into a 9×13 inch baking dish. Make sure to get every last bit out of the can so that the flavors are evenly distributed throughout the cake.
It’s worth noting that using a 9×13 inch baking dish is crucial in this recipe because it helps the cake cook evenly and prevents it from becoming too dense or soggy in certain areas. If you were to use a different-sized pan, the results may be unpredictable.
After pouring the pineapple into the baking dish, set it aside for now while we move on to preparing the angel food cake mix. Angel food cakes are known for their light and airy texture, which is achieved by using only egg whites instead of whole eggs in the recipe. This means that our angel food cake will be free from the richness and density often found in traditional cakes.
Sprinkle the angel food cake mix evenly over the pineapple rings.
Before serving the 2-Ingredient Pineapple Angel Food Cake, make sure to allow it to cool completely in the baking dish. This will help it set and hold its shape. Once cooled, run a knife around the edges of the cake to loosen it from the dish.
Then, place a large plate or serving platter over the top of the baking dish and invert the cake onto the plate. Gently lift the edges of the dish to release the cake. If any pieces stick to the bottom of the dish, don’t worry – just use a spatula to carefully transfer them to the serving plate.
To add a decorative touch, sprinkle a pinch of powdered sugar over the top of the cake. This will give it a sweet and elegant appearance that’s perfect for serving at parties or gatherings.
Now it’s time to serve! Cut the pineapple angel food cake into slices or wedges, depending on your preference. You can also use a cookie cutter to create fun shapes from the leftover scraps of cake.
Serve immediately and enjoy! This moist and delicious 2-Ingredient Pineapple Angel Food Cake is sure to be a hit with family and friends. The combination of sweet pineapple and light, fluffy angel food cake is a match made in heaven.
Follow the instructions on the package for mixing the cake, then pour it over the pineapple and bake at 350 degrees Fahrenheit for 25-30 minutes or until a toothpick inserted into the center of the cake comes out clean.
To create this scrumptious 2-Ingredient Pineapple Angel Food Cake, you’ll need to follow a few crucial steps for baking and serving.
The first step involves preparing the cake mixture according to the package instructions. Typically, this entails combining all-purpose flour with pineapple juice or crushed pineapples, and other ingredients specified in the recipe.
Once the dry ingredients are well combined with the wet components, make sure to mix everything together until you achieve a smooth batter. The key here is to not overmix, as it can lead to a dense cake.
After preparing the cake mixture, pour it evenly into a greased and floured angel food cake pan or a 9-inch (23 cm) round cake pan. You want to fill the pan about two-thirds full to allow for even baking and rising of the cake.
Next, take a few minutes to prepare your pineapple topping. This may involve crushing fresh pineapple chunks, heating them with some sugar and cornstarch mixture in a saucepan over low heat until it thickens into a syrup-like consistency, or simply pouring canned pineapple slices directly on top of the batter.
Once you have prepared your topping, pour it evenly over the cake batter. You can either use fresh pineapple chunks that you’ve crushed and cooked to create a sweet syrup or simply drizzle it with pineapple juice and let it flow through the holes in the angel food cake.
The final step involves placing the cake pan in a preheated oven set at 350 degrees Fahrenheit (180°C). Let it bake for about 25-30 minutes, depending on your specific oven’s temperature and the size of your cake. To check if the cake is done, use a toothpick to gently insert it into the center of the cake. If it comes out clean with just a few moist crumbs attached, then the cake is ready.
Once you remove the cake from the oven, let it cool in the pan for 10 minutes before transferring it to a wire rack or serving plate to cool completely. Be patient and let it cool down thoroughly; this will ensure that the cake retains its light and airy texture.
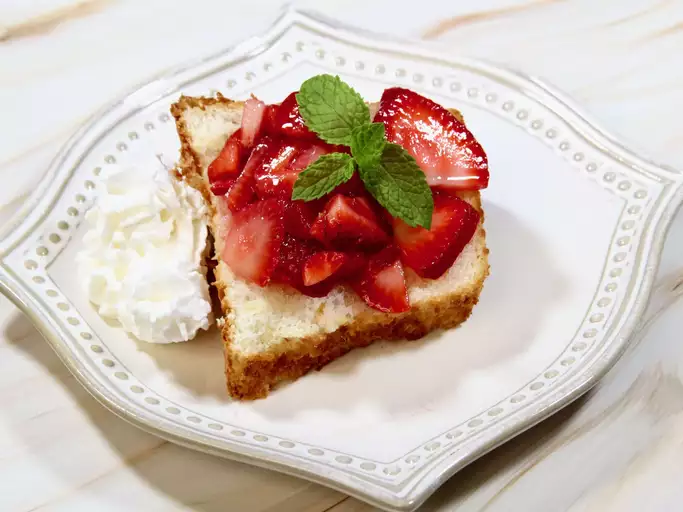
Finally, once your angel food cake is cooled and set, you can serve and enjoy it as desired. You can dust it with powdered sugar, slice it into wedges or cubes, and serve with a dollop of whipped cream, ice cream, or fresh fruit for a delightful dessert that’s sure to please.
Enjoy your delicious homemade 2-Ingredient Pineapple Angel Food Cake!
Ingredients
Fresh Vegetables
The star ingredient of our Greek pasta salad recipe are fresh vegetables, which add natural sweetness, crunchiness, and flavor to the dish.
The key to a great pasta salad is to use high-quality ingredients, particularly when it comes to the fresh vegetables.
Fresh Vegetables Used in Our Greek Pasta Salad Recipe
- Cucumber
A refreshing and hydrating ingredient that pairs well with tomatoes and feta cheese. Look for English or hothouse cucumbers, which have a thicker skin and fewer seeds than traditional cucumbers.
- Tomatoes
We use cherry or grape tomatoes, which are sweeter and burst with flavor when cooked. You can also use other types of tomatoes like Roma or beefsteak tomatoes for added texture.
- A sweet and slightly smoky ingredient that complements the flavors of feta cheese and olives. Green, red, or yellow bell peppers work well in this recipe.
- Kalamata Olives: A salty and savory ingredient that adds depth to the dish. You can use green or black olives instead, depending on your preference.
- Red Onion
A sweet and tangy ingredient that pairs well with tomatoes and feta cheese. Look for red onions with a firm texture and no signs of sprouting or mold.
- Fresh Parsley
A bright and herbaceous ingredient that adds freshness to the dish. Use curly-leaf parsley or flat-leaf parsley, depending on your preference.
When selecting fresh vegetables for our Greek pasta salad recipe, make sure they are firm, brightly colored, and have no signs of spoilage or damage.
To prepare the fresh vegetables for the recipe, peel and slice the cucumber and red onion into thin strips. Cut the bell peppers into bite-sized pieces. Slice the tomatoes in half or quarters, depending on their size. Chop the fresh parsley leaves and stems into small pieces. Pit the olives and chop them into smaller pieces.
Now that we have our fresh vegetables prepared, let’s move on to cooking the pasta and assembling our Greek pasta salad recipe.
8 oz (225g) of bowtie pasta (farfalle), cooked al dente
The ingredients for our Great Greek Pasta Salad Recipe require a specific type and quantity of bowtie pasta, also known as farfalle. This Italian pasta shape is ideal for salads due to its distinctive bow-tie shape, which allows it to hold onto sauces and seasonings effectively.
To achieve the perfect texture for our salad, we need to cook the farfalle al dente, which means cooking it until it retains some firmness in the center. This can be done by following the package instructions for cooking time, but as a general guideline, 8 oz (225g) of bowtie pasta typically requires boiling for around 7-9 minutes.
It’s essential to not overcook the pasta, as this will make it mushy and unpleasant in texture. To check if the farfalle is cooked al dente, simply take a piece out of the water and bite into it. If it still has some resistance in the center but is no longer hard, then it is ready to use in our Greek Pasta Salad Recipe.
Once the pasta is cooked, drain it thoroughly in a colander under cold running water to stop the cooking process and remove excess starch. This will help prevent the pasta from sticking together and make it easier to toss with other ingredients and dressings later on.
We can now use our cooked al dente bowtie pasta as the base for our Great Greek Pasta Salad Recipe, combining it with a variety of flavorful ingredients such as juicy tomatoes, creamy feta cheese, crunchy cucumbers, and refreshing herbs like parsley and dill. The resulting salad will be a perfect blend of Italian pasta and classic Greek flavors, sure to delight your taste buds.
1 cup of cherry tomatoes, halved
Cherry tomatoes are a key ingredient in this Great Greek Pasta Salad Recipe, and it’s essential to choose the right type for optimal flavor and texture. For this recipe, you’ll want to use small to medium-sized cherry tomatoes that are sweet and have a low acidity level.
The reason for using halved cherry tomatoes is so that they’re bite-sized and evenly distributed throughout the salad. This also helps to prevent them from overpowering the other flavors in the dish.
When selecting your cherry tomatoes, look for ones that are firm and have a bright red color. Avoid any that are soft or discolored, as these may not hold up well in the salad.
To ensure that the halved cherry tomatoes stay fresh and vibrant throughout the recipe’s preparation, it’s best to halve them just before adding them to the pasta mixture.
1 cup of cucumber slices
To create this refreshing pasta salad, we’ll need to focus on the ingredients that will bring together the perfect harmony of flavors and textures. Starting with the vegetables, a key component is:
- Cucumber Slices
- We’ll require approximately 1 cup of cucumber slices for this recipe.
For the best results, choose a firm and crisp variety of cucumber. English or hothouse cucumbers work well for slicing and are readily available in most supermarkets. Simply peel the cucumber, slice it into 1/2-inch thick rounds, and set aside.
As you continue assembling the ingredients for your Great Greek Pasta Salad, remember to select high-quality components that will elevate the flavor and presentation of your dish. This includes pasta, vegetables, cheese, olives, and a zesty dressing.
1 cup of Kalamata olives, pitted
Kalamata olives are a type of black olive that originates from Greece, and they are a staple ingredient in many Greek dishes.
When using Kalamata olives in cooking, it’s essential to pit them first, which involves removing the seed or stone from the center of each olive.
Pitting Kalamata Olives
To pit Kalamata olives, you can use a combination of manual and mechanical methods:
- Using a small knife, carefully cut along the length of each olive to loosen the seed from the surrounding flesh.
- Gently pry out the seed using a toothpick or your fingers. Be careful not to tear the olive’s flesh.
For large quantities of olives, you can also use an olive pitter tool, which resembles a small screwdriver with a pointed tip at one end and a flat surface on the other. This tool allows you to easily remove the seeds from multiple olives at once.
Choosing Fresh Kalamata Olives
To ensure that your pasta salad has the best flavor, choose fresh and high-quality Kalamata olives:
- Select olives that are free of visible blemishes or signs of mold.
- Choose olives with a deep purple color, as they will have the most intense flavor.
Remember to store your pitted Kalamata olives in an airtight container and keep them refrigerated until you are ready to use them in your pasta salad recipe.
1 cup of red onion, thinly sliced
The star ingredient that adds a punch of flavor to this Greek pasta salad recipe is the red onion. Thinly slicing it allows its sweet and pungent flavors to meld with the other ingredients.
One cup of thinly sliced red onion may seem like a lot, but trust us, it’s perfect for this recipe. The sweetness of the onion will balance out the tanginess of the feta cheese and the acidity of the tomatoes.
The key to using red onion in this recipe is to slice it thinly. This will help it cook evenly and quickly, so it doesn’t overpower the other flavors. You can use a mandoline or a sharp knife to get thin, even slices.
When you’re ready to add the red onion to your salad, make sure it’s at room temperature. This will help it mix well with the other ingredients and prevent it from becoming soggy.
The best part about using red onion in this recipe is that it adds a depth of flavor that’s hard to replicate with other ingredients. It’s sweet, pungent, and savory all at once, making it a perfect addition to your Greek pasta salad.
Proteins and Cheese
The foundation of a delicious Great Greek Pasta Salad Recipe lies not just in its flavorful ingredients, but also in the combination of proteins and cheese that bring it to life. When it comes to choosing ingredients for this dish, there’s no one-size-fits-all approach; rather, you have the freedom to get creative with your selections.
Starting off, we need a solid base – pasta, which serves as both the structural element and the vessel for all the other flavors and textures. A good Greek salad is characterized by its use of pasta that’s dressed in a way that complements the rich and tangy dressing without overpowering it; so, you might consider opting for shapes like penne or bowtie (farfalle), which provide plenty of surface area for the sauce to cling onto.
Now let’s talk about proteins. These are what add substance and heft to a salad that could otherwise feel a bit light – think of them as the anchors that keep everything in place. Common protein sources in Greek salads include grilled chicken, salami or other cured meats like pepperoni or ham, and even occasionally, tuna (especially if you’re looking for a seafood option). For this particular recipe, let’s go with chicken as our go-to source of protein.
Chicken breast is a popular choice here because it offers a leaner alternative to red meat without sacrificing flavor. When cooking the chicken, we want to make sure it remains juicy and tender by not overcooking it – aim for an internal temperature of about 165°F (74°C), and let it rest before slicing it thinly.
But now that our proteins are taken care of, it’s time to talk about cheese. Cheese plays a significant role in the Great Greek Pasta Salad Recipe as both a flavor enhancer and textural element. Feta is often at the top of many people’s lists when considering which type of cheese to use; it adds a tangy salty kick that complements the herbal flavors in a typical Greek salad.
However, if you’re looking for something slightly different or want to cater to vegetarian diets, consider goat cheese (chevre) as an alternative – it has a softer texture than feta and carries a milder flavor. Regardless of which type of cheese you choose, make sure it’s crumbled into small pieces before mixing it with the other ingredients in the salad.
Once all these elements are combined, our Great Greek Pasta Salad Recipe is starting to take shape. At this point, we can start thinking about how we want to finish it off – perhaps by adding some chopped fresh herbs like parsley or dill to give it that extra burst of freshness and vitality? The beauty of this salad lies in its versatility, so don’t be afraid to get creative!
8 oz (225g) of grilled chicken breast, diced
To make a delicious Great Greek Pasta Salad Recipe, you’ll need to start with high-quality ingredients. One essential component is 8 oz (225g) of grilled chicken breast, diced.
Here’s what you can do with it:
- Dicing the Chicken
Slice the grilled chicken into small, bite-sized pieces. This will make it easier to distribute throughout the salad and ensure that each bite has a good balance of flavors.
You want the diced chicken to be around 1/4 inch (6 mm) in size for optimal texture and distribution. This way, you can sprinkle it evenly over your pasta salad without making any single serving too large or overwhelming.
1/2 cup of crumbled feta cheese
Feta cheese is a staple ingredient in traditional Greek cuisine and plays a crucial role in adding a salty, tangy flavor to this Great Greek Pasta Salad recipe.
In order to prepare 1/2 cup of crumbled feta cheese, you will need to start with a block of high-quality feta cheese. Feta is typically made from sheep’s milk or a combination of sheep and goat’s milk, although some variations may also be made with cow’s milk.
The best type of feta cheese for this recipe would likely be a Greek-style feta that has been aged to perfection, developing a rich, creamy texture and a salty, slightly tangy flavor. Look for a block of feta that is dense and firm in the center, with a white or off-white color.
To crumble the feta cheese, you can use your fingers or a fork to break it down into small pieces. It’s best to aim for a mixture of large chunks and smaller crumbs, as this will help distribute the flavor and texture throughout the salad.
One thing to note is that feta cheese is quite strong, so be careful not to overdo it with the amount you add to the recipe. A general rule of thumb would be to use about 1/2 cup of crumbled feta for every 8 ounces of pasta in this salad.
The key is to find a balance between the salty flavor of the feta and the other ingredients in the salad, such as the tomatoes, cucumbers, bell peppers, olives, and red onion. By combining these flavors in just the right proportions, you can create a truly authentic Greek pasta salad that’s both delicious and visually appealing.
Tangy Dressing
Sauce Preparation
Tangy dressing is a crucial component of a great Greek pasta salad, and preparing it from scratch can elevate the entire dish.
The foundation of tangy dressing is its acidic component, which typically comes in the form of vinegar or lemon juice.
Choosing the Right Acidic Component
- Vinegar: White wine vinegar, red wine vinegar, or apple cider vinegar can all be used as a base for tangy dressing. White wine vinegar has a neutral flavor and is often preferred in Greek cuisine.
- Lemon juice: Freshly squeezed lemon juice adds a bright and citrusy note to the dressing. Be careful not to add too much, as it can quickly become overpowering.
Once you’ve chosen your acidic component, it’s time to consider the richness that will balance out its tartness. This is typically achieved through the addition of oil or mayonnaise.
Add a Rich Component
- Oil: Olive oil is a popular choice for its distinct flavor and health benefits. Use a high-quality, extra-virgin olive oil to get the most out of your dressing.
- Mayonnaise: Mayonnaise can add a creamy texture and neutralize some of the acidity. However, be careful not to overdo it, as it can make the dressing too heavy.
Now that you have your acidic and rich components in place, it’s time to consider adding flavor enhancers that will take your tangy dressing to the next level.
Add Flavor Enhancers
- Dried oregano: This classic Greek herb pairs perfectly with tomato and cucumber, making it a staple in many salads.
- Garlic powder: Add a pinch of garlic powder to give your dressing a savory and aromatic flavor.
Mix all the ingredients together in a bowl until they’re well combined, then adjust the seasoning as needed. Some people like their tangy dressing sweeter, so feel free to add a bit of sugar or honey if that’s your preference.
1/4 cup of olive oil
The star of our Great Greek Pasta Salad Recipe is undoubtedly the _Tangy Dressing_ that brings all the flavors together.
One of the essential ingredients in this dressing is olive oil. You’ll need to use 1/4 cup of it, which is a generous amount that will add depth and richness to your salad. Make sure you choose high-quality olive oil with a good balance of acidity and flavor.
Now, let’s talk about the ratio of ingredients in our Tangy Dressing. Here’s a breakdown:
- 1/4 cup _olive oil_
- 2 tablespoons red wine vinegar (for that tangy taste)
- 1 teaspoon Dijon mustard (to add a bit of spice and texture)
- 1 clove garlic, minced (for an extra kick)
- 1 teaspoon dried oregano (for a classic Greek flavor)
To make the dressing, simply whisk all these ingredients together in a bowl until they’re well combined. You can adjust the amount of olive oil to your taste, but keep in mind that you want it to coat all the pasta and vegetables evenly.
Once you’ve made your Tangy Dressing, you’ll be ready to assemble our Great Greek Pasta Salad Recipe. It’s time to add the cooked pasta, cherry tomatoes, cucumber, red onion, feta cheese, Kalamata olives, and artichoke hearts. Don’t forget to sprinkle some chopped fresh parsley on top for extra flavor and color!
With this delicious salad recipe, you’ll have a perfect combination of flavors and textures that will leave your taste buds dancing the Greek dances!
2 tbsp of freshly squeezed lemon juice
The star of our Great Greek Pasta Salad recipe is undoubtedly the tangy dressing, which perfectly balances the flavors and textures of the dish.
One of the key components of this dressing is freshly squeezed lemon juice, specifically 2 tablespoons of it.
Main Ingredients:
-
- Lemon JuiceFreshly squeezed from high-quality lemons, providing an intense and refreshing flavor.
This generous amount of lemon juice serves several purposes in the dressing:
It adds a burst of citrus flavor, which complements the Mediterranean herbs and spices used in the recipe.
It helps to balance the richness of the pasta and other ingredients by cutting through with its acidity.
Why Freshly Squeezed is Best:
Flavor
Fresh lemon juice has a more vibrant, dynamic flavor compared to bottled or processed alternatives.
Nutrients
Fresh lemons are packed with vitamins and minerals, particularly vitamin C, which is lost during the processing of commercial lemon juice products.
When using freshly squeezed lemon juice in our Great Greek Pasta Salad recipe, be sure to:
- Squeeze the juice just before mixing it with the other ingredients to ensure optimal flavor and nutritional benefits.
1 tsp of Dijon mustard
Tangy Dressing is a crucial component of a delicious Greek pasta salad, and it’s surprisingly easy to make. The key ingredient that gives this dressing its distinctive tanginess is Dijon mustard.
Here are the ingredients you’ll need for this recipe:
-
-
-
- Dressing ingredients:
- 1/2 cup extra-virgin olive oil
- 1/4 cup white wine vinegar or red wine vinegar
- 1 tsp Dijon mustard (this is the key ingredient for tanginess)
- 1 tsp dried oregano
- 1 tsp lemon zest (optional, but highly recommended)
- 2 cloves garlic, minced
- Salt and pepper to taste
-
-
Now, let’s talk about the role of Dijon mustard in this recipe. You’ll need just 1 teaspoon of it to give your dressing that perfect balance of tanginess and creaminess.
Dijon mustard is a type of mustard made from white mustard seeds, which are less spicy than brown or black mustard seeds. It has a mild, slightly sweet flavor that pairs perfectly with the other ingredients in this recipe.
To make the dressing, simply combine all the ingredients (except the olive oil) in a bowl and whisk until smooth. Then, slowly pour in the olive oil while continuously whisking until the dressing is emulsified and creamy.
Here are some additional tips to help you create the perfect Greek pasta salad:
- Use high-quality ingredients: Fresh vegetables, good-quality cheese, and authentic Mediterranean spices will make a big difference in the flavor of your salad.
- Dress it just before serving: This will ensure that the flavors are at their best and that the dressing doesn’t become too soggy or oily.
- Let it sit for a while: Allow the salad to sit at room temperature for about 30 minutes to allow all the flavors to meld together.
This tangy dressing is perfect for Greek pasta salads, but you can also use it as a marinade or a sauce for grilled meats or vegetables. Experiment with different ingredients and flavor combinations to make it your own!
1 tsp of dried oregano
Tangy dressing is a key component in adding flavor to many dishes, including our featured recipe, _A Great Greek Pasta Salad_.
When it comes to creating a delicious and authentic Greek pasta salad, the choice of dressing is crucial. A good tangy dressing, such as Greek vinaigrette or a combination of red wine vinegar and olive oil, will help bring out the flavors of the vegetables and herbs used in the recipe.
In our Great Greek Pasta Salad Recipe, we call for 1 tsp of dried _oregano_ to be added to the tangy dressing mixture. Oregano is a popular herb in Greek cuisine, and its earthy, slightly bitter flavor pairs perfectly with the sweetness of tomatoes and cucumbers.
The combination of the tangy dressing and oregano adds depth and complexity to the salad, making it a truly authentic representation of traditional Greek flavors. By incorporating these elements into your pasta salad recipe, you’ll be able to transport yourself to the Mediterranean coast without ever leaving your kitchen.
Salt and pepper to taste
When it comes to creating a delicious and tangy pasta salad, using the right dressing can make all the difference. One popular choice for a Great Greek Pasta Salad Recipe is Tangy Dressing, which provides a perfect balance of flavors.
Tangy Dressing typically consists of a combination of ingredients such as red wine vinegar, olive oil, and spices like garlic powder and dried oregano. These components work together to create a savory and slightly sweet flavor profile that complements the pasta, vegetables, and feta cheese in your salad.
To make the most of your Tangy Dressing, it’s essential to use high-quality ingredients. Look for a good quality red wine vinegar with minimal additives, as well as a fragrant and fresh olive oil that will add depth to the dressing.
The key to creating a great Greek Pasta Salad is finding the right balance between tangy, sweet, and savory flavors. This is where Tangy Dressing shines, adding just the right amount of zest to your dish without overpowering it.
When using Tangy Dressing in your Great Greek Pasta Salad Recipe, be sure to mix well and adjust seasoning as needed with salt and pepper to taste. This will ensure that each bite is perfectly balanced and delicious.
Assembly and Tips
Tasting Notes
The art of Assembly is a crucial step in creating a stunning and delicious Greek Pasta Salad. It involves carefully combining all the ingredients, taking into account texture, color, and presentation.
To begin, start by preparing your ingredients. This includes cooking al dente pasta, chopping fresh vegetables, crumbled feta cheese, and thinly slicing red onions. Ensure that each ingredient is prepared to a high standard, as this will directly impact the overall quality of your salad.
When assembling your salad, consider the concept of layering. Start by adding a base layer of pasta, followed by the vegetables, feta cheese, and finally a sprinkle of chopped fresh parsley or dill. This not only adds visual appeal but also allows each component to shine.
The key to a great Greek Pasta Salad lies in its balance of flavors. The sweetness of the tomatoes, the tanginess of the feta cheese, and the crunch of the fresh vegetables all come together to create a harmonious taste experience. To achieve this balance, experiment with different combinations of ingredients and seasonings.
Tasting notes for a classic Greek Pasta Salad typically include:
- Freshness: The crunch and freshness of the vegetables, such as cucumber and bell peppers, should be evident in every bite.
- Sourness: The tangy flavor of feta cheese adds a delightful contrast to the sweetness of the tomatoes.
- Creaminess: A drizzle of tzatziki sauce or Greek yogurt can add a rich and creamy element to your salad.
- Spice: A sprinkle of red pepper flakes or dried oregano can add a subtle kick of heat and flavor.
Remember, the beauty of Greek Pasta Salad lies in its customization. Feel free to experiment with different ingredients, seasonings, and dressings to create your own unique recipe.
For a more intense flavor, use 1/2 cup of chopped red bell pepper in place of the cucumber.
Incorporating assembly and tips into a recipe like this Great Greek Pasta Salad is crucial for achieving the perfect blend of flavors, textures, and presentation. When it comes to assembling a pasta salad, timing is everything. It’s essential to prepare each component just before serving to prevent sogginess and to ensure that all the flavors meld together harmoniously.
Firstly, consider using high-quality ingredients such as whole wheat pasta or even quinoa for added nutrition. Cooking the pasta al dente is also vital, as it will help maintain its texture throughout the salad. When preparing the vegetables, thinly slice the red onion and cucumber to allow them to marinate evenly in the dressing.
Now, about that tip of substituting the cucumber with chopped red bell pepper for an intense flavor: this adds a sweet and crunchy element that complements the tanginess of feta cheese. This variation is perfect for those who prefer a bolder taste or want to add a pop of color to their salad.
Another crucial aspect of assembling a Greek pasta salad is balancing the flavors. Combine Kalamata olives with artichoke hearts and sun-dried tomatoes to create a savory mix that pairs well with the feta cheese. Don’t overdo it – a little goes a long way in preventing an overpowering taste.
As for tips, here are some additional suggestions: add a handful of chopped fresh parsley or dill for an herbaceous note; try using different types of pasta, such as orzo or penne, to change the texture and presentation; and consider adding a drizzle of lemon juice or zest to brighten up the flavors.
Ultimately, assembling this Great Greek Pasta Salad is all about experimenting with ingredients and flavors until you find your perfect combination. Don’t be afraid to get creative and make it your own!
To add some crunch, toss in some toasted almonds or walnuts.
When it comes to assembling a delicious Greek pasta salad, there are several tips and tricks that can take your dish from bland to grand.
Here are some essential tips to keep in mind:
- Choose the right pasta: A long, thin shape like penne or bowtie works well for this recipe. You want a pasta that will hold onto the flavors and ingredients without getting too mushy.
- Select high-quality ingredients: Fresh vegetables, herbs, and cheese can make all the difference in the taste and texture of your salad.
- Don’t overcook the pasta: You want it to still have a bit of bite to it. Al dente is perfect for this recipe.
- Toss with care: When combining the ingredients, use a large spoon or tongs to gently toss everything together. This will help prevent any one ingredient from getting smashed or broken.
Here are some additional tips to add extra texture and flavor:
- Add some crunch: Toss in some toasted almonds or walnuts for a satisfying crunch that complements the pasta and vegetables.
- Incorporate fresh herbs: Chopped parsley, dill, or oregano can add a bright, refreshing flavor to your salad.
- Get creative with cheese: Feta is traditional in Greek cuisine, but you could also try using crumbled goat cheese or ricotta for added creaminess.
Remember, the key to a great Greek pasta salad is balance. You want a combination of salty, sweet, tangy, and crunchy elements that all work together in harmony. Experiment with different ingredients and flavor combinations until you find one that suits your taste buds.
This recipe makes about 6 servings. Store leftovers in an airtight container for up to 3 days.
Pasta salads are a staple of Greek cuisine, and this recipe for a classic Greek pasta salad is a crowd-pleaser. To assemble and serve this delicious dish, follow these tips:
Assembly Tips
- Start by cooking the pasta according to the package instructions until it’s al dente. Drain and set aside to cool.
- While the pasta is cooling, chop the cucumbers, bell peppers, onion, and tomatoes into bite-sized pieces.
- In a large bowl, combine the cooled pasta, chopped vegetables, crumbled feta cheese, and chopped fresh parsley.
- Drizzle the Greek vinaigrette over the salad and toss to coat. Make sure all the ingredients are well coated with the dressing.
Tips for a Great Greek Pasta Salad
- Use high-quality feta cheese that’s crumbly and salty. This will give your salad a rich, authentic flavor.
- Don’t skip the red onion – it adds a pungent flavor and crunchy texture to the salad.
- Add some chopped Kalamata olives for a salty, savory element that complements the feta cheese.
- Make sure to use fresh parsley for the best flavor and aroma. You can also use dried parsley if fresh is not available.
This recipe makes about 6 servings. Store leftovers in an airtight container for up to 3 days. The salad will retain its flavor and texture even after it’s been refrigerated for a few hours or overnight.

- Best LeadsGorilla Alternatives for 2025 - April 22, 2025
- Best Leadzai Alternatives for 2025 - April 22, 2025
- Best LeadSwift Alternatives for 2025 - April 21, 2025
