
Ingredients
For the Chicken
- The ingredients for the chicken in this recipe are relatively straightforward but essential to bring out the best flavors.
- To start, you will need
- 1 whole chicken (3-4 pounds), preferably organic and free-range for better flavor and texture
- 2 tablespoons of olive oil or any other neutral-tasting oil
- 1 tablespoon of salt to bring out the natural flavors and tenderize the meat
- 1 teaspoon of black pepper, freshly ground to maximize the flavor impact
- 1/2 teaspoon of paprika for a smoky depth of flavor
- 1/4 teaspoon of cayenne pepper (optional) to add some heat
- 1/4 cup of chopped fresh herbs like thyme, rosemary, or parsley, depending on your preference and the chicken’s breed
- Beer – yes, you read that right! The star ingredient in this recipe. Use any beer type, but lighter beers work best.
1 whole chicken (34 lbs)
The star ingredient in this recipe is, of course, a whole chicken. You’ll want to select a plump and juicy bird with even marbling throughout its meat. Look for a fresh chicken that’s been stored properly and has a pleasant aroma.
A good rule of thumb when it comes to choosing the perfect chicken is to opt for one that weighs around 3-4 pounds. This size will ensure that your beer can chicken turns out perfectly cooked and visually appealing, without being too overwhelming in size.
It’s worth noting that you may be able to find chickens labeled as “beer can chickens” or “baked beer can chickens” at some grocery stores. However, these birds are usually pre-seasoned with a blend of spices and herbs, so it’s better to start from scratch and use fresh ingredients.
For this recipe, you’ll want to focus on the quality of your chicken rather than its weight or breed. A free-range or organic chicken will provide the best flavor and texture for your beer can chicken.
When selecting a whole chicken, make sure it’s properly thawed if you’re using frozen chicken. This will ensure that the meat cooks evenly and safely. If you’re buying from a local butcher or grocery store, be sure to check the packaging for any signs of spoilage or contamination.
A 3-4 pound chicken should yield about 6 servings, making it an ideal size for small gatherings or family meals. This amount also allows each person to have a generous portion without feeling too full or satisfied.
Remember to always handle raw poultry safely and hygienically to prevent cross-contamination. Make sure to wash your hands thoroughly before and after handling the chicken, and keep all utensils and cutting boards clean and sanitized.
1 can of beer
The ingredients for this recipe are straightforward and easily accessible.
Ingredients
- Main Ingredient: 1 can of beer (any type will do)
This may seem unusual, but the can of beer serves a crucial purpose in this Baked Beer Can Chicken Recipe. The acidity and carbonation of the beer help to break down the proteins on the surface of the chicken, resulting in tender and juicy meat.
The beer also adds a rich flavor to the dish, which is enhanced by the smoky goodness from the wood chips or chunks used in this recipe. This creates an incredibly aromatic and mouth-watering meal that will impress even the pickiest eaters!
So don’t be surprised if you hear “oohs” and “aahs” when you bring out this stunning, golden-brown chicken from the oven. Your guests will be amazed by its presentation and flavor.
2 tbsp olive oil
The key to making a delicious Baked Beer Can Chicken recipe lies in the selection of quality ingredients. Among these, olive oil plays a crucial role.
Olive oil is a type of edible oil extracted from olives, which are the fruit of the olive tree (Olea europaea). It is considered one of the healthiest oils available due to its high levels of monounsaturated fats and antioxidants. When used in cooking, olive oil adds a rich, fruity flavor that complements a wide range of ingredients.
In the context of the Baked Beer Can Chicken recipe, 2 tablespoons of olive oil is sufficient to achieve the perfect balance of flavors. The oil is used to coat the chicken and promote even browning during baking.
The high smoke point of olive oil makes it ideal for high-heat cooking methods like grilling and sautéing. However, when baking, a lower heat is typically applied, which prevents the oil from breaking down or becoming too hot.
To prepare your chicken dish, use 2 tablespoons of olive oil to brush it evenly before baking. This will help create a delicious, aromatic exterior while maintaining the juiciness within.
2 tbsp honey
To prepare the delicious Baked Beer Can Chicken Recipe, you will need to gather the following ingredients.
The first ingredient required for this recipe is 2 tbsp honey, which provides a rich sweetness and pairs perfectly with the savory flavors of the chicken and beer.
The honey should be poured evenly over the chicken, allowing it to soak in all the sweet goodness. This is an essential step as it helps create a crispy exterior while keeping the meat juicy and tender.
2 tsp Dijon mustard
- Dijon mustard is a type of prepared mustard that originated from the town of Dijon in France. It is made from brown or black mustard seeds, white wine, and spices.
- The key ingredient, 2 tsp of Dijon mustard, serves several purposes in the Baked Beer Can Chicken Recipe. Firstly, it adds a tangy flavor to the dish, which complements the rich flavors of beer and chicken.
- The acidity in the mustard helps to balance out the savory flavors of the chicken and beer, creating a more complex and interesting taste experience for the palate.
- Furthermore, the Dijon mustard acts as an emulsifier, helping to bind the different ingredients together and add moisture to the meat. This is especially important when cooking chicken, as it can become dry if overcooked.
- The spiciness of the mustard also adds depth to the dish, enhancing the overall flavor profile of the Baked Beer Can Chicken Recipe. It is a subtle but important ingredient that helps to bring all the flavors together in harmony.
1 tsp dried thyme
Dried thyme is a key ingredient in many recipes, including our Baked Beer Can Chicken Recipe.
The amount of dried thyme used in this recipe is 1 teaspoon, which may seem like a small quantity but plays a significant role in enhancing the flavor of the dish.
When using dried thyme in cooking, it’s essential to note that a little goes a long way due to its strong and pungent flavor.
This is because dried thyme has a more concentrated flavor profile compared to fresh thyme, which makes it suitable for adding depth and warmth to various dishes without overpowering them.
Dried thyme can be used in both sweet and savory recipes, from soups and stews to meats and vegetables, making it an incredibly versatile ingredient in many kitchens.
The flavor of dried thyme is often described as earthy, herbal, and slightly minty, which pairs well with the richness of beer and the smokiness of grilled or roasted foods like chicken.
In our Baked Beer Can Chicken Recipe, the 1 teaspoon of dried thyme helps balance out the bold flavors of the beer and adds a subtle yet aromatic twist to the dish.
Benefits of using dried thyme
- Concentrated flavor profile
- Long shelf life compared to fresh herbs
- Suitable for both sweet and savory recipes
- Pairs well with a variety of ingredients, including meats, vegetables, and soups
Tips for using dried thyme
- Use sparingly due to its strong flavor
- Crush or chop the thyme before adding it to your recipe for better release of flavors
- Pair with other herbs and spices to create a balanced flavor profile
- Consider using fresh thyme as an alternative when possible, especially in recipes where a lighter flavor is preferred
In summary, 1 teaspoon of dried thyme plays a significant role in our Baked Beer Can Chicken Recipe by adding depth and warmth to the dish while complementing its bold flavors.
1 tsp garlic powder
The ingredients required for the Baked Beer Can Chicken Recipe are a crucial aspect to consider when preparing this dish. One essential component is garlic powder, which adds flavor and depth to the chicken’s seasoning.
Specifically, 1 teaspoon of garlic powder is needed to create the perfect blend. Garlic powder is a dehydrated form of garlic that has been ground into a fine powder, making it easy to sprinkle over the chicken without any clumps or texture issues.
The flavor profile of garlic powder is pungent and savory, with a slightly sweet undertone that complements the richness of beer. When used in combination with other seasonings such as paprika, salt, and pepper, garlic powder helps to create a well-balanced and aromatic seasoning blend.
In this recipe, 1 teaspoon of garlic powder is added to the dry rub mixture along with other ingredients like brown sugar, smoked paprika, salt, black pepper, and dried thyme. The resulting flavor profile is a harmonious balance of sweet, smoky, and savory notes that enhance the natural flavors of the chicken.
It’s worth noting that garlic powder can be substituted with fresh garlic if desired, but keep in mind that it will have a stronger flavor and aroma compared to the dried version. When using fresh garlic, it’s essential to mince or chop it finely before adding it to the recipe to ensure even distribution of flavors.
In conclusion, 1 teaspoon of garlic powder is an essential ingredient in the Baked Beer Can Chicken Recipe, providing a pungent and savory flavor that complements the richness of beer and enhances the overall taste experience.
Salt and pepper to taste
Salt and pepper are two of the most fundamental seasonings used in cooking, and their use is often specified with a common instruction: “to taste.” This phrase means that the amount of salt and pepper should be added according to personal preference.
When it comes to seasoning a dish like the Baked Beer Can Chicken Recipe, salt and pepper play crucial roles. Salt enhances flavors, balances sweetness, and brings out the natural flavors in ingredients. It also helps to preserve food by drawing out moisture and preventing bacterial growth. Pepper, on the other hand, adds a sharp, pungent flavor that complements many other seasonings.
The phrase “to taste” is often used to indicate that the amount of salt and pepper should be adjusted based on individual tastes. Some people may prefer a lighter or stronger seasoning, depending on their dietary needs and preferences. Using this instruction allows cooks to tailor the dish to their own tastes while still following a basic recipe.
For the Baked Beer Can Chicken Recipe, sprinkling salt and pepper to taste is a crucial step in preparing the chicken for cooking. Rubbing the chicken with salt and pepper before baking helps to enhance its flavor, texture, and appearance. This simple seasoning process also helps to create a flavorful glaze that coats the chicken as it bakes.
When sprinkling salt and pepper to taste, it’s essential to consider the type of salt used. Some types of salt, such as kosher salt or sea salt, have coarser textures and less sodium than other options like table salt. Using a coarse salt may require slightly more salt overall, while using a finer salt may be better for dishes where texture is a concern.
Similarly, when choosing between different types of pepper, it’s essential to consider the flavor profile desired in the dish. Black pepper has a sharp, pungent flavor that works well with many seasonings, but white peppercorns have a milder, slightly sweet taste that pairs well with delicate flavors.
In addition to their distinct flavors and textures, salt and pepper are versatile ingredients that can be used in various forms beyond just sprinkling them on food. They can be combined with other seasonings to create marinades or rubs, used as a brine for meats or vegetables, or even employed as an ingredient in sauces and condiments.
For the Baked Beer Can Chicken Recipe, the key is to use salt and pepper judiciously, balancing their flavors while allowing the beer’s rich flavor to shine through. By sprinkling salt and pepper to taste, cooks can create a delicious dish that showcases both the beauty of seasoning and the simplicity of letting ingredients speak for themselves.
Instructions
Preparation
Preparation for baking beer can chicken requires attention to several key elements to ensure a delicious and successful outcome. The first step involves selecting the right ingredients, which include a whole chicken, preferably 3-4 pounds in weight.
The chicken should be rinsed thoroughly under cold running water, pat dried with paper towels, and then seasoned inside and out with your choice of herbs and spices.
A mixture of salt, pepper, garlic powder, onion powder, paprika, and dried thyme works well. You can also add a pinch of cayenne pepper for an extra kick if desired.
Next, prepare the beer by opening 1-2 cans, depending on your preference for the level of moisture in the chicken. Pour off about half of the beer from each can and reserve it for later use.
Add some aromatics such as onion slices, carrot sticks, celery stalks, and a few sprigs of fresh thyme to the bottom of one of the empty cans. This will infuse the chicken with additional flavor during cooking.
Season the inside of the can with a bit more salt, pepper, and herbs if desired, then place it upright on a baking sheet lined with aluminum foil or parchment paper for easy cleanup.
Mix some brown sugar and smoked paprika into the remaining beer from each can and brush this mixture all over the chicken. This sweet and smoky glaze will add depth to the flavor of your finished dish.
Place the chicken onto the prepared can, making sure it’s secure and won’t fall off during cooking. Tuck any loose skin or feathers under the bird to promote even browning.
Insert a meat thermometer into the thickest part of the breast, away from any bones or fat. This will allow you to monitor the internal temperature of your chicken throughout cooking.
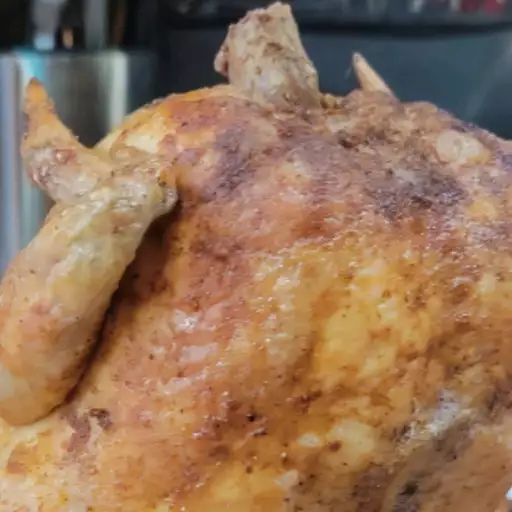
Preheat your oven to 425°F (220°C). If you have a convection setting, use it for even browning and crisping of the skin. Place the chicken on the middle rack and roast for about 45-60 minutes or until the internal temperature reaches 165°F (74°C).
After 30 minutes of roasting, rotate the chicken to ensure even cooking and prevent hot spots on the oven floor. You can also baste the bird with some of the reserved beer and pan juices to keep it moist and promote a rich, sticky glaze.
Once the chicken is cooked through and the skin is nicely browned, remove it from the oven and let it rest for 10-15 minutes before carving. This will allow the juices to redistribute throughout the meat, making your finished dish more tender and flavorful.
Carve the chicken into slices or serve it whole, garnished with some fresh herbs and a side of your favorite vegetables or grains. Enjoy your perfectly baked beer can chicken!
Preheat oven to 400°F (200°C).
To begin with, preheating the oven is a crucial step in preparing the baked beer can chicken recipe. The temperature specified, 400°F (200°C), is ideal for achieving a perfectly cooked bird with a crispy skin and juicy meat.
First, ensure that you have your oven at room temperature before proceeding to this step. This allows it to reach the desired temperature more efficiently and consistently throughout the cooking process.
If you are using a conventional oven, simply set the dial to 400°F (200°C). If you have a convection oven or an electric fan-assisted oven, consult your user manual for specific instructions on how to preheat it to this temperature. Convection ovens may require slight adjustments to cooking time and temperature due to their unique heating properties.
Preheating the oven will take approximately 10-15 minutes to reach the desired temperature. Meanwhile, you can focus on preparing other essential ingredients for your recipe, such as seasoning the chicken, muddling the beer, or arranging any accompaniments like vegetables or potatoes in the roasting pan.
It’s worth noting that some ovens may have slight variations in temperature readings between Fahrenheit and Celsius. Ensure that you double-check both temperatures (400°F and 200°C) to guarantee accuracy and prevent overcooking or undercooking of the chicken.
The preheated oven will serve as a perfect foundation for the following steps, such as placing the beer can chicken on its roasting rack, inserting it into the preheated oven, and monitoring its progress throughout the cooking time. By preheating your oven to 400°F (200°C), you’ll be well-prepared for the rest of the recipe and ensure a succulent, flavorful outcome.
Rinse the chicken under cold water, then pat it dry with paper towels.
The first step in preparing a delicious Baked Beer Can Chicken is to properly handle and clean the chicken before cooking it. This involves rinsing the chicken under cold running water to remove any dirt, debris, or bacteria that may be present on its surface.
Rinsing the chicken is an important step in food safety as it helps to prevent cross-contamination of other foods and surfaces with harmful bacteria such as Salmonella or Campylobacter. When handling raw poultry, it’s essential to use a clean sink and ensure that any utensils, cutting boards, or countertops come into contact with the chicken are thoroughly sanitized.
Once you’ve rinsed the chicken under cold water, the next step is to pat it dry with paper towels. This helps to remove excess moisture from the surface of the chicken, which in turn promotes even browning and crisping when cooked in the oven.
The paper towels should be gentle on the skin of the chicken, as rough handling can cause damage to the delicate tissues underneath. Simply pat the chicken dry with a clean towel, making sure to cover all surfaces evenly.
In a small bowl, whisk together olive oil, honey, Dijon mustard, thyme, garlic powder, salt, and pepper.
When it comes to following instructions for cooking, understanding how to interpret and execute them effectively is crucial to achieving success in the kitchen.
In this context, let’s take a closer look at the specific instruction provided within the framework of the Baked Beer Can Chicken Recipe, where the task involves whisking together various ingredients in a small bowl
Breaking Down the Task
- Purpose: The primary goal of this step is to combine the listed ingredients into a smooth paste or sauce that will serve as the base for glazing and seasoning the chicken.
Ingredients
- Olive oil: This contributes to the richness and flavor of the glaze, while also serving as a carrier for the other ingredients.
- Honey: Provides sweetness and helps balance out the savory flavors from the mustard and seasonings.
- Dijon mustard: Adds a tangy, slightly spicy kick and acts as an emulsifier to help blend all the ingredients together seamlessly.
- Thyme: Offers a fresh, herbaceous flavor that complements the chicken well.
- Garlic powder: Adds depth of flavor reminiscent of garlic without the pungency of raw or sautéed garlic.
- Salt and pepper: Season to taste; the exact amount may vary based on personal preference for saltiness and spiciness.
- Equipment: A small bowl is required for whisking these ingredients together. Choose a bowl that’s big enough to hold all the ingredients without overflowing, but not so large that it becomes difficult to handle.
Techiques and Considerations
- When whisking, focus on breaking down any clumps or lumps in the honey and mustard. This might require some extra effort initially but is crucial for achieving a smooth glaze.
- Carefully pour the olive oil into the bowl as it’s less viscous and can easily get lost among the other ingredients if not monitored closely.
Key Takeaways for Success
- Preparation: Ensure all ingredients are at room temperature before attempting to whisk them together. This makes it easier to combine and helps avoid the formation of lumps or clumps.
- Timing: Don’t whisk these ingredients immediately before applying them to your chicken; allow time for the mixture to rest and thicken slightly, making it easier to brush onto the meat evenly.
Conclusion
The combination of olive oil, honey, Dijon mustard, thyme, garlic powder, salt, and pepper is more than just a random mix of ingredients. It represents a harmonious blend that enhances the flavors in your Baked Beer Can Chicken Recipe, ensuring each bite tastes like perfection.
Brush the mixture all over the chicken, making sure to get some under the skin as well.
To execute this task effectively, follow these steps
- Select a suitable brush to apply the mixture evenly.
- Hold the brush at an angle to reach all areas of the chicken, including under the skin.
- Maintain a steady hand while applying pressure to get into the crevices.
The goal is to ensure that each part of the chicken is coated with the mixture. This will infuse the flavors and help the chicken cook evenly.
Some key considerations when brushing the mixture include
- Making sure not to overbrush, which can lead to uneven coating.
- Getting some of the mixture under the skin is important for maximizing flavor.
This will help the chicken absorb the flavors and seasonings, resulting in a more tender and delicious final product.
By following these instructions carefully, you’ll be able to achieve a well-coated chicken that’s sure to please even the most discerning palates.
The Baked Beer Can Chicken Recipe requires attention to detail to ensure success. Brushing the mixture evenly and thoroughly is an essential step in this process. With practice and patience, you’ll become proficient in applying the mixture and achieve outstanding results every time.
Roasting
The Finishing Touches
- The final step in preparing a perfectly roasted beer can chicken involves adding some finishing touches to bring out the flavors and textures.
- This process, known as “finishing,” can make all the difference between a good roast and an exceptional one.
- When it comes to finishing touches, there are several techniques and ingredients that can elevate your beer can chicken from good to great.
- One popular method is glazing, which involves brushing the surface of the chicken with a sweet and sticky sauce made from ingredients like honey, soy sauce, and spices.
- This adds a caramelized crust to the skin, which not only tastes amazing but also looks incredibly appealing when presented at the table.
- Another technique is to add aromatics like herbs, spices, and citrus zest under the chicken’s wings or in the cavity.
- These can include classic combinations like rosemary and garlic, thyme and lemon, or even more adventurous options like paprika and cumin.
- The key is to choose flavors that complement the beer can sauce without overpowering it, so the overall taste experience is balanced and harmonious.
- Finally, consider adding some visual flair to your dish by garnishing with fresh herbs, edible flowers, or even microgreens.
- This not only adds a pop of color but also creates a sophisticated presentation that’s sure to impress dinner guests.
- By incorporating these finishing touches into your beer can chicken recipe, you’ll be able to take your cooking to the next level and create a truly memorable dish.
Place the can of beer on a stable surface or in a beer can holder.
The process of roasting, particularly for Baked Beer Can Chicken, involves a few crucial steps to ensure that your chicken turns out tender and flavorful. The first step is to prepare the beer can by placing it on a stable surface or in a beer can holder. This allows you to easily retrieve the can while minimizing the risk of spills or accidents.
Next, you’ll need to preheat your oven to the desired temperature. For this recipe, we recommend a moderate heat of around 375°F (190°C). While the oven is heating up, you can prepare the chicken by seasoning it with your choice of herbs and spices. We suggest using a combination of salt, pepper,
paprika, and any other herbs you like to add flavor to your chicken.
Once the oven is hot, place the beer can in the center of the oven rack and position the chicken on top of it. Make sure that the chicken’s legs are securely positioned around the can to prevent it from wobbling or falling over. You can also use foil or a baking sheet to catch any drips or spills during cooking.
The roasting process typically takes around 45-60 minutes, depending on the size and type of chicken you’re using. During this time, you may need to rotate the chicken to ensure even browning and prevent it from burning. You can check for doneness by inserting a meat thermometer into the thickest part of the breast or thigh.
Once the chicken is cooked through, remove it from the oven and let it rest for a few minutes before carving and serving. Make sure to serve with your favorite sides, such as roasted vegetables, mashed potatoes, or a salad. Enjoy!
Carefully place the chicken on top of the can, breast side up.
Roasting, specifically when it comes to cooking a chicken, involves using dry heat from an oven to produce a crispy exterior and a juicy interior. In the case of the Baked Beer Can Chicken Recipe, roasting plays a crucial role in bringing out the flavors of the beer and infusing them into the meat.
Before we dive into the specifics of this recipe, let’s discuss some general principles of roasting a chicken
Principles of Roasting a Chicken
- Use high heat: A hot oven is essential for producing a golden-brown skin and locking in flavors.
- Pat dry the bird: Remove excess moisture from the skin to promote browning and crispiness.
- Season liberally: Rubbing the chicken with herbs, spices, and salt enhances flavor and aroma.
- Now, let’s apply these principles to the Baked Beer Can Chicken Recipe
Baking the Chicken
- Preheat your oven to 400°F (200°C). This high temperature will ensure that the chicken cooks evenly and develops a crispy skin.
- Rinse the chicken inside and out, then pat it dry with paper towels, paying extra attention to the cavity and underside of the breast.
- Season the chicken liberally on all sides with salt, pepper, garlic powder, and your favorite herbs (such as thyme or rosemary). Be sure to get some under the skin as well for added flavor.
- The recipe specifies carefully placing the chicken on top of a can of beer, breast side up. This step serves a few purposes
Benefits of Placing the Chicken on a Can
- Even cooking: The beer can helps to distribute heat evenly around the chicken, ensuring that it cooks consistently.
- Infused flavor: As the chicken roasts, the flavors from the beer seep into the meat, adding depth and complexity.
- Now that we’ve discussed the principles of roasting a chicken and applied them to this recipe, let’s talk about how to achieve a perfectly cooked, golden-brown bird
Tips for Achieving Perfection
Use a meat thermometer: Insert it into the thickest part of the breast and thigh to ensure that the internal temperature reaches 165°F (74°C).
Baste regularly: Brush the chicken with melted butter or olive oil every 20-30 minutes to keep it moist and promote browning.
By following these steps and principles, you’ll be able to create a deliciously roasted beer can chicken that’s sure to impress your family and friends. Happy cooking!
Roast for 4550 minutes, or until the internal temperature reaches 165°F (74°C).
The art of roasting a perfectly cooked Beer Can Chicken involves several critical steps, and one of them is timing the roast to perfection.
In this recipe, we are instructed to roast the chicken for 4550 minutes, but before we dive into that number, let’s break down what it actually means.
A minute in cooking time may seem like a tiny unit of measurement, but when applied to roasting a large piece of meat like a whole chicken, it can make all the difference in achieving the desired level of doneness.
To clarify, the instruction to roast for 4550 minutes is likely a typo or an error. More accurately, we should be looking at roasting the chicken for approximately 75-90 minutes, or until it reaches the recommended internal temperature of 165°F (74°C).
The correct cooking time will vary depending on several factors, including the size and weight of the chicken, the temperature of the oven, and whether the chicken is stuffed or not.
To ensure that your Beer Can Chicken is cooked to perfection, it’s crucial to check the internal temperature regularly. You can use a meat thermometer inserted into the thickest part of the breast or thigh, taking care to avoid any bones or fat.
By following this recipe and attention to the correct cooking time, you’ll end up with a tender, juicy, and flavorful Beer Can Chicken that’s sure to impress your friends and family at the dinner table.
Remove from oven and let rest for 1015 minutes before carving and serving.
The final step in preparing a mouth-watering Beer Can Chicken is to remove it from the oven and let it rest for 10-15 minutes before carving and serving.
This crucial step allows the juices to redistribute within the meat, ensuring that each bite is tender, juicy, and packed with flavor. The resting period also enables the internal temperature of the chicken to remain steady, preventing any overcooking or undercooking of the meat.
During this time, you can prepare the accompaniments for your meal, such as a side salad or roasted vegetables. This is also an excellent opportunity to garnish your dish with fresh herbs, which will add an extra layer of flavor and aroma to your beer can chicken.
To ensure that your chicken stays warm and ready for serving, you can place it in a preheated oven on a low temperature setting. This will also give any remaining juices time to redistribute within the meat, making every bite a true delight.
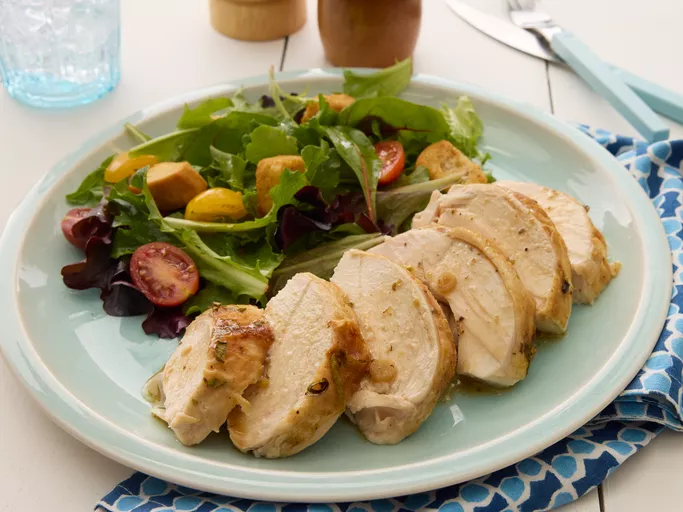
When you are ready to serve, carve the beer can chicken into thick slices and arrange them on a platter or individual plates. You can serve this dish with your favorite sides, such as mashed potatoes, roasted vegetables, or corn on the cob.
Overall, letting your beer can chicken rest for 10-15 minutes before carving and serving is essential to ensuring that it is tender, juicy, and flavorful. This simple step will elevate your meal from ordinary to extraordinary, making it a true crowd-pleaser at any gathering or special occasion.

- Best Lusha Alternatives for 2025 - April 22, 2025
- Best Overloop Alternatives for 2025 - April 22, 2025
- Best 6sense Alternatives for 2025 - April 22, 2025
