
Ingredients
Creamy Chocolate Base
The creamy chocolate base is a crucial component of the chocolate gelato recipe, as it provides the rich and velvety texture that defines this type of frozen dessert.
To make the creamy chocolate base, you will need the following ingredients:
- Cocoa Powder (1 cup) – Dutch-processed cocoa powder gives a milder flavor and darker color to the chocolate base, while natural cocoa powder has a more intense flavor and lighter color.
- Sugar (2 cups) – Granulated sugar adds sweetness and helps balance out the bitterness of the cocoa. You can also use brown sugar for a slightly different flavor profile.
- Milk or Cream (2 cups) – Whole milk, skim milk, or heavy cream works well in this recipe. The type of dairy you choose will affect the richness and texture of the chocolate base.
- Large Egg Yolks (4-6 yolks) – Egg yolks add moisture, richness, and a subtle yellow color to the chocolate base.
- Salt (a pinch) – A small amount of salt enhances the flavors in the chocolate base and helps balance out sweetness.
- Unsalted Butter (1/4 cup) – Melted butter adds a rich, creamy texture to the chocolate base.
- High-Quality Chocolate Chips or Shavings (1 cup) – Use high-quality chocolate for the best flavor and texture. You can also use cocoa nibs or chocolate chunks instead of chips.
Note that you can adjust the proportions of these ingredients to suit your taste preferences and dietary needs. For example, if you prefer a stronger chocolate flavor, you can add more cocoa powder or use a higher percentage of dark chocolate.
A 1quart heavy cream
A quart of heavy cream is an essential ingredient for creating rich and creamy chocolate gelato. Heavy cream, also known as whipping cream, has a high fat content which makes it perfect for adding a luxurious texture to ice cream.
The heavy cream used in this recipe should be at least 35% fat, but 36% or higher is even better if you can find it. This type of heavy cream will give your gelato an extra rich and smooth flavor that’s sure to impress your friends and family.
When selecting a quart of heavy cream, look for one from a reputable dairy source such as Organic Valley or Horizon. These brands offer high-quality heavy cream that is free from artificial growth hormones and pesticides, ensuring that your gelato is made with the purest ingredients possible.
Making sure to note the fat content is not only important for flavor but also for achieving the right consistency in your gelato. A higher fat content will give you a better chance of creating a smooth and creamy texture that’s perfect for scooping into cones or bowls.
It’s worth noting that some heavy creams may contain additives such as carrageenan or gums to enhance the texture and shelf life. However, it’s best to avoid these additives if possible by choosing an organic or natural brand.
1/2 cup whole milk
- When it comes to making chocolate gelato, using high-quality ingredients is crucial for achieving a rich and creamy texture.
- The recipe calls for 1/2 cup whole milk, which may seem like an unusual choice considering that skim or low-fat milk are often preferred in dessert recipes.
- However, using whole milk is actually beneficial in this case because it contains more fat than lower-fat options, which helps to create a smooth and velvety texture in the finished gelato.
- The fat content in whole milk also plays a role in enhancing the flavor of the chocolate, allowing the rich and deep flavors of the cocoa to shine through without overpowering the other ingredients.
- Additionally, whole milk contains a higher amount of casein, a protein found in milk that helps to strengthen the gelato’s structure and prevent it from becoming too icy or grainy.
- In summary, using 1/2 cup whole milk in this chocolate gelato recipe is an intentional choice designed to produce the best possible texture and flavor results.
Cocoa Powder
Cocoa powder is an essential ingredient in making rich and decadent chocolate gelato. It serves as a key flavor component, providing a deep, intense chocolate taste to the final product.
The quality of cocoa powder can significantly impact the overall flavor and texture of the gelato. There are two primary types of cocoa powder: natural and Dutch-processed.
Natural cocoa powder is made from cocoa beans that have been fermented and then roasted at a lower temperature, resulting in a slightly sweet and fruity flavor with a reddish-brown color.
Dutch-processed cocoa powder, on the other hand, has been treated with an alkalizing agent to neutralize its natural acidity, giving it a milder, more bitter-sweet taste and a deeper brown color. This type of cocoa powder is commonly used in commercial chocolate production due to its ease of mixing and bolder flavor.
For the best results when making chocolate gelato, choose high-quality Dutch-processed cocoa powder that has been finely ground for maximum flavor release.
In terms of quantity, start by using 1/4 cup or about 60 grams of Dutch-processed cocoa powder per batch of gelato. You can adjust this amount to your taste preferences, but keep in mind that too little cocoa powder will result in a lighter chocolate flavor, while too much may make the gelato overly bitter.
Additionally, ensure you’re using unsweetened cocoa powder without added sugars or flavors to avoid affecting the overall sugar content and balance of the gelato recipe.
Finally, it’s essential to store your cocoa powder properly by keeping it in an airtight container away from direct sunlight, moisture, and heat sources. This will help preserve its flavor and aroma for future use.
8 ounces dark cocoa powder, preferably Dutchprocessed
The star ingredient of this chocolate gelato recipe is, of course, dark cocoa powder. It’s essential to use high-quality dark cocoa powder for the best flavor and texture. Look for Dutch-processed cocoa powder, as it has been treated with an alkalizing agent that gives it a milder flavor and a deeper color.
Dark Cocoa Powder: Dark cocoa powder is made from cacao beans that have been roasted to bring out their natural sweetness and rich, chocolatey flavor. The darker the cocoa powder, the more intense the flavor will be. For this recipe, we recommend using Dutch-processed dark cocoa powder, which has a milder flavor than regular dark cocoa powder.
The benefits of using Dutch-processed cocoa powder include:
- Improved flavor: The alkalizing process brings out the natural sweetness and richness of the cacao beans, resulting in a deeper, more complex flavor.
- Better texture: The lower acidity level in Dutch-processed cocoa powder helps to create a smoother, creamier gelato.
- Increased shelf life: Dutch-processed cocoa powder has a longer shelf life than regular dark cocoa powder due to its reduced acidity level.
When choosing your dark cocoa powder, look for the following:
High-quality beans: Ensure that the cacao beans used to make the cocoa powder are of high quality and have been carefully roasted to bring out their natural flavors.
No artificial additives: Opt for a cocoa powder that contains no artificial additives, preservatives, or flavorings.
Dutch-processed treatment: Confirm that the cocoa powder has been treated with an alkalizing agent to give it its characteristic milder flavor and deeper color.
By selecting high-quality Dutch-processed dark cocoa powder, you’ll be able to create a rich, creamy, and intensely chocolatey gelato that’s sure to impress your family and friends!
Mix-ins and Toppings
Nuts or Other Mix-ins
Nuts or other mix-ins are an exciting way to add texture and flavor variety to chocolate gelato, providing a delightful contrast to the rich, smoothness of the frozen dessert. Some popular options include:
- Walnuts: Chopped walnuts bring a nutty flavor and satisfying crunch to the chocolate gelato.
- Pecans: These buttery nuts complement the deep flavor of dark chocolate, while their coarse texture adds interest.
- Cashews: Sliced or chopped cashews can add a subtle sweetness and creamy texture to balance the bitterness of cocoa.
- Hazelnuts: Chopped hazelnuts can evoke the flavors of nutella, adding a delightful twist to traditional chocolate gelato.
Other mix-ins can also enhance the chocolate experience:
- Caramel bits or ribbons: Add a gooey, sweet surprise that melts into the gelato.
- Raspberries or strawberries: Fresh berries burst with juicy sweetness and add natural flavor contrast to the rich chocolate.
- Mint chips: Chopped peppermint patties or chocolate mint candies can refresh the palate between spoonfuls of the creamy treat.
For a more decadent twist, try combining different mix-ins:
- Nuts and fruit: Pair walnuts with raspberries or pecans with strawberries for a harmonious balance of flavors and textures.
- Nuts and chocolate chips: Combine chopped nuts with dark, milk, or white chocolate chips for an explosion of cocoa flavors.
When incorporating mix-ins, remember to fold them into the gelato gently after it has finished churning to avoid over-aeration and maintain a smooth consistency. This will ensure that each bite offers an optimal balance of textures and flavors in your delicious homemade chocolate gelato!
your choice of nuts (hazelnut, almond), candy pieces (M&M’s), or fruit (strawberry)
Mix-ins and toppings are a crucial element to consider when crafting a chocolate gelato recipe, as they can add texture, flavor, and visual appeal to this Italian-style frozen dessert.
For those who desire a crunchy contrast to the smooth, creamy gelato, incorporating nuts is an excellent option. The most commonly used nuts in mix-ins are:
- Hazelnuts: These have a distinct nutty flavor and aroma that pairs exceptionally well with chocolate. They also retain their crunch even after being frozen.
- Almonds: Sliced or slivered almonds can add a delicate crunch without overpowering the other flavors in the gelato. Their mild, slightly sweet taste complements both dark and milk chocolate well.
For those who prefer their mix-ins to be small, round, and brightly colored, candy pieces are an appealing option. Some popular choices include:
- M&M’s: These bite-sized treats come in a variety of colors and flavors, allowing you to customize the look and taste of your gelato based on their seasonal offerings or your personal preference.
Finally, for those who prefer a fruity twist on traditional chocolate gelato, incorporating diced fruit is a delicious alternative. Some popular options include:
- Strawberry: Diced strawberries can add natural sweetness and a burst of fresh flavor to your gelato. They also visually appeal as vibrant red specks throughout the dessert.
When selecting mix-ins, remember that it’s essential to balance their texture with the smoothness of the gelato. A general rule of thumb is to use about 1/4 cup of mix-ins per quart of gelato base.
Instructions
Making the Gelato Base
The art of making gelato base starts with selecting the finest ingredients and follows a precise process to ensure that every scoop tastes like a symphony of flavors.
To begin, we need to gather our essential components:
- 2 cups of whole milk
- 1 cup of heavy cream
- 1/4 cup of granulated sugar
- 1/2 cup of dark chocolate chips (at least 70% cocoa)
- 1 tsp vanilla extract
Now, let’s proceed with making the gelato base:
- Cool the mixture: In a small saucepan, combine the milk, heavy cream, and granulated sugar. Heat the mixture over medium heat, stirring occasionally, until the sugar has dissolved and the mixture is just below boiling point.
Remove the saucepan from the heat source and let it cool to room temperature. This step is crucial as it prevents the formation of ice crystals during the gelato-making process.
- Add the chocolate: In a separate bowl, melt the dark chocolate chips in the microwave or over a double boiler until smooth. Be cautious not to overheat the chocolate, which can cause it to seize and become grainy.
Once the chocolate is melted, add it to the cooled milk mixture and stir until well combined.
- Add the vanilla extract: Add the teaspoon of vanilla extract to the chocolate-milk mixture and whisk gently to incorporate.
The addition of vanilla will enhance the overall flavor profile of your gelato base, adding a subtle yet distinct character.
- Chill and refrigerate: Pour the gelato base into an airtight container and cover it with plastic wrap or aluminum foil. Refrigerate the mixture for at least 2 hours or overnight to allow it to chill thoroughly.
This final step is essential in preparing your gelato base for churning. A well-chilled mixture ensures that the flavors will be evenly distributed during the churning process, resulting in a smooth and creamy gelato.
- Churn the gelato: Remove the gelato base from the refrigerator and pour it into an ice cream maker. Follow the manufacturer’s instructions for churning times and temperatures to create your delicious chocolate gelato.
Once the gelato has finished churning, transfer it to an airtight container and place it in the freezer to harden for at least 2 hours before serving.
With these precise steps, you’ll be able to create a rich, velvety chocolate gelato that will satisfy your sweet tooth and impress your friends with its sophisticated flavors.
Combine cream and milk in a medium saucepan. Heat over low heat until the mixture starts to simmer. Be careful not to let it boil.
To make this decadent Chocolate Gelato, the first step is to combine cream and milk in a medium saucepan. It’s essential to use high-quality ingredients for the best flavor and texture. The ratio of cream to milk can be adjusted to suit personal preference, but a good starting point is 3:1 or 4:1.
Next, heat the mixture over low heat until it starts to simmer. This process should take around 10-15 minutes, depending on the stove and the size of the saucepan. Be patient and let the mixture heat up gradually, as this will help prevent scalding or burning.
As you wait for the mixture to simmer, ensure that you’re keeping a close eye on it. The goal is to get the mixture hot, but not boiling. A gentle simmer is ideal, with small bubbles rising to the surface of the liquid. If the mixture starts to boil, remove it from the heat source immediately and let it cool slightly before continuing.
Once your cream-milk mixture has reached a gentle simmer, you’re ready to move on to the next step: tempering the chocolate. This is an essential process for ensuring that the chocolate doesn’t seize up or form unsightly lumps in the gelato. Tempering involves melting the chocolate slowly and carefully, then cooling it to a specific temperature before adding it to the cream-milk mixture.
Add Cocoa Powder and Sugar
- To begin with, when it comes to adding cocoa powder and sugar to our chocolate gelato recipe, it’s essential to understand that these two ingredients serve distinct purposes.
- Cocoa powder is a key component in creating the rich, intense flavor of our gelato. It’s what gives chocolate its characteristic taste and aroma. However, raw cocoa powder can be quite bitter and needs to be balanced with sugar to create a smooth and palatable finish.
- When adding cocoa powder, start by sifting it into your mixture to prevent lumps from forming. A general rule of thumb is to use one cup of sifted cocoa powder for every two cups of sugar in the recipe.
- Now, when it comes to the type of sugar to use, granulated sugar is a good choice as it dissolves easily and provides an even sweetness. However, brown sugar or muscovado can also be used to add depth and complexity to the flavor profile.
- The ratio of sugar to cocoa powder is crucial in achieving the perfect balance of flavors. Too much sugar will overpower the delicate taste of the cocoa, while too little sugar may leave a bitter aftertaste.
- A good starting point is to mix one cup of sifted cocoa powder with 2/3 cup of granulated sugar for every four cups of cream or milk in the recipe. Adjust this ratio as needed based on personal preference and the type of sugar used.
- Finally, when adding both cocoa powder and sugar to the mixture, make sure to whisk thoroughly to ensure that they’re evenly distributed throughout the gelato base. This will help prevent any unevenness or streaks in the finished product.
Gradually whisk in cocoa powder, then add granulated sugar. Whisk constantly to prevent lumps from forming.
In order to successfully create a rich and creamy chocolate gelato, it is essential to follow the instructions for incorporating cocoa powder and granulated sugar into the mixture.
- Gradually Whisk in Cocoa Powder: When adding cocoa powder, it’s crucial to do so in a slow and controlled manner. This helps prevent any clumps from forming, which can result in an unpleasant texture in the finished gelato.
- Begin by whisking the cocoa powder into the mixture on low speed, gradually increasing the speed as needed to incorporate the powder evenly. Be patient and take your time, as rushing this step can lead to unwanted lumps.
- Once the cocoa powder has been fully incorporated, it’s time to add the granulated sugar. To ensure a smooth gelato texture, add granulated sugar in a slow and controlled manner, whisking constantly as you do so.
- Continue whisking until the sugar has dissolved completely and there are no visible lumps or grains remaining. The result should be a smooth, creamy mixture that’s ready for further processing into chocolate gelato.
- By following these instructions carefully, you’ll be well on your way to creating a delicious and authentic chocolate gelato that’s sure to please even the most discerning palate.
Chill and Blend
To successfully prepare a rich and creamy chocolate gelato, it’s essential to follow the given instructions carefully.
Instructions
- Mix 2 cups of whole milk with 1 cup of heavy cream in a medium-sized bowl. Stir well to combine and set aside for later use.
- In another large mixing bowl, melt 8 ounces (225g) of high-quality dark chocolate (at least 70% cocoa solids) using either a double boiler or the microwave in 30-second increments at 50% power. Stir well after each interval to prevent burning.
- In a separate mixing bowl, whisk together 1/2 cup of granulated sugar and 2 large egg yolks until light and airy.
- Pour the chocolate mixture over the sugar-egg yolk mixture in a thin stream while continuously whisking the contents. Continue mixing until smooth, silky consistency is achieved.
- Add the combined milk and cream mixture to the chocolate mixture and stir well to incorporate all ingredients.
- Cover the bowl with plastic wrap and refrigerate for at least 2 hours or overnight (6-8 hours) before churning the gelato in an ice cream maker according to the manufacturer’s instructions.
- Pour the churned gelato into a container and place it in the freezer to set. This process typically takes around 30 minutes to 1 hour, depending on the desired firmness.
Chill the chocolate gelato for at least 2 hours before serving. You can also store it in an airtight container in the freezer for up to 3 days.
Tips and Variations
- To make a more intense chocolate flavor, use more dark chocolate or add cocoa powder to the mixture.
- Add-ins like chopped nuts (hazelnuts, almonds), chocolate chips, or candy pieces can enhance the overall texture and taste of the gelato.
- Try substituting some of the sugar with honey or maple syrup for a different flavor profile.
Enjoy your homemade chocolate gelato as is or experiment with various toppings like whipped cream, fresh fruit, or even cookie crumbs to create unique flavor combinations.
Avoid over churning; gelato should be slightly chunky. Stop blending once the desired consistency is reached.
The key to achieving the perfect texture for chocolate gelato lies in not over blending the mixture. Over churning can lead to a smooth, creamy consistency that’s too dense and heavy.
This can result in an unpleasant mouthfeel, making it difficult for the flavors to shine through. The ideal consistency of gelato is slightly chunky, allowing each bite to be full of texture and contrast.
To avoid overchurning, monitor your blender closely as you mix the ingredients. Stop blending once the desired consistency is reached, taking care not to push it too far.
This can involve checking on the mixture after every 30 seconds or so, using a spoon to scrape down the sides of the blender and assess its progress. This approach helps prevent overchurning and ensures that your gelato turns out light and airy, with just the right balance of texture.
Tips for Achieving Gelato Perfection
Overnight Chilling
To achieve gelato perfection, it’s essential to pay attention to the details, especially when it comes to overnight chilling. This step is crucial for allowing the flavors to meld together and the mixture to firm up, making it perfect for serving.
The night before serving, transfer your Chocolate Gelato Recipe base to an airtight container. Cover the container with plastic wrap or aluminum foil and place it in the refrigerator at 40°F (4°C) or below. Allow it to chill undisturbed for at least 8 hours or overnight.
The length of time you let your gelato chill will depend on various factors, such as the temperature and humidity level in your fridge , the size of your container, and even the type of ingredients used. As a general rule, it’s better to err on the side of caution and give your gelato more time to chill than less.
When you remove your chilled gelato from the fridge, make sure to scrape the sides and bottom of the container with a spoon or spatula. This helps to redistribute any separated mix-ins or ice crystals that may have formed during the chilling process.
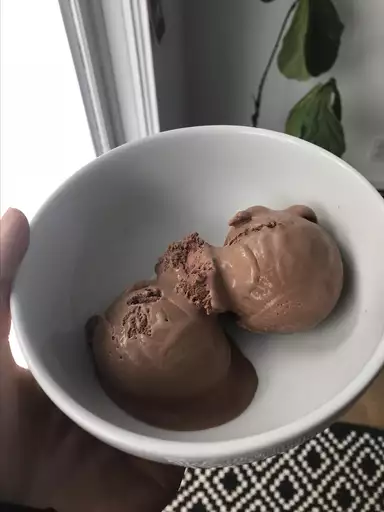
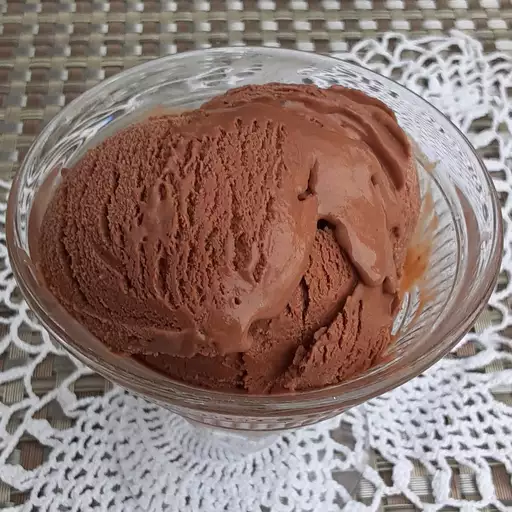
If you’re planning to serve your chocolate gelato in a scoops-style bowl, you can transfer it to a serving dish and top it with whipped cream, chocolate shavings, or other desired toppings. Otherwise, you can also spoon it directly into cones or bowls for an instant treat.
Regardless of how you choose to serve your gelato, the most important thing is to enjoy the fruits of your labor! The overnight chilling process allows all the flavors and textures to come together in perfect harmony, making every bite a decadent chocolate experience.
Serving temperature for chocolate gelato should be around 18°F (-8°C) to -12°F (-24°C), which is slightly firmer than traditional ice cream. This temperature range allows the flavors to shine while still maintaining a smooth, creamy texture that’s perfect for scooping and savoring.
When storing your chilled gelato in an airtight container , make sure to press plastic wrap or aluminum foil directly onto the surface of the mixture to prevent air from entering. This will help to keep your gelato fresh for a longer period, while also preventing the growth of unwanted bacteria and other microorganisms.
Allow the gelato to rest in the refrigerator overnight for best results.
To achieve perfection when making gelato, it’s crucial to understand the fundamentals and execute them with precision. First and foremost, choosing high-quality ingredients is vital.
The base for most gelato recipes begins with heavy cream and whole milk, which should be chosen based on their fat content and freshness. The fat content will contribute to a rich and creamy texture, while the freshness of the dairy ensures that the flavor remains unadulterated.
Finding the perfect balance between sugar and flavorings is also key. Too much sugar can result in a gelato that’s overly sweet, while insufficient sugar may leave it tasting flat. It’s worth noting that different types of sugars have distinct characteristics; for example, caster sugar dissolves quickly, whereas brown sugar adds depth to the flavor.
When it comes to adding flavorings such as cocoa powder or melted chocolate, ensure they are added slowly and whisked thoroughly into the base to avoid creating a grainy texture. Some gelato recipes may include stabilizers like guar gum to enhance the texture, but these should be used judiciously due to their potential impact on the flavor.
Allowing the gelato to rest in the refrigerator overnight is not merely an optional step; it’s essential for achieving optimal results. During this time, the flavors will mature and intensify, while any air pockets or bubbles that developed during mixing will dissipate, leaving a smoother texture.
Before serving, give the gelato at least 15 minutes to soften in room temperature. This will allow the mixture to come to a spreadable consistency, perfect for enjoying with toppings like fresh fruit or whipped cream.
Lastly, consider tempering your gelato by transferring it to an ice bath before freezing. This step can help eliminate ice crystals and create an ultra-smooth texture that’s characteristic of high-quality gelato.
Freezing Temperature
To achieve gelato perfection, especially with a rich and decadent chocolate gelato recipe, it’s crucial to understand the importance of freezing temperature.
The ideal freezing temperature for gelato is between 10°F (-12°C) and 15°F (-9°C). This narrow range allows the gelato to maintain its smooth texture and prevents ice crystals from forming, which can give the gelato a grainy or icy mouthfeel.
When it comes to the chocolate gelato recipe specifically, a slightly lower freezing temperature may be necessary due to the high cocoa solid content. The optimal freezing temperature for this type of gelato is around 5°F (-15°C) to 10°F (-12°C). This will help to preserve the rich flavor and velvety texture of the chocolate.
To maintain a consistent freezing temperature, it’s essential to use a high-quality ice cream maker that can control the temperature within this narrow range. Some ice cream makers may have adjustable temperature settings, allowing you to fine-tune the freezing process to suit your specific gelato recipe.
Another crucial factor in achieving gelato perfection is the churning time. The churning time should be around 20-30 minutes for a standard gelato recipe. This allows the gelato to develop the necessary air pockets and texture without over-aerating or over-freezing, which can result in an unpleasant consistency.
Finally, it’s vital to note that the freezing temperature may vary depending on the specific ingredients used in your chocolate gelato recipe. Some ingredients, like high-quality cocoa powder or fresh fruit, may require a slightly lower freezing temperature to preserve their unique flavors and textures.
In conclusion, achieving gelato perfection requires careful attention to the freezing temperature, which should be maintained between 10°F (-12°C) and 15°F (-9°C). For a rich and decadent chocolate gelato recipe, a slightly lower freezing temperature around 5°F (-15°C) to 10°F (-12°C) is recommended. By mastering this essential aspect of gelato-making, you’ll be able to create a truly exceptional and unforgettable dessert.
The ideal freezing temperature is at 0°F (18°C) or lower to preserve texture and prevent ice crystal formation.
To achieve gelato perfection, it’s essential to understand the importance of temperature control throughout the entire process, from churning to freezing.
The ideal freezing temperature for gelato is between 0°F (18°C) and -5°F (-21°C). This range helps maintain the smooth, creamy texture characteristic of Italian-style gelato while preventing ice crystal formation that can result in an unpleasant grainy or icy consistency.
Another critical factor in achieving gelato perfection is controlling the temperature during churning. The ideal churning temperature should be around 40°F (4°C) to 50°F (10°C). Chilling your mixture too much before churning can cause it to freeze and form ice crystals, compromising the texture of your final product.
Temperature control also plays a crucial role in the development of flavor in gelato. Freezing temperatures can mute or even destroy some flavors, so it’s essential to balance temperature with flavor intensity. For example, when working with strong-flavored ingredients like cocoa powder or espresso, you may need to temper the flavors slightly by adding a small amount of sugar to balance out the bitterness.
Furthermore, achieving gelato perfection requires attention to detail in terms of ingredients and ratios. A classic chocolate gelato recipe typically consists of 50% dark chocolate (at least 70% cocoa solids), 20% granulated sugar, and 30% whole milk or cream. The quality of your ingredients will significantly impact the final flavor and texture of your gelato.
In conclusion, achieving gelato perfection is a delicate balance of temperature control, attention to detail in terms of ingredients and ratios, and an understanding of how these factors interact with one another to produce a smooth, creamy, and flavorful product. By mastering these elements, you can create a rich and indulgent chocolate gelato that will impress even the most discerning palates.

- Best Datanyze Alternatives for 2025 - April 24, 2025
- Best Hunter.io Alternatives for 2025 - April 22, 2025
- Best Lead411 Alternatives for 2025 - April 22, 2025
