
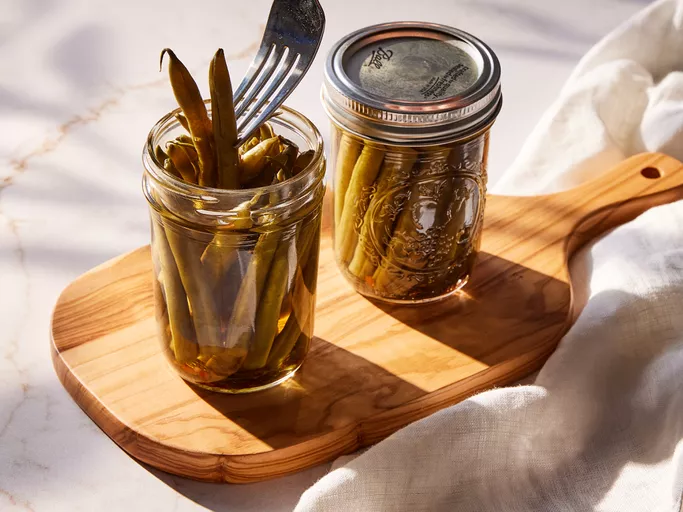
Ingredients
Crisp Pickled Green Beans Ingredients
The ingredients required for Crisp Pickled Green Beans are simple and easily accessible. Here’s a detailed list to guide you through:
For the pickling liquid:
- 1 cup (250 ml) white vinegar
- 1/2 cup (125 ml) water
- 1 tablespoon granulated sugar
- 1 teaspoon salt
- 1/4 teaspoon black pepper, whole or ground
- Optional: pickling spice or dill weed for added flavor
For the green beans:
- 12 oz (340g) fresh green beans, trimmed of ends and any damaged areas
- Optional: a few sprigs of fresh parsley or dill for garnish
Additional items you’ll need:
- Pickle jars with lids and bands (sterilized in boiling water before use)
- A large pot for blanching the green beans
- Sterile utensils, such as tongs or a slotted spoon, for handling the green beans
Note: The quantity of ingredients may be adjusted to suit your taste preferences and the number of servings you’re making.
Crisp pickled green beans are a tangy and crunchy side dish that can elevate any meal, from a simple weeknight dinner to a fancy holiday gathering.
The key to making these delicious beans lies in the ingredients themselves, which must be carefully selected and prepared to bring out their full flavor and texture.
Green Beans
These are the star of the show, and for this recipe, you’ll want to use fresh green beans that are still crisp and have a vibrant color. You can either use them whole, cut them into bite-sized pieces, or even trim the ends off before proceeding.
Cucumbers
These will add extra crunch and flavor to your pickled green beans. Look for firm, thin-skinned cucumbers that are free of blemishes. Slice them thinly so they fit in with the overall aesthetic of your dish.
Onion
You can either use caramelized onions, which will add a sweet and savory flavor to your pickled green beans, or simply chop up a raw onion for a more pungent taste. Either way, be sure to mince the onion finely so it doesn’t overpower the other ingredients.
Vinegar
The type of vinegar you choose will significantly impact the flavor and acidity level of your pickled green beans. You can use white wine vinegar, apple cider vinegar, or even balsamic vinegar for a sweeter taste. Mix it with water to achieve the right consistency.
Salt
This is essential for bringing out the natural flavors in your ingredients and adding depth to your dish. Use kosher salt or sea salt for their coarser texture, which will help prevent your pickled green beans from becoming too salty.
Spices and Herbs
You can customize this recipe with any combination of spices and herbs you like, but common options include dill weed, garlic powder, and paprika. Feel free to experiment until you find the perfect balance for your taste buds.
With these ingredients on hand, you’re ready to make your crisp pickled green beans! Just follow our recipe guide for instructions on how to prepare this tasty side dish.
1 pound of fresh green beans, trimmed
For this Crisp Pickled Green Beans recipe, you will need the following ingredients:
- 1 pound of fresh green beans, trimmed: This is the main ingredient in our pickling process. When selecting fresh green beans, look for ones that are firm, bright green, and free of blemishes or soft spots.
- Vinegar: For this recipe, we recommend using a combination of apple cider vinegar and white wine vinegar for their distinct flavor profiles. Apple cider vinegar adds a fruity and slightly sweet taste, while white wine vinegar contributes to the acidity and crispness.
- 2 tablespoons apple cider vinegar
- 1 tablespoon white wine vinegar
- Sugar: A small amount of sugar helps balance the flavors and adds a hint of sweetness. For this recipe, we recommend using a granulated white sugar or brown sugar.
- 1 teaspoon granulated white sugar (or brown sugar)
- Salt: Use a flaky sea salt or kosher salt to add depth and texture. A small amount of salt will help preserve the green beans and enhance their natural flavors.
- 1 teaspoon flaky sea salt (or kosher salt)
- Spices: For an added flavor boost, you can use some spices and herbs that complement the green beans. Feel free to experiment with different combinations of spices.
- A pinch of black pepper
- A few sprigs of fresh dill weed (optional)
1 cup (250 ml) of white vinegar
The recipe for crisp pickled green beans calls for several key ingredients, but the focus here will be on one essential component: white vinegar.
White vinegar is a type of liquid that adds flavor and acidity to dishes, including the pickling process for green beans.
The primary role of white vinegar in this recipe is to create an environment that inhibits bacterial growth, allowing the pickled green beans to remain fresh and edible for a longer period.
When using white vinegar in cooking, it’s essential to note that not all types of vinegar are created equal. The acidity level, which typically ranges from 4-8% acetic acid, is crucial for pickling purposes.
The acidity of the vinegar will help to:
- Create a briny flavor
- Help preserve the green beans by inhibiting the growth of unwanted microorganisms
- Enhance the overall texture and crunch of the pickled green beans
The choice of white vinegar in this recipe is based on its mild, neutral taste and high acidity level. It will add a tangy flavor to the pickled green beans without overpowering them.
In addition to adding flavor and preserving the green beans, white vinegar can also be used as an ingredient to help soften any stubborn cell walls of the beans, allowing for easier absorption of flavors.
When selecting the right type of white vinegar, it’s worth noting that some varieties may have added flavorings or preservatives. For this recipe, it is recommended to choose a plain, unflavored white vinegar without any additives.
The 1 cup (250 ml) of white vinegar called for in the Crisp Pickled Green Beans Recipe should be used at room temperature and can be stored in an airtight container once opened.
1/4 cup (60 g) granulated sugar
The use of granulated sugar as an ingredient in the Crisp Pickled Green Beans recipe may seem unusual, but it serves a crucial purpose. The 1/4 cup (60 g) of granulated sugar adds a subtle sweetness to balance out the acidity and sourness from the vinegar and pickling spices.
In this particular recipe, granulated sugar is used as an essential component in achieving a perfect balance between sweet and tangy flavors. It helps to counteract the harshness of the vinegar, creating a more harmonious taste profile for the pickled green beans.
Granulated sugar, also known as table sugar or white sugar, is a type of sugar that has been refined to remove any impurities and molasses. This refining process gives granulated sugar its characteristic fine texture and white color. The 1/4 cup measurement in this recipe translates to approximately 60 grams of granulated sugar.
When working with granulated sugar, it’s essential to note that the finer the grain, the more easily it dissolves. Since granulated sugar is already finely powdered, it can be mixed with liquids and other ingredients without any issues.
In terms of nutritional information, 1/4 cup (60 g) of granulated sugar contains approximately 45 calories and negligible amounts of essential vitamins and minerals. However, sugar plays a vital role in this recipe by contributing to the flavor and texture of the pickled green beans.
It’s also worth noting that using granulated sugar instead of other sweeteners can result in a slightly different taste profile for the final product. This is because granulated sugar contains only sucrose, whereas other sugars like brown sugar or honey have additional components that affect their flavor and nutritional content.
In summary, granulated sugar is a crucial ingredient in this Crisp Pickled Green Beans recipe due to its ability to balance out the acidity and add a touch of sweetness. Its fine texture and white color make it an ideal choice for mixing with other ingredients, while its minimal nutritional contribution allows it to play a supporting role rather than dominating the flavor profile.
1 teaspoon salt
When it comes to the ingredients for this Crisp Pickled Green Beans recipe, one crucial component is a dash of salt. Specifically, we’re looking at 1 teaspoon of salt that plays a significant role in bringing out the flavors and textures of the dish.
Salt serves multiple purposes here. Firstly, it helps to balance the sweetness from the pickling liquid and the natural taste of the green beans. Secondly, salt enhances the crunchiness of the beans by drawing out excess moisture and allowing them to retain their texture for a longer period. This results in a delightful contrast between the crisp exterior and the slightly tender interior of each bean.
The 1-teaspoon measurement is crucial as it adds just the right amount of flavor without overpowering the other ingredients. Too little salt, and the dish might taste bland; too much, and it could become overwhelmingly salty. This precise measurement strikes a perfect balance, making it an essential component of this recipe.
When selecting the type of salt to use, consider options like kosher salt or sea salt for their mild flavor and fine texture. Avoid using table salt as it can leave an unpleasant aftertaste due to its finer texture and added preservatives. The goal is to add a neutral-tasting element that elevates the other flavors in the dish without overpowering them.
Keep in mind that 1 teaspoon of salt translates to about one-eighth teaspoon if you’re measuring out by weight using a kitchen scale, which can be useful for precision baking or cooking. Remember, it’s always better to err on the side of caution when adding salt and taste as you go, adjusting the seasoning according to your preference.
1/2 teaspoon black peppercorns
The ingredients for this recipe play a crucial role in bringing out the flavors and texture of the crisp pickled green beans. One of the key ingredients is black peppercorns, which adds a pungent and slightly spicy flavor to the dish.
When it comes to using black peppercorns, 1/2 teaspoon is an ideal amount for this recipe. This is because too much pepper can overpower the other flavors in the dish, while too little may not provide enough depth of flavor.
Black peppercorns contain a compound called piperine, which gives them their distinctive flavor and aroma. When you crush or grind black peppercorns, the oils are released, allowing the pepper to infuse its flavor into other ingredients.
In the context of this recipe, the black peppercorns will help to balance out the sweetness of the green beans and add a nice kick to each bite. To get the most flavor out of your black peppercorns, be sure to use high-quality ones that are freshly ground or crushed just before using.
The key is to find the right balance between the different flavors in this recipe. With too much pepper, the dish may become overpowering and unpalatable, while too little may make it bland and uninspiring. By using 1/2 teaspoon of black peppercorns, you can create a harmonious blend of flavors that will elevate this crisp pickled green beans recipe to new heights.
1/2 teaspoon red pepper flakes (optional, for some heat)
- To add an extra kick to your Crisp Pickled Green Beans, you can include 1/2 teaspoon of red pepper flakes (optional) for some heat.
- Red pepper flakes, also known as dried red chili peppers or crushed red pepper, are made from dried and crushed red chili peppers.
- They come in varying levels of intensity, but most have a moderate to hot level of heat, which is perfect for adding a spicy kick to your pickled green beans without overpowering the other flavors.
- The heat level of red pepper flakes can be described as smoky, earthy, and slightly sweet, with a slow-building intensity that warms the palate.
- When using red pepper flakes in your Crisp Pickled Green Beans recipe, it’s essential to note that a little goes a long way.
- Start with a small amount, such as 1/4 teaspoon, and adjust to taste, as you can always add more heat but removing it once it’s added is difficult.
- The heat from the red pepper flakes will mellow slightly over time, so don’t be afraid to experiment and find the perfect balance of flavor for your taste buds.
2 cloves garlic, peeled and minced
The ingredient “2 cloves garlic, peeled and minced” refers to a fundamental component commonly used in various cuisines, particularly in Mediterranean and Asian cooking.
Garlic is a versatile bulbous plant with a pungent flavor and aroma that adds depth and character to numerous dishes. In the context of this Crisp Pickled Green Beans Recipe, garlic serves to enhance the overall flavor profile of the pickling liquid.
The quantity specified as “2 cloves” implies a moderate amount suitable for most recipes, although personal preferences may vary in terms of desired intensity. For those with extremely sensitive taste buds or strict dietary restrictions, using one clove could provide a more subtle effect without overpowering the other ingredients.
To prepare 2 cloves of garlic according to this recipe, it’s essential to peel and mince them. The peeling process typically involves carefully removing the thin outer skin from each clove while preserving the tender inner flesh. Minced garlic is then obtained by cutting the peeled cloves into very small pieces.
The size and uniformity of minced garlic are critical in achieving even distribution throughout the pickling liquid, ensuring that all green beans receive the intended flavor boost. A fine mincing technique will help to prevent overpowering any one bean with a concentrated amount of garlic.
The key to making delicious crisp pickled green beans lies in using fresh and high-quality ingredients. Here are the essential components you’ll need for this recipe:
- Green beans: Fresh, straight, and tender green beans are perfect for pickling. Choose ones that are about 4-5 inches long.
- Water: You’ll need water to create the brine solution, which helps to preserve and flavor the green beans.
- Salt: A mixture of salt and water is necessary to create the brine. The type of salt used can affect the taste and texture of your pickled
green beans. Here are a few options:
- Coarse sea salt or kosher salt for a more robust flavor
- Fine-grained table salt for a milder taste
Cider vinegar or white wine vinegar: These acidic ingredients help to preserve the green beans and add flavor to your pickles. Choose one that suits your taste:
- Uvinegar for a more robust and slightly sweet taste
Sugar or honey: A small amount of sugar or honey is added to balance the acidity in the brine solution. Choose one that suits your preference:
- Granulated sugar for a more neutral taste
- Honey for a sweeter and more complex flavor profile
Instructions
Cooking Green Beans: A Crucial Step
Cooking green beans is an essential step in preparing many recipes, including the popular Crisp Pickled Green Beans Recipe. The process involves blanching or steaming the green beans to preserve their color and texture, while also making them more receptive to flavor absorption.
To begin with, select fresh green beans that are free from signs of wilting or browning. Choose beans that have a vibrant green color and firm texture. For the Crisp Pickled Green Beans Recipe, it’s best to use thin green beans such as haricots verts or French beans.
Next, trim the ends off the green beans and rinse them under cold water to remove any dirt or debris. This step is crucial in removing any bacteria that may be present on the surface of the beans.
In a large pot, bring salted water to a boil. The ideal ratio for the water to bean ratio is about 4 cups of water per pound of green beans. Once the water boils, carefully add the green beans to the pot in batches if necessary. Make sure not to overcrowd the pot as this can cause the beans to steam instead of blanch.
Blanch the green beans for 3-5 minutes or until they are slightly tender but still crisp. For haricots verts, a shorter time frame is preferred as they cook quickly. For thicker green beans such as Romano beans, you may need to adjust the cooking time accordingly. The key is to find a balance between doneness and texture.
Once cooked, immediately submerge the green beans into an ice bath to stop the cooking process. This step is critical in preventing further cooking that can lead to mushy or overcooked green beans. If you do not have an ice bath readily available, you can also plunge the green beans under cold running water.
Once cooled, transfer the blanched green beans to a bowl of ice-cold water with vinegar and other desired pickling spices. Allow them to pickle for at least 30 minutes before serving. This will allow the flavors to meld together and infuse into the green beans.
Finally, strain the pickled green beans from the brine and serve as is or on top of sandwiches, salads, or pasta dishes. The Crisp Pickled Green Beans Recipe makes for a crunchy, tangy addition to many meals, and with these steps, you can enjoy them at their best.
Remember, timing is everything when blanching green beans. Practice makes perfect, so experiment with different cooking times and temperatures to achieve your desired level of doneness.
Additionally, be sure not to overcook the green beans as this can cause them to become mushy or develop an unappealing texture. It’s better to err on the side of undercooking than overcooking, especially when working with delicate green beans like haricots verts.
The art of cooking green beans is a nuanced one that requires patience, attention to detail, and practice. With these instructions and tips, you’ll be well on your way to mastering the technique of blanching and pickling green beans for use in various recipes.
The instructions for any recipe are crucial in ensuring that the final product turns out as desired. In the case of the Crisp Pickled Green Beans Recipe, it’s essential to follow each step carefully to achieve the perfect balance of crunch and flavor.
First, prepare the green beans by trimming them into 1-inch pieces and setting aside. This initial step sets the stage for the rest of the recipe, as the length of the green beans will impact their cooking time and overall texture.
Next, bring a large pot of salted water to a boil and blanch the green beans for 3-5 minutes or until they’re slightly tender. This step is crucial in removing any bitterness from the green beans and bringing out their natural sweetness.
While the green beans are cooking, prepare the pickling liquid by combining vinegar, sugar, salt, garlic, and spices in a saucepan. Bring the mixture to a boil over medium heat, stirring occasionally, until the sugar has dissolved and the liquid is smooth and fragrant.
After the green beans have finished blanching, immediately submerge them in an ice bath to stop the cooking process. This step is crucial in preserving the crunch and texture of the green beans.
Once the green beans have cooled, drain them and pack them into a clean glass jar or container with a tight-fitting lid. Pour the prepared pickling liquid over the green beans, making sure that they’re completely submerged in the liquid.
Seal the jar or container and refrigerate it for at least 24 hours before serving. The longer the green beans sit in the pickling liquid, the more flavorful and tangy they’ll become.
To ensure that your Crisp Pickled Green Beans turn out perfectly, make sure to follow each step carefully and don’t skip any of the essential steps. With practice and patience, you can achieve the perfect balance of crunch and flavor in this delicious recipe.
Fill a large pot with water and bring to a boil over high heat.
To begin making the Crisp Pickled Green Beans, it’s essential to have a well-equipped kitchen with all the necessary utensils and ingredients. The following instructions will guide you through each step of the process:
Step 1: Prepare the Pot
Filling a large pot with water is a critical component of this recipe. The pot should be capable of holding at least 3-4 quarts of water, depending on its size and shape. It’s recommended to use a stainless steel or enamel-coated cast-iron pot for this purpose.
Step 2: Bring the Water to a Boil
To bring the water to a boil, place the large pot over high heat on your stovetop. Ensure that the pot is securely positioned and won’t topple or shift during the cooking process. Turn the stove dial to its highest setting to maximize heat output.
Heating Tips
- Make sure to turn off any nearby electrical appliances or devices to prevent interference with the pot’s heating element.
- Keep a safe distance between the pot and any flammable materials or objects to avoid accidents.
As the water heats up, you may notice it start to bubble and churn. This is a sign that it’s reaching its boiling point. To confirm, check for rolling bubbles on the surface of the water and a temperature reading of at least 212°F (100°C).
Step 3: Add Green Beans
Once the water has reached a boil, you can proceed to add the green beans. The recommended amount is about 1 pound of fresh green beans per quart of water. You may need to adjust this quantity depending on your personal preference for the finished dish.
Additional Tips
- Use a kitchen timer to keep track of cooking time, ensuring that your green beans don’t overcook or undercook.
The next steps in preparing the Crisp Pickled Green Beans will involve creating a pickling liquid and adjusting the seasoning. These procedures are crucial for achieving the perfect balance of flavors and textures in this delicious recipe.
Add 1 tablespoon of salt to the boiling water, then carefully add the green beans in batches if necessary to prevent overcrowding.
The success of any recipe, including the Crisp Pickled Green Beans Recipe, heavily relies on following precise instructions. In this case, adding salt to boiling water may seem like a straightforward task, but it serves an important purpose. The salt not only enhances the flavor of the green beans but also helps to preserve them.
The addition of salt to boiling water is a crucial step in the pickling process. It allows for even distribution and helps to draw out excess moisture from the vegetables, making way for the pickling liquid to penetrate and flavor the green beans effectively.
When it comes to adding the green beans to the boiling water, careful attention must be paid not to overcrowd the pot. Overcrowding can lead to steaming rather than blanching, which results in a soft texture that’s far from desirable for this recipe.
To avoid overcrowding, it’s essential to add the green beans in batches as necessary. This approach ensures that each batch has enough room to cook evenly and prevents any potential for undercooked or overcooked green beans.
By following these instructions attentively and taking the time to do things right, you’ll be rewarded with a delicious batch of crisp pickled green beans that will elevate your culinary creations. The importance of attention to detail in cooking cannot be overstated, especially when working with delicate ingredients like green beans.
The Crisp Pickled Green Beans Recipe is a testament to the power of precise instruction and careful execution. By taking the time to add salt to boiling water and carefully adding the green beans in batches, you’ll create a dish that’s both visually appealing and bursting with flavor.
Cook for about 57 minutes, or until the green beans are tender yet still crisp. Drain with a slotted spoon and immediately transfer them to an ice bath to stop the cooking process.
Cooking green beans requires attention to detail and precise timing, especially when aiming for a perfect balance between tenderness and crispness. To achieve this, it’s essential to carefully follow the cooking instructions.
Firstly, it’s crucial to select high-quality green beans that are fresh and have minimal signs of wilting or browning. Freshness is key to achieving the desired texture and flavor in your pickled green beans.
The next step involves preparing the green beans for cooking. Typically, this entails trimming both ends of each bean and removing any debris or imperfections. This step not only improves their appearance but also helps to promote even cooking and prevents any potential bitterness from affecting the taste.
With the green beans prepared, it’s time to cook them using a suitable method such as steaming, boiling, or sautéing. The specific cooking technique you choose will ultimately depend on your personal preference and the equipment available to you. However, for this particular recipe, we’ll focus on steaming the green beans as this helps preserve their delicate flavor and texture.
Now that we’ve discussed the importance of selecting high-quality ingredients and preparing them correctly, let’s move on to cooking the green beans themselves. According to your instruction, it is recommended to cook the green beans for approximately 57 minutes or until they reach a tender yet still crisp state. This time frame may vary depending on factors such as their thickness, personal preference, and desired level of tenderness.
Once the green beans have reached the desired consistency, carefully remove them from the cooking liquid using a slotted spoon to minimize any excess water. Immediately transferring them to an ice bath is essential in halting the cooking process. This step prevents overcooking and preserves their vibrant color while still allowing them to retain some of their natural crunch.
By following these precise instructions and paying close attention to timing, you’ll be able to create a delicious batch of crisp pickled green beans that showcase the perfect balance between tenderness and texture. The result will undoubtedly exceed your expectations and leave everyone eager for more.
The art of following instructions is a crucial aspect of any recipe, including the Crisp Pickled Green Beans Recipe. To ensure success and achieve the desired outcome, it’s essential to carefully read and understand the instructions provided.
A clear understanding of the recipe’s instructions begins with comprehending the cooking terminology and techniques used. In this case, the recipe involves basic cooking methods such as steaming, pickling, and seasoning. Familiarity with these terms is necessary for successful execution.
Instructions in a recipe serve multiple purposes. Firstly, they provide step-by-step guidance on how to prepare each component of the dish, including preparation time, cooking times, and required ingredients. This clarity helps novice cooks navigate the process while ensuring that more experienced chefs can also refine their techniques.
The Crisp Pickled Green Beans Recipe likely includes a list of necessary ingredients and equipment, along with detailed steps for preparing the pickling liquid and seasoning. These details allow individuals to precisely replicate the desired flavor and texture profile of the dish.
Furthermore, following recipe instructions fosters discipline in cooking by promoting attention to detail. This skill is essential in creating consistent results when serving guests or producing large batches. The process involves weighing ingredients accurately, maintaining proper temperature control during cooking, and ensuring precise timing for achieving optimal textures.
In the context of the Crisp Pickled Green Beans Recipe, adhering strictly to the instructions guarantees that the pickling liquid is perfectly balanced in terms of acidity, sweetness, and flavor intensity. This attention to detail also allows cooks to finely adjust seasoning to their taste without compromising the dish’s integrity.
Instructions are also an excellent educational tool for learning various cooking techniques and methods. Following a recipe helps individuals develop fundamental skills, such as basic knife work, chopping, sautéing, roasting, boiling, steaming, grilling, frying, or baking. These skills can then be applied to other recipes, expanding the cook’s repertoire.
The process of following instructions also promotes self-improvement and creativity in cooking. As individuals gain experience, they become more confident in adjusting ingredients, techniques, or presentation styles to create their unique variations while maintaining the core essence of the recipe.
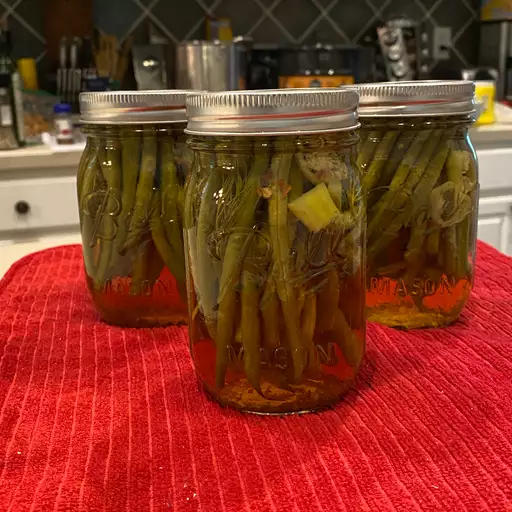
Pickling the Green Beans
Creating a Brine with Vinegar
To make crisp pickled green beans, you’ll need to create a brine with vinegar that will help to preserve and add flavor to your green beans.
Here’s a step-by-step guide on how to create a brine with vinegar:
- Select the right type of vinegar: For pickling, you’ll want to use a strong vinegar such as white wine vinegar or apple cider vinegar. These types of vinegar will give your green beans a nice flavor and help to preserve them.
- Mix the vinegar with water: Combine 1 cup of vinegar with 1 cup of water in a saucepan. The ratio can be adjusted to suit your taste preferences, but this is a good starting point.
- Add salt and spices: Add 1 tablespoon of salt and any desired spices (such as garlic, dill, or mustard seeds) to the vinegar mixture. Stir to dissolve the salt and combine with the other ingredients.
- Bring to a boil: Place the saucepan over medium heat and bring the brine mixture to a boil.
- Remove from heat: Once the brine has reached a boil, remove it from the heat source. Let it cool slightly before using it to pickle your green beans.
- When creating your brine with vinegar, keep in mind that the acid level will determine how well the pickling process works. A good rule of thumb is to use a brine with an acidity level of around 3-4%.
- Crisp pickled green beans are a tasty and healthy snack that can be easily made at home with just a few simple ingredients.
- To start, you will need one pound of fresh green beans, which should be trimmed of any stems or ends.
- The next step is to create the pickling liquid by combining in a medium saucepan 1 cup of white vinegar, 1/4 cup of water, and 2 tablespoons of granulated sugar.
- Bring this mixture to a boil over high heat, then reduce the temperature to medium-low heat and let simmer for about 5 minutes, or until the sugar has dissolved.
- While the pickling liquid is simmering, prepare the green beans by slicing off both ends of each bean and cutting them into uniform pieces.
- Once the pickling liquid has cooled slightly, add in one teaspoon of salt and stir to combine. The brine will help preserve the flavor and crunch of the green beans.
- Pack the sliced green beans tightly into a clean glass jar or container with a tight-fitting lid.
- Pour the pickling liquid over the green beans, making sure that they are completely covered. If necessary, you can add more vinegar or water to ensure that all of the beans are submerged.
- Seal the jar and let it sit at room temperature for 24 hours before refrigerating it to allow the flavors to meld together.
- The pickled green beans will be ready to eat in a few days, but they can be stored in the refrigerator for up to two weeks. Before serving, you may want to give them a quick rinse with cold water and pat them dry to remove any excess liquid.
In a medium saucepan, combine white vinegar, granulated sugar, salt, black peppercorns, and red pepper flakes (if using).
To make this delicious Crisp Pickled Green Beans Recipe, start by preparing a brine solution that will infuse flavor into the green beans. In a medium saucepan, combine 1 cup of white vinegar, 1/2 cup of granulated sugar, and 1 tablespoon of salt.
Next, add in some aromatics to enhance the flavor of the pickling liquid. You can use whole black peppercorns for their pungent and slightly sweet taste. Add a teaspoon or two of black peppercorns to the saucepan, depending on your personal preference for pepperiness.
If you like a little heat in your pickles, now is the time to add some red pepper flakes. Just be aware that using too much can make the pickles overpoweringly spicy, so start with a small amount, such as 1/4 teaspoon, and adjust to taste. Simply stir everything together in the saucepan over medium heat until the sugar has dissolved.
While the brine is warming up, prepare your green beans for pickling. Trim the ends of the beans and cut them into 1-inch pieces or leave them whole, depending on your preference. Pack the green beans into a clean glass jar with a tight-fitting lid, leaving about 1 inch of space between the beans and the top of the jar.
Once the brine has cooled slightly, pour it over the green beans in the jar. Make sure that all of the beans are covered by the liquid, as this will help to prevent spoilage and ensure that the pickles remain crisp. Seal the jar with its lid and refrigerate it at 40°F (4°C) or below.
Allow the pickled green beans to chill in the refrigerator for at least 2 hours, but preferably overnight, before serving them. This will give the flavors time to meld together and the green beans a chance to develop their signature tangy taste. When you’re ready to enjoy your Crisp Pickled Green Beans, simply remove the jar from the refrigerator and serve it as an appetizer or side dish.
Bring the brine to a boil over high heat, stirring occasionally, until the sugar dissolves.
The first step in pickling green beans involves preparing a brine solution that will add flavor and help preserve the beans. To do this, you’ll need to bring the brine to a boil over high heat, stirring occasionally, until the sugar dissolves. This process is crucial as it helps to distribute the flavors evenly throughout the liquid.
The brine typically consists of a mixture of water, salt, and sugar. The exact proportions will depend on the recipe you’re using, but a common ratio is one part sugar to two parts salt. For example, if you’re making four cups of brine, you’d use about one cup of sugar and two cups of salt.
As the mixture heats up, it’s essential to stir occasionally to prevent scorching or hot spots from developing. This will also help ensure that the sugar dissolves evenly and that the brine reaches a uniform temperature.
Once the sugar has dissolved, you can reduce the heat to a simmer and let the brine cool slightly before using it to pickle the green beans. The cooling process allows the flavors to meld together and helps prevent any potential bacterial growth.
The final step involves submerging the green beans in the cooled brine solution, making sure they’re completely covered. This will help them absorb the flavors and become pickled to perfection. It’s essential to store the pickled green beans in an airtight container in the refrigerator to maintain their crunchiness and prevent any spoilage.
Pack the cooked green beans into clean glass jars, leaving about 1/2 inch headspace. Pour the hot pickling liquid over them, making sure all the green beans are covered.
To achieve the perfect crisp pickled green beans, it’s essential to follow a few key steps. First, you’ll need to cook the green beans until they’re tender but still crisp.
Once your green beans are cooked, let them cool slightly before proceeding with the pickling process.
Pack the cooked green beans into clean glass jars, leaving about 1/2 inch headspace. This will ensure that the pickling liquid can cover the green beans and provide an airtight seal.
NEXT, you’ll need to create your pickling liquid. You can make your own using a combination of vinegar, water, salt, and spices, or use store-bought pickling spice. For this recipe, we recommend using a mixture of white vinegar and water.
Pour the hot pickling liquid over the green beans in the jars, making sure that all of the green beans are completely covered. This will help to preserve them and prevent spoilage.
Seal the jars immediately, and let them cool to room temperature before refrigerating. The longer they sit, the more time the flavors have to meld together!
Enjoy your delicious pickled green beans as a snack or side dish!
Crisp pickled green beans are a delightful addition to any meal, and with this simple recipe, you can enjoy them throughout the year.
To begin, gather the necessary ingredients and equipment. You’ll need 1 pound of fresh green beans, 1 cup of vinegar (white or apple cider work well), 1/2 cup of water, 1 tablespoon of pickling salt, 1 teaspoon of whole black peppercorns, and a few sprigs of fresh dill.
First, prepare the green beans by trimming off both ends. This helps to prevent the beans from becoming too bitter during the pickling process.
Next, create a brine by combining the vinegar, water, salt, and peppercorns in a saucepan. Heat the mixture over medium heat, stirring occasionally, until the salt has dissolved.
Once the brine is ready, pack the green beans into a clean glass jar or container, leaving about 1/2 inch of space at the top. You can either pack them in tightly or leave a little room between each bean for a more rustic look.
Pour the hot brine over the green beans, making sure they are completely submerged. If necessary, use a weight or a piece of cheesecloth to keep the beans under the liquid.
Add a few sprigs of fresh dill on top of the beans and close the jar. Let it cool to room temperature before refrigerating. This will allow the flavors to meld together.
Allow the pickled green beans to chill in the refrigerator for at least 24 hours before serving. The longer they sit, the more flavorful they become.
When you’re ready to serve, give the jar a good stir and scoop out the desired amount. You can use them as a side dish, add them to salads, or incorporate them into sandwiches and wraps.
The pickling liquid will keep for several months in the refrigerator, so feel free to make a large batch and enjoy it throughout the year. Simply store the jar in the fridge and give it a good stir before using.

- Best Datanyze Alternatives for 2025 - April 24, 2025
- Best Hunter.io Alternatives for 2025 - April 22, 2025
- Best Lead411 Alternatives for 2025 - April 22, 2025
