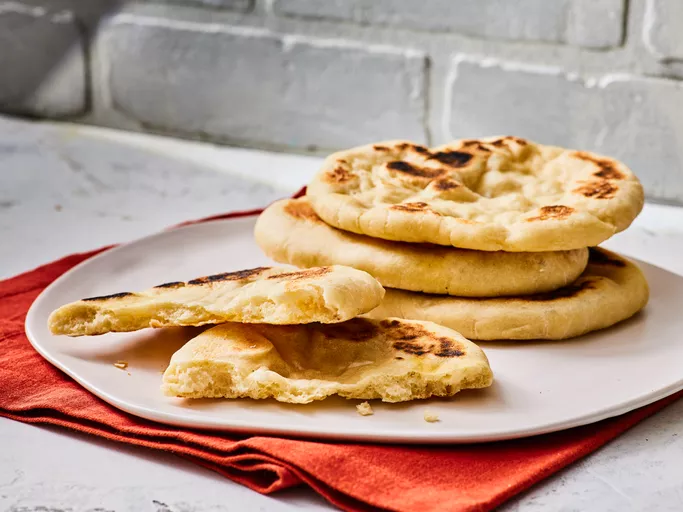
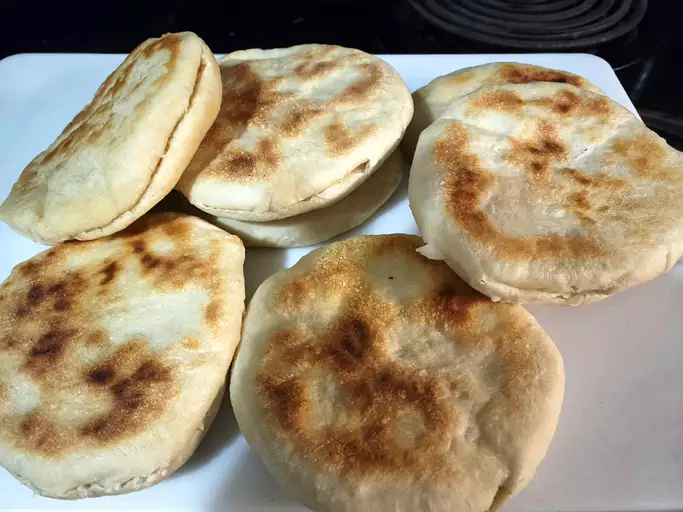
Ingredients and Equipment
FLOUR AND YEAST: The Foundation of Pita Bread
Pita bread, a staple in Middle Eastern cuisine, relies heavily on two essential ingredients: flour and yeast. These two components work together to provide structure, texture, and flavor to this popular flatbread.
Flour is the primary component of pita bread, making up about 80% of its weight. The type and quality of flour used can significantly affect the final product’s characteristics. All-purpose flour or bread flour with a high protein content (usually around 12-14%) is ideal for making pita bread.
Bread flour contains more gluten than all-purpose flour, which enables it to produce a stronger, chewier dough that can hold its shape during baking. The excess gluten in the dough causes the characteristic bubbles and pockets found inside pita bread, giving it its signature texture and appearance.
Yeast, on the other hand, is responsible for fermenting the sugars present in the flour, producing carbon dioxide gas as a byproduct. This process is known as fermentation, which contributes to the dough’s rising action and helps create the bread’s airy interior.
Active dry yeast or instant yeast can be used interchangeably in pita bread recipes. However, active dry yeast typically requires longer rehydration times and may produce a slightly different flavor profile compared to instant yeast.
When selecting flour for making pita bread, it is essential to consider factors such as protein content, moisture level, and ash content. A high-protein flour with minimal additives and lower ash content will yield better results and allow the bread’s natural flavors to shine through.
To ensure optimal yeast performance in pita bread recipes, keep in mind that yeast thrives best in a slightly warm environment (around 75-80°F/24-27°C). Excessive heat can cause the yeast to die off prematurely, resulting in an under-proofed or flat loaf.
The ingredients required for making homemade pita bread are relatively simple and can be found in most local grocery stores or supermarkets.
To start, you will need 2 cups of all-purpose flour. This type of flour has a low protein content which is essential for creating the light and airy texture that pita bread is known for.
You will also require 1 teaspoon of salt. This serves to enhance the flavor of the dough without overpowering it.
A packet or 2 teaspoons of instant yeast is necessary to help the dough rise during fermentation.
One tablespoon of sugar is needed to feed the yeast and promote healthy growth.
4 tablespoons of olive oil are used to add moisture and tenderness to the bread. You can also use other neutral-tasting oils like canola or grapeseed if you prefer.
1 cup of lukewarm water is required to create a smooth and pliable dough.
Optional ingredients that can be added for extra flavor include 2 cloves of minced garlic, 1 tablespoon of chopped fresh rosemary, or 1/4 teaspoon of ground black pepper.
To mix the dough, you will need a large mixing bowl, a wooden spoon or spatula for kneading, and a clean work surface for shaping.
A lightly floured baking sheet or pizza stone can be used to bake the pita bread in your oven. A cast-iron skillet or Dutch oven works well for creating crispy crusts.
Make sure you have a rolling pin or your hands to shape the dough into balls and then flatten them into disks.
All purpose flour (500g): Look for bread flour or high protein flour with a protein content of at least 12.5%.
To make a delicious homemade pita bread, it’s essential to have the right ingredients and equipment.
Ingredients
- All-purpose flour (500g): Look for bread flour or high-protein flour with a protein content of at least 12.5%. This type of flour will provide the necessary strength and elasticity to your pita bread.
- Salt: Add 1-2 teaspoons of salt to bring out the flavors in your pita bread.
- Sugar: You can add 1-2 tablespoons of sugar to help feed the yeast and promote fermentation.
- Yeast: Active dry yeast or instant yeast will help your dough rise. Use 1 teaspoon of active dry yeast or 0.5 teaspoons of instant yeast.
- Water: Use warm water (around 90°F to 100°F) for proofing the yeast and mixing the dough.
- Oil: You can add a tablespoon or two of oil to help lubricate your dough and prevent sticking.
Equipment
- Stand mixer: A stand mixer with a dough hook attachment will make mixing and kneading the dough much easier.
- Dough scraper: A dough scraper will help you scrape the dough off the counter and transfer it to your mixing bowl.
- Measuring cups and measuring spoons: Accurate measurements are crucial in bread-making, so make sure to use measuring cups and spoons to measure your ingredients.
- Baking steel or baking stone: A baking steel or baking stone will help you achieve a crispy crust and a well-cooked interior.
- Bench scraper: A bench scraper will come in handy when transferring the dough to your baking surface.
Remember, the quality of your ingredients and equipment will directly impact the outcome of your homemade pita bread. Invest in good-quality flour and equipment, and you’ll be well on your way to making delicious pita bread that will impress even the most discerning palates!
Yeast (1 teaspoon): Active dry yeast is the best type to use in this recipe; instant yeast can also be used but reduce the amount to half a teaspoon.
To make homemade pita bread, you will need to start with the right ingredients and equipment. For this recipe, you’ll be working with a type of yeast that plays a crucial role in rising the dough.
Yeast (1 teaspoon): Active dry yeast is the best type to use in this recipe; instant yeast can also be used but reduce the amount to half a teaspoon. This type of yeast is perfect for bread making as it’s easy to mix with the dough and produces consistent results.
When working with yeast, make sure you’re using fresh yeast to ensure it’s active and will help your dough rise properly. Old or stale yeast can lead to disappointing results and a flat loaf.
In addition to yeast, you’ll also need other ingredients such as flour, water, salt, sugar, and olive oil. These ingredients will come together to create the perfect blend of flavors and textures in your homemade pita bread.
In order to make delicious homemade pita bread, you will need the following ingredients
- 2 cups all-purpose flour
- 1 teaspoon salt
- 1 teaspoon sugar
- 1 packet active dry yeast (2 1/4 teaspoons)
- 1 cup warm water (around 100°F to 110°F)
- Optional: vegetable oil or olive oil for brushing
The equipment you will need is relatively basic
- A large mixing bowl
- A measuring cup and spoons
- A wooden spoon or a stand mixer with a dough hook attachment
- A clean, lightly floured surface for kneading the dough
- A baking sheet or oven stone for baking the pita bread
- A sharp knife or pastry cutter for cutting the dough into individual pitas
Some additional notes on equipment
- If you don’t have a stand mixer, kneading by hand can be just as effective.
- A pizza stone or baking steel in the oven can help to create a crispy crust and well-cooked interior.
- Make sure your mixing bowl is large enough to hold all of the dough. If the dough begins to overflow, you may need to mix it on the stovetop with a wooden spoon or spatula.
Instructions and Preparation
Mixing the Dough: A Balance of Wet and Dry Ingredients
In order to create a delicious homemade pita bread, it’s essential to follow the instructions carefully and prepare all the necessary ingredients before beginning.
The preparation process starts with measuring out the dry ingredients, including flour, yeast, salt, and sugar, in a large mixing bowl.
Next, you’ll need to measure out the wet ingredients, such as water, olive oil, and any other flavorings or spices you’d like to add, in a separate container.
Once both sets of ingredients are prepared, it’s time to begin mixing the dough.
The key to creating a balanced pita bread is finding the perfect harmony between wet and dry ingredients.
With your wet and dry ingredients ready, you can start incorporating them into one another, beginning with the yeast mixture.
Add the yeast to the dry ingredients and gently mix until just combined.
This initial mixing stage should be done with a gentle touch to avoid over-mixing the dough, which can cause it to become tough.
Next, you’ll need to gradually add in the wet ingredients while continuing to mix the dough.
The exact ratio of wet to dry ingredients will depend on your specific flour and the humidity in your environment, so don’t be afraid to adjust as needed.
A general rule of thumb is to start with a 1:2 ratio (one part water to two parts dry ingredients), but feel free to experiment and find what works best for you.
As you continue to mix the dough, it should begin to come together in a sticky ball.
Don’t worry if the dough seems too wet or sticky at this stage – just be patient and continue mixing until it starts to develop some structure.
It’s essential to remember that pita bread is meant to have a slightly soft texture, so avoid over-mixing the dough as much as possible.
If you’re unsure whether your dough has reached the right consistency, try poking it gently with your finger – if it springs back quickly, it’s ready to go!
Once the dough has reached the perfect balance of wet and dry ingredients, it’s time to knead it.
Kneading helps to develop the gluten in the dough, giving pita bread its characteristic chewy texture.
To knead your dough, simply transfer it to a floured surface and begin stretching and folding it for several minutes.
Be gentle but firm as you work the dough, focusing on developing a smooth and elastic texture.
When kneading is complete, shape your pita bread into balls or ovals – the traditional shape of a pita loaf!
Let the dough rest for several minutes before rolling it out thinly to create the signature pocket of air that gives pita its distinctive taste and texture.
Finally, bake your homemade pita bread in a hot oven until golden brown, then slice and serve with your favorite toppings or fillings!
In order to make homemade pita bread, it’s essential to first prepare the ingredients and equipment needed for the task.
The first step involves gathering all the necessary ingredients, including 2 cups of warm water, 2 teaspoons of sugar, 1 teaspoon of active dry yeast, 3 cups of all-purpose flour, 1 teaspoon of salt, and 2 tablespoons of olive oil.
Next, you’ll need to ensure that your mixing bowl and utensils are clean and free from any contamination. It’s also crucial to have a measuring cup, a wooden spoon or stand mixer with a dough hook attachment, a baking sheet lined with parchment paper, and a clean work surface for kneading the dough.
With the ingredients and equipment ready, it’s time to prepare the yeast mixture. In a small bowl, combine the warm water, sugar, and yeast. Stir gently to dissolve the yeast and let it sit for 5-10 minutes, or until it becomes frothy and bubbly.
Meanwhile, in a separate large mixing bowl, whisk together the flour and salt. Once the yeast mixture has reached its foamy state, add it to the dry ingredients and mix using a wooden spoon or stand mixer with a dough hook attachment until a shaggy dough forms.
At this point, you’ll need to knead the dough for approximately 10 minutes, either by hand or using the stand mixer. Kneading will help develop the gluten in the dough, leading to a better texture and structure in your pita bread.
To prepare for the next step of letting the dough rise, make sure you have a lightly floured surface ready. After kneading the dough, shape it into a ball and transfer it to the prepared surface. Cover the dough with plastic wrap or a damp towel to maintain humidity and let it rest in a warm place for about an hour, or until it has doubled in size.
Once the dough has risen, punch it down gently using your fists or a rolling pin to release any air pockets that may have formed. Divide the dough into 4-6 equal pieces, depending on how large you want your pita breads to be.
Roll out each piece of dough into a ball and then flatten it slightly into an oval shape, using your hands or a rolling pin to achieve the desired thickness. Place the shaped pita breads onto the prepared baking sheet lined with parchment paper, leaving about 1 inch of space between each one.
Finally, preheat your oven to 450°F (230°C) and bake the pita breads for 10-15 minutes on each side, or until they are golden brown and have a few blisters on the surface. Remove them from the oven and let them cool slightly before serving.
With these detailed instructions, you’ll be able to create homemade pita bread that’s soft, delicious, and perfect for sandwiches, wraps, or as a side dish to your favorite Middle Eastern dishes.
Water (375ml): Use lukewarm water between 100°F and 110°F (38°C to 43°C); cold water will slow down yeast activity.
To prepare homemade pita bread, it’s essential to understand the importance of water temperature and preparation.
When working with yeast, the optimal water temperature is between 100°F and 110°F (38°C to 43°C). Using cold water will slow down the yeast activity, which can lead to a longer proofing time and potentially affect the final texture and flavor of the bread.
To achieve the perfect water temperature, you can heat the water in the microwave or on the stovetop. Here are some guidelines
- For every cup (250ml) of water, heat it for 30-45 seconds in the microwave or until it reaches a temperature between 100°F and 110°F.
- If using the stovetop, bring the water to a boil, then reduce the heat to low and let it simmer for about 5 minutes to cool down to the desired temperature.
Before adding the yeast to the water, make sure the temperature has reached between 100°F and 110°F. If you’re using a thermometer, you can check the temperature by placing the probe directly into the water.
Once the water has cooled down to the correct temperature, you can proceed with adding the yeast and other ingredients according to your pita bread recipe.
Remember, achieving the right water temperature is crucial for proper yeast activation and fermentation. This will help your dough rise evenly and result in a delicious homemade pita bread.
Salt (1 teaspoon): Unrefined sea salt or kosher salt can add a richer flavor; use the fine crystals if available.
To prepare and execute the homemade pita bread recipe, it’s essential to have a thorough understanding of the ingredients and their respective roles in the baking process.
The first step is to gather all the necessary ingredients and equipment, including the salt mentioned above.
For this particular task, we are focusing on the use of unrefined sea salt or kosher salt, which offers a richer flavor profile compared to other types of salt.
To reap the benefits of these salts, look for products that have fine crystals. The finer texture will provide better distribution and absorption during the baking process.
The reasoning behind choosing this type of salt is rooted in the understanding that coarser crystals can leave a somewhat unpleasant texture on the palate, detracting from the overall dining experience.
By selecting a high-quality salt with fine crystals, you can elevate the flavor profile and enhance the enjoyment of your homemade pita bread.
To begin making homemade pita bread, it’s essential to prepare all necessary ingredients and equipment ahead of time. This will not only save you from last-minute stress but also ensure a smooth and enjoyable baking experience.
The first step in preparation involves gathering the required ingredients, which include 2 cups of warm water, 1 tablespoon of sugar, 2 teaspoons of active dry yeast, 3 cups of all-purpose flour, 1 teaspoon of salt, 2 tablespoons of olive oil, and any additional herbs or spices you prefer to add flavor.
Once you have all the ingredients within reach, it’s crucial to measure them accurately. Measuring is not only essential for achieving the perfect balance of flavors but also for obtaining the right texture and structure in your pita bread.
Next, make sure your workspace is clean and sanitized to prevent contamination and foodborne illnesses. If you’re planning to bake at home, ensure that your oven has been preheated according to the manufacturer’s instructions.
Prioritize preparing your yeast by combining it with warm water in a separate bowl. This process usually takes around 5-10 minutes or until the mixture starts frothing and bubbly. Yeast is a live organism that feeds on sugars, releasing carbon dioxide gas as its byproduct. A well-prepared yeast ensures your dough rises correctly.
While waiting for the yeast to activate, proceed with mixing all dry ingredients in another bowl – flour, salt, sugar. This blend forms the base of your pita bread and provides structure and texture when combined with the activated yeast mixture and olive oil.
After your yeast has frothed, it’s time to mix the dough by slowly pouring the wet ingredients into the dry mixture. Combine using a wooden spoon or stand mixer until the dough comes together in a sticky ball. Be mindful not to overmix at this stage, as it can lead to dense and hard pita bread.
Transfer your dough onto a lightly floured surface where you will knead it gently for about 10 minutes. This process works on developing the gluten strands within the dough that eventually provide elasticity to your pita bread when baked. Avoid overworking your dough as it might result in toughness.
Kneaded dough should be placed in a greased bowl, turning the dough to coat evenly with oil. Cover the bowl using plastic wrap or damp cloth and let your dough rest at room temperature for an hour to rise until doubled its original size. Monitor this process closely as overproofing might cause collapse during baking.
Once your dough is ready to shape, divide it into 8-10 equal portions, depending on how large you prefer your pita breads to be. Roll each portion out using a rolling pin to form flat circles of around 1/4 inch thickness. If desired, use a baking stone or preheated skillet for baking; otherwise, simply proceed with placing them directly onto the center oven rack.
Preheat your oven according to its specifications, usually at 500°F (260°C) with steam generated either through water placed in a pan inside the oven or by using steam injection on select models. Baking time will vary based on size and desired level of crispiness but generally takes between 2-5 minutes per pita bread.
Upon completion, remove your freshly baked pita from the oven and transfer onto wire racks for cooling. They will naturally puff up in the center as they cool, giving you perfectly baked homemade pita bread with a soft interior and crispy exterior.
Shaping and Baking the Pita Bread
The Science of Air Pocket Formation: Temperature and Steam Control
The art of shaping and baking pita bread is a delicate balance of technique and science, with the goal of producing perfectly formed, airy loaves with well-defined air pockets.
When it comes to shaping pita dough, the key is to handle it gently but firmly, avoiding over-working or stretching the dough too much, which can lead to dense, flat breads. A light touch and a smooth, even motion are essential for developing the dough’s gluten structure without damaging its delicate network of air pockets.
However, shaping pita bread is only half the battle; the real magic happens during baking, when steam and temperature come into play. To form those iconic bubbles within the bread, bakers must control both factors carefully.
The science behind air pocket formation in pita bread lies in the Maillard reaction, a chemical process that occurs when amino acids and reducing sugars react with heat to produce new flavor compounds and browning products. When the dough is heated, water molecules on its surface evaporate quickly, creating steam that accumulates within the loaf’s interior.
As the pita bread bakes, the steam gets trapped in the dough’s air pockets, causing them to expand and create the characteristic bubbles and crevices we associate with authentic Middle Eastern flatbreads. This process is crucial for maintaining a delicate balance of texture and structure within the bread.
The temperature at which pita bread is baked plays a significant role in controlling steam formation and, consequently, air pocket distribution. A relatively low oven temperature (around 450-500°F) allows the dough to release its natural sugars more slowly, preventing excessive browning or crisping on the surface, while still encouraging steam accumulation within.
On the other hand, higher temperatures accelerate sugar caramelization and Maillard reaction rates, leading to a crisper exterior but potentially dense, flat interior. To achieve optimal air pocket formation and texture balance in homemade pita bread, bakers must carefully control both temperature and steam levels throughout the baking process.
In terms of specific techniques for regulating steam during baking, several methods can be employed to influence the distribution of air pockets within the loaf
Baking directly on a hot stone or baking steel helps absorb excess moisture from the dough’s surface, encouraging more even browning and preventing over-crisping.
Using a steaming environment, such as a steam-injected oven or a domestic oven with a steam function, enhances natural sugar release and promotes deeper browning without compromising air pocket formation.
A combination of both approaches can be used to achieve the perfect balance between texture, structure, and appearance in homemade pita bread.
The process of shaping and baking pita bread is a crucial step in creating a delicious and authentic homemade pita. Here’s a detailed guide on how to shape and bake your pita bread
Shaping the Pita Bread
- Gently remove the dough from the bowl, and knead it briefly until it becomes pliable and easy to work with.
- Divide the dough into 4-6 equal pieces, depending on how large you want your pita breads to be. You can also use a kitchen scale to divide the dough equally.
- Roll each piece of dough into a ball and then flatten it slightly into a disk shape using your hands or a rolling pin.
- Use your thumbs to create a small indentation in the center of each disk, which will help the pita bread puff up during baking.
Baking the Pita Bread
The heat from the oven helps the yeast ferment and causes the pita bread to rise. Here’s how to bake your pita bread
- Preheat your oven to 450°F (230°C) with a baking stone or a cast-iron skillet inside. If you don’t have a baking stone or skillet, you can use a regular baking sheet.
- Dust the pita breads lightly with cornmeal and place them on the preheated baking stone or skillet. You can also brush the tops with olive oil for a crispy crust.
- Bake the pita bread for 2-3 minutes, or until it starts to puff up and the edges start to curl. Then, flip the pita bread over and bake for another 2 minutes.
- Remove the pita bread from the oven and let it cool on a wire rack for at least 5 minutes before slicing or serving.
By following these steps, you’ll be able to create delicious homemade pita bread that’s soft on the inside and crispy on the outside. Enjoy!
Oven temperature (500°F/260°C): A hot oven is necessary to create a puffed bread; use a pizza stone or baking steel for better results.
To shape and bake the pita bread, preheat your oven to a very hot temperature of 500°F/260°C. This high heat is crucial in creating a puffed and well-cooked bread. To ensure even baking, use a pizza stone or a baking steel, as these will help to distribute the heat evenly and promote a crispy crust.
Before placing the dough on the preheated surface, make sure it has been allowed to rest for a few minutes. This will allow the yeast to start fermenting and the dough to become easier to shape. Once the dough is relaxed, use your hands to shape each piece into a ball and then flatten it slightly into an disk shape.
Punch down the center of each disk with your fingers or a rolling pin to create a small indentation. This will help the dough to puff up during baking and give the pita bread its characteristic pocket.
Place the shaped dough on the preheated pizza stone or baking steel, leaving about 1-2 inches of space between each pita. Bake for 2-3 minutes, or until the bread starts to puff up and the surface is dry and slightly puffed.
Turn on your oven’s broiler (if it has one) and place a pan of water underneath it to create steam. This will help to create a crispy crust and a well-cooked interior. Broil for an additional 1-2 minutes, or until the bread is golden brown and puffed.
Remove the pita bread from the oven and let it cool on a wire rack for at least 5-10 minutes before serving. The longer it cools, the more tender and pliable it will become.
Steam injection (optional): Adding steam during the last minute of baking helps create a soft and pliable crust, as recommended by food scientists at the University of California, Davis.
The process of shaping and baking pita bread is a crucial step in creating a delicious and authentic homemade pita bread.
To begin, shape each piece of dough into an elongated ball, with the seam side facing upwards.
Maintain even tension while forming the dough to ensure that it develops a symmetrical shape.
Using your thumbs, create a small indentation in the center of each dough ball, and then punch down gently to release any air bubbles that may have formed.
Carefully place each shaped dough onto a lightly floured surface or a piece of parchment paper, leaving about an inch of space between each pita bread.
Maintain room temperature during this process to prevent the dough from rising too quickly and losing its shape.
Preheat your oven to 450-500°F (230-260°C) with a baking stone or baking sheet inside, allowing it to preheat for at least 30 minutes prior to baking.
Once the oven is hot, use a pizza peel or a piece of parchment paper to gently slide each pita bread onto the preheated baking stone.
Bake the pita breads for 2-3 minutes on the first side, until they start to puff up and develop a light golden brown color.
Using a spatula or tongs, carefully flip each pita bread over and continue baking for an additional 1-2 minutes, until it is cooked through and has a soft, pliable crust.
Steam injection: Adding steam during the last minute of baking helps create a soft and pliable crust, as recommended by food scientists at the University of California, Davis.
To inject steam into the oven, place a pan filled with about 1/2 cup of water on the bottom shelf of your oven or near the heating element.
Once you flip the pita breads over, close the oven door and allow the steam to circulate inside for an additional minute before removing the pita bread from the oven.
The result is a deliciously soft and pliable pita bread with a crispy crust, perfect for serving as a sandwich wrap or enjoying on its own with your favorite toppings.
To shape and bake the pita bread, follow these steps
Step 1: Shape the Dough
- After the first rise, punch down the dough to release any air bubbles.
- Divide the dough into 4-6 equal pieces, depending on how large you want your pita breads to be.
- Roll each piece of dough into a ball and then flatten it slightly into an disk shape using your hands or a rolling pin.
Step 2: Roll Out the Dough
- Place each disk on a lightly floured surface and use a rolling pin to roll out the dough to about 1/4 inch thickness.
- Maintain an even thickness throughout, as this will help the pita bread cook evenly.
Step 3: Let it Rest
- Place the rolled-out dough on a lightly floured surface or a piece of parchment paper and let it rest for about 10-15 minutes.
- This step is called proofing and allows the yeast to do its magic, causing the dough to rise slightly.
Step 4: Preheat your Oven
- Preheat your oven to 450°F (230°C) with a baking stone or baking sheet inside. If you don’t have a baking stone, a regular baking sheet will work too.
- This high heat is what will give your pita bread its signature char and crispy edges.
Step 5: Bake the Pita Bread
- Place 1-2 pita breads on the preheated baking stone or baking sheet, leaving about 1 inch of space between each pita bread.
- Bake for 2-3 minutes on the first side, until it starts to puff up and you see some bubbles forming.
Step 6: Flip and Bake Again
- Remove the pita bread from the oven and flip it over using a pair of tongs or a spatula.
- Return it to the oven for another 1-2 minutes, until the other side is also lightly charred and crispy.
- Your homemade pita breads are now ready to be served with your favorite fillings!
- Best Lusha Alternatives for 2025 - April 22, 2025
- Best Overloop Alternatives for 2025 - April 22, 2025
- Best 6sense Alternatives for 2025 - April 22, 2025

