
Ingredients
Garlic Selection
The first step to making a delicious black garlic recipe is selecting high-quality ingredients, particularly when it comes to garlic selection. The quality and type of garlic used will significantly impact the flavor, aroma, and overall outcome of your dish.
When it comes to choosing garlic for cooking, there are several factors to consider. First, look for firm, dry bulbs with no signs of sprouting or mold. This indicates that the garlic is fresh and has been stored properly.
The color of the garlic bulb can also give you a clue about its quality. A good-quality garlic bulb should have a deep brown or reddish-brown skin, which will turn darker as it ages. Avoid bulbs with pale, greenish, or soft skins, as they may be older or not stored well.
There are several types of garlic available in the market, each with its unique flavor and aroma. For black garlic recipes, choose a high-quality variety that is naturally sweet and mild in flavor, such as ‘Silver skin’ or ‘Creole’.
Avoid using supermarket garlic for making black garlic recipe. Instead, opt for specialty stores or farmers’ markets where you can find heirloom varieties of garlic. These will not only provide better flavor but also a more intense aroma.
When purchasing garlic in bulk, consider the storage conditions and how you plan to use it within a certain timeframe. Fresh garlic is usually best consumed within a few weeks, while aged garlic can last longer with proper storage.
In some cases, you may also come across ‘black garlic’ or ‘fermented garlic’ at stores. While this type of garlic has been fermented and turned black, be aware that it has undergone significant changes in flavor and texture compared to fresh garlic.
Select firm bulbs with no signs of sprouting or mold.
Fresh garlic bulbs are the foundation for making black garlic, and selecting the right ones is crucial for achieving optimal flavor and aroma.
The first step in selecting firm garlic bulbs with no signs of sprouting or mold is to choose bulbs that have not yet started to sprout. Sprouted garlic tends to be bitter and has a different texture than non-sprouted garlic, which can affect the overall quality of the black garlic.
When selecting garlic bulbs, look for firm, compact heads with no visible signs of decay or mold. Check the skin of each bulb for any soft spots, wrinkles, or discoloration. Avoid bulbs that are soft to the touch or have visible cracks in the skin, as these can be indicators of mold growth.
Some garlic varieties, like Elephant Garlic and Silverskin Garlic, tend to produce firmer bulbs with fewer chances of sprouting than other types. However, regardless of the variety, all garlic bulbs should be firm to the touch and have no visible signs of mold or decay.
In addition to selecting firm garlic bulbs, it’s also essential to choose bulbs that are relatively fresh. Fresh garlic is easier to cook down into a rich, caramelized paste than older garlic, which can become dry and papery over time.
When purchasing garlic from the store, check the packaging for any signs of moisture or mold. If you’re growing your own garlic, ensure that it’s stored in a cool, dry place to prevent sprouting or mold growth.
In summary, when selecting firm bulbs with no signs of sprouting or mold for making black garlic, look for compact, firm heads with no visible signs of decay or mold. Choose relatively fresh bulbs, and consider the variety to minimize the risk of sprouting or mold growth.
Choose a variety like ‘Silver skin’ or ‘Creole’, which is higher in moisture content.
In order to create an authentic black garlic recipe, it’s essential to select the right variety of garlic that has a higher moisture content. This will help in achieving the desired result of soft, sticky, and sweet black garlic.
Some popular varieties of garlic with high moisture content include ‘Silvers kin’ and ‘Creole’. These types of garlic have a thicker papery skin and are more prone to developing the characteristic dark purple or almost black color of fermented black garlic.
‘Silvers kin’ garlic, in particular, is known for its sweet flavor and high moisture content, making it an ideal choice for creating rich and intense black garlic. It’s also relatively easy to work with due to its soft and compact nature.
On the other hand, ‘Creole’ garlic has a slightly more robust flavor profile compared to ‘Silver skin’, but still maintains its high moisture content. This makes it an excellent choice for those who prefer a slightly more pungent black garlic taste.
When selecting a variety of garlic, make sure to choose bulbs that are fresh and have no signs of sprouting or damage. This will ensure the best flavor and texture outcome in your fermented black garlic.
In addition to choosing the right variety of garlic, it’s also crucial to understand the process involved in making black garlic. The fermentation process typically involves wrapping whole garlic bulbs in foil or parchment paper, then heating them to a high temperature (around 150-200°F) for several weeks. This helps break down the sugars and starches within the garlic, resulting in its characteristic dark color and intense flavor.
By following these steps and choosing the right variety of garlic, you’ll be well on your way to creating authentic black garlic with a rich, sweet flavor that’s sure to elevate any dish.
Preparation Methods
Curing Process
Culinary enthusiasts often explore various ways to prepare ingredients for optimal flavor and nutritional value, as exemplified by the preparation methods and curing process involved in creating Black Garlic.
Preparation Methods
To create black garlic, several preparation methods can be employed:
- Pit-roasting method: This traditional method involves placing whole bulbs of garlic in a pit or oven at temperatures between 150°C to 200°C (302°F to 392°F) for 2-4 weeks. The heat breaks down the enzymes, creating a soft, dark paste.
- Low-Temperature Fermentation: Similar to the previous method, this process also employs low temperatures but uses fermentation instead of roasting. The garlic is left at room temperature (around 20-25°C) for several weeks.
- Solar Dehydration Method: In this approach, whole bulbs of garlic are exposed to direct sunlight and allowed to dry gradually over a period of weeks.
- Chemical-Free Preservation Method: This method uses vacuum-sealed containers with controlled temperatures (between 20-30°C) to preserve the garlic for an extended period.
Curing Process
The curing process transforms raw garlic into a rich, savory black garlic paste. A key aspect of this transformation is the reduction of sulfur compounds through the breakdown of enzymes:
- During the curing period, an enzyme called alliinase breaks down sulfenic acid, resulting in the formation of a sweet and savory flavor profile.
- The transformation involves complex chemical reactions where the breakdown products combine to create unique flavor compounds.
- The reduction of sulfur compounds also contributes to the characteristic dark color and velvety texture of black garlic.
While various preparation methods can be used, pit-roasting remains a widely employed technique for creating high-quality black garlic. The slow-cooking process at low temperatures enables optimal transformation of the enzymes within the garlic bulbs.
Store garlic at room temperature (around 60°F to 70°F) for 46 weeks, flipping the bulbs every week.
To prepare black garlic, it’s essential to choose high-quality heads with tight, dry wrappers. Store garlic at room temperature (around 60°F to 70°F) for 46 weeks, flipping the bulbs every week, to initiate fermentation.
This slow process involves creating a favorable environment for mold growth, which breaks down the sugars and enzymes in the garlic, turning it dark brown or black. The resulting flavor is rich, sweet, and savory, with notes of molasses, soy sauce, and spices.
It’s worth noting that some manufacturers use artificial heating methods to accelerate fermentation, but this method is more labor-intensive and requires patience. If you’re interested in trying this recipe at home, be sure to monitor the temperature and humidity levels to achieve optimal results.
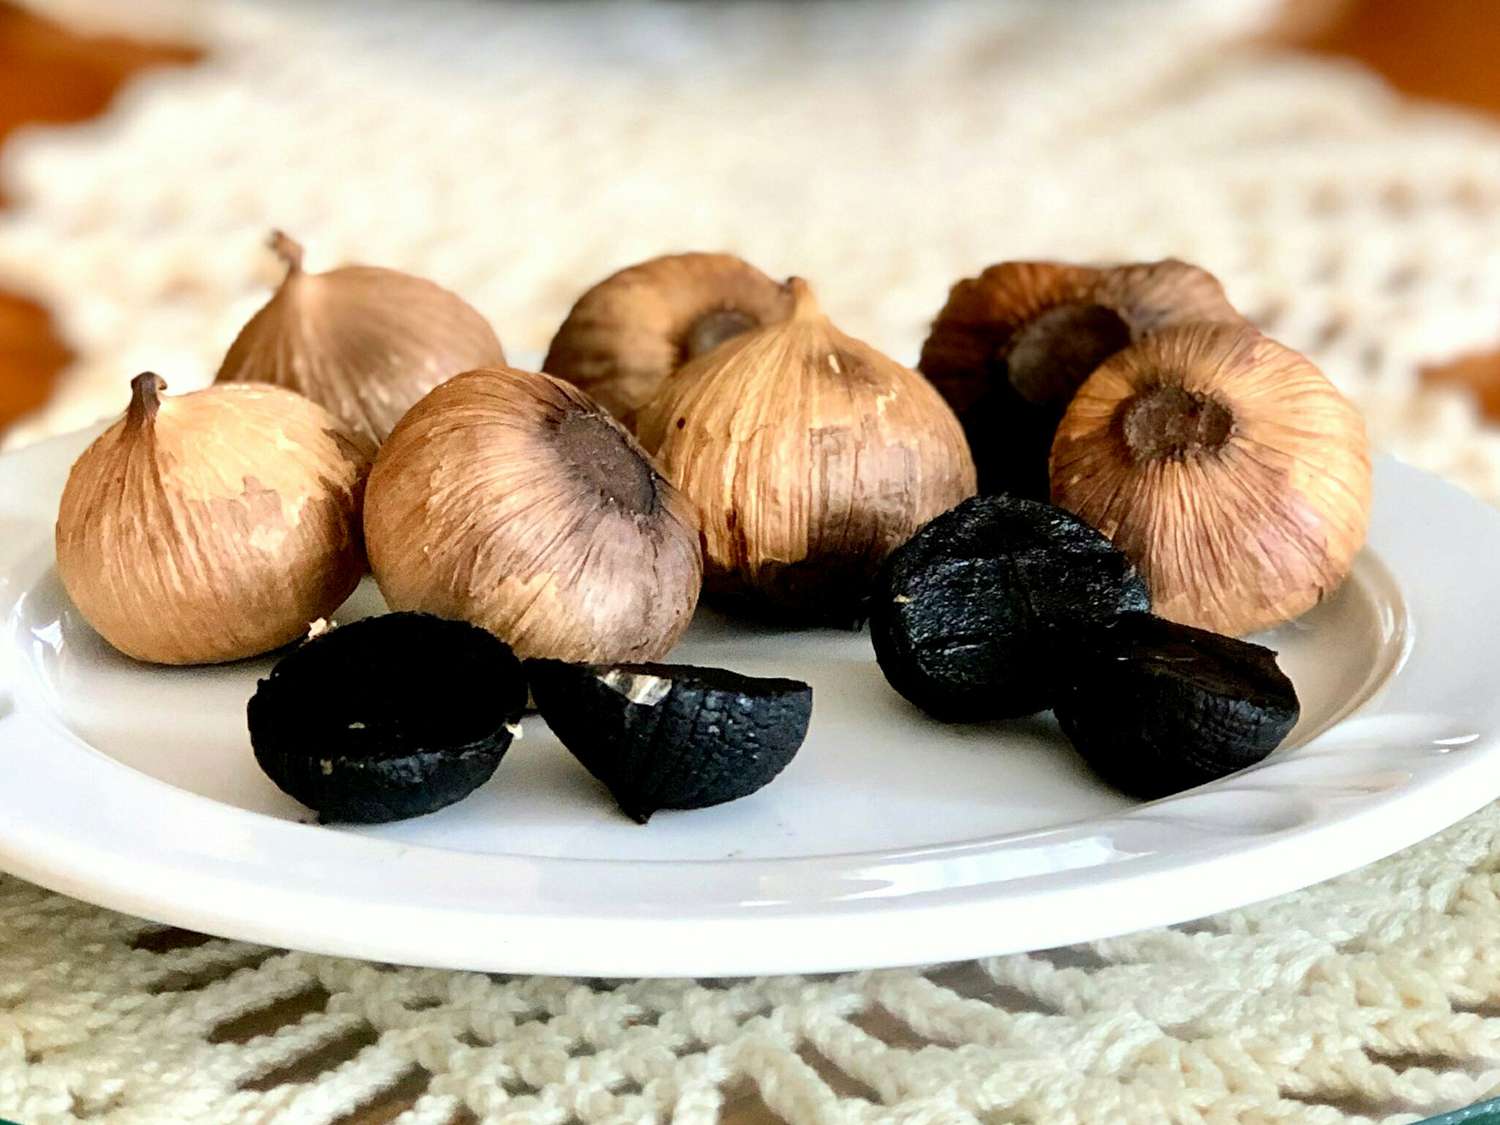
To determine if your black garlic is ready, check for a deep brown or black color, softness, and a sweet, pungent aroma. It’s also essential to store it properly after fermentation to maintain its flavor and texture.
Monitor for sprouting and remove any green shoots.
The preparation method for black garlic involves several stages to achieve the desired result. First-stage preparation typically includes cleaning and peeling the garlic bulbs.
This can be done by hand, ensuring that all outer layers are removed.
Next, wrap the bulbs in aluminum foil or a heat-resistant material and place them in an oven set at 200°F (90°C) for about 30-40 minutes to allow the garlic to soften.
This initial process helps break down the cell structure of the garlic, making it easier for fermentation to occur later on.
After heating, remove the foil and let the garlic cool slightly before transferring it to an airtight container or a glass jar with a lid.
The next stage in preparing black garlic is to allow it to ferment at room temperature (around 70°F – 75°F) for several weeks – typically between six weeks to three months. During this time, the natural enzymes within the garlic will break down and transform into new compounds.
Monitor the black garlic regularly while it’s fermenting. This can be done by checking the color and smell of the garlic. The fermentation process is complete when the garlic develops a rich, sweet aroma and the cloves turn dark brown to almost black in color.
Once fermented, check for any signs of sprouting – green shoots starting to emerge from the cloves – as this can indicate spoilage or improper storage conditions.
If sprouting is detected, remove all green shoots from the garlic to prevent them from continuing to grow and spoiling the rest of the black garlic. This step requires careful handling to avoid damaging the cloves.
The final step in preparing black garlic involves storing it properly. This can be done by sealing the container or jar with an airtight lid to maintain humidity and keep contaminants out. The black garlic should then be stored in a cool, dark place for up to six months after fermentation is complete.
After curing, store in a cool, dark place like a pantry or cupboard.
- To ensure that the black garlic retains its flavor and aroma, it’s essential to store it properly after curing.
- A cool, dark place like a pantry or cupboard is ideal for storing black garlic.
- This type of environment prevents light from degrading the antioxidants and sulfur compounds that are responsible for the unique flavor and aroma of black garlic.
- High humidity can also cause the formation of mold, which can ruin the product, so it’s crucial to store black garlic in a well-ventilated area with low humidity levels.
- Keep the black garlic away from direct sunlight, heat sources, and strong-smelling foods as these can affect its flavor and aroma.
- It’s also essential to keep the black garlic cloves separated and not touching each other, as this prevents moisture from accumulating between them and promotes mold growth.
- When storing black garlic in a pantry or cupboard, it’s recommended to use an airtight container to maintain a consistent level of humidity and prevent contamination.
- Make sure the container is clean and dry before placing the black garlic cloves inside, and consider adding a desiccant packet to absorb excess moisture if needed.
Cooking Techniques
Roasting vs. Fermenting
Cooking techniques play a vital role in transforming raw ingredients into delicious dishes, and when it comes to specific processes like roasting and fermenting, understanding their differences can elevate any recipe to new heights.
Roasting is a dry-heat cooking method that uses high temperatures to caramelize the natural sugars in food, resulting in a rich, savory flavor. This technique is perfect for bringing out the best in ingredients like meats, vegetables, and roots, such as carrots or beets. When roasting, the Maillard reaction occurs – an interaction between amino acids and reducing sugars that creates new compounds with distinct flavors and aromas.
Fermenting, on the other hand, is a wet-heat process where microorganisms like bacteria, yeast, or mold break down food components into their constituent parts. This technique not only enhances flavor but also increases nutritional value and texture. Fermentation can occur through various methods, including lactic acid fermentation (sauerkraut or kimchi), alcoholic fermentation (beer or wine), and even lacto-fermentation (kefir or yogurt).
In the context of a Black Garlic Recipe, both roasting and fermenting are crucial steps. Roasting garlic at high temperatures caramelizes its natural sugars, creating an intense, sweet flavor that’s perfect for sauces and dressings. However, this process is not suitable for preserving garlic long-term, which is where fermentation comes in.
By fermenting roasted garlic, the resulting Black Garlic develops a deep, pungent aroma and a rich, savory taste. The longer it ferments, the more complex the flavors will be. This technique requires patience but yields a product that’s perfect for using as a condiment or adding depth to sauces.
For those interested in creating their own Black Garlic Recipe, it’s essential to understand both roasting and fermenting techniques before beginning. By combining these methods, you’ll end up with a deliciously rich ingredient that will elevate your cooking and impress friends and family alike.
When selecting ingredients for Black Garlic, look for heads of garlic that are firm and compact – avoid those with soft spots or signs of sprouting. After roasting, allow the garlic to cool completely before peeling off its skin and placing it into an airtight container for fermentation.
A word of caution: fermentation times can vary depending on factors such as temperature and humidity. To achieve optimal results, monitor your Black Garlic regularly, tasting it periodically to determine when it has reached your desired level of depth and flavor.
Through the combination of roasting and fermenting techniques, you’ll be able to create a deliciously complex ingredient that will add new dimensions to any dish – from roasted meats and vegetables to sauces and dressings. Give Black Garlic a try today and discover its unique charm for yourself!
Try roasting garlic at 400°F (200°C) for 3040 minutes to get a caramelized flavor.
The process of cooking and preparing food involves various techniques, which can greatly impact the final product’s taste, texture, and aroma. Among these methods, roasting garlic stands out as an excellent approach to infuse it with a rich, caramelized flavor.
Roasting is a dry heat cooking method that requires low moisture to produce a savory, slightly sweet, and concentrated flavor from garlic. The key factor in achieving this flavor profile lies in the temperature and cooking time, which should be carefully controlled.
For roasting garlic to achieve a caramelized taste, it’s essential to set your oven at a high temperature of 400°F (200°C). This heat level will not only facilitate the breakdown of starches into sugars but also help develop a deep brown color on the surface of the garlic.
The cooking time for roasting garlic at 400°F (200°C) is crucial. Cooking it for approximately 3040 minutes should be sufficient to achieve a caramelized flavor, though it may vary based on your personal preference and desired level of darkness. It’s worth noting that this extended period allows the natural enzymes in garlic to break down into new compounds with distinct flavors.
A key point to remember is that the initial 10-15 minutes at high heat will cause the garlic to start browning, but it may not yet have reached its full flavor potential. The remaining time (approximately 30 minutes) should allow for a slower, even cooking process that prevents burning and produces an intense, sweet aroma.
Once cooked, you can store the roasted garlic in an airtight container at room temperature for later use. To release its caramelized flavor, simply squeeze the roasted garlic out of its skin or chop it into small pieces to be added to your favorite dishes.
For fermented black garlic, roast the cloves in an oven at 150°F (65°C) for 23 weeks or until they turn into a dark, sticky paste.
To produce fermented black garlic, several key cooking techniques are employed to bring out its rich and complex flavor profile. The process involves a combination of roasting, fermentation, and storage to transform regular garlic into a sweet and savory paste.
Roasting Garlic
The first step in making fermented black garlic is to roast the cloves at 150°F (65°C) for an extended period of time. This process can take anywhere from 3 to 4 months, depending on the desired level of caramelization and darkness.
To achieve this slow roasting, it’s essential to maintain a consistent temperature throughout the cooking process. A lower oven temperature ensures that the garlic is cooked evenly without developing any burnt or charred flavors.
Fermentation
The second step in making fermented black garlic involves allowing the roasted cloves to ferment for several weeks. This allows the natural enzymes present in the garlic to break down and develop new flavor compounds.
Benefits of Fermentation
- Fermentation helps to enhance the bioavailability of nutrients in the garlic, making it easier for the body to absorb its health benefits
- The fermentation process contributes to the development of new flavor compounds and aromas that are characteristic of black garlic
- Fermentation also helps to reduce the risk of spoilage by creating an environment that is inhospitable to bacteria and other pathogens
Storage
Once the fermented black garlic has reached the desired level of darkness and stickiness, it’s essential to store it properly to maintain its quality. The garlic should be stored in an airtight container, away from direct sunlight and heat sources.
It’s worth noting that fermented black garlic can be quite sticky and may require some gentle handling when storing or transferring it to different containers. However, with proper storage conditions, the fermented black garlic can last for several months without losing its flavor and texture.
Preparation Tips
- Use a consistent temperature throughout the roasting process to ensure even cooking
- Maintain humidity levels during fermentation to prevent drying out and promote healthy bacterial growth
- Handle fermented black garlic gently when storing or transferring it to different containers to avoid breakage
Using Fermented Black Garlic
Fermented black garlic can be used in a variety of dishes, from savory sauces and marinades to stir-fries and salads. It adds a rich, sweet flavor that is perfect for balancing out bold flavors or adding depth to lighter dishes.
Recipe Ideas
- Garlic shrimp with fermented black garlic sauce
- Fermented black garlic and mushroom stir-fry
- Black garlic and blue cheese salad dressing
Conclusion
With these techniques and tips, you can create your own delicious fermented black garlic at home. From the slow roasting process to the fermentation and storage phases, each step contributes to the development of its unique flavor profile.

- Best LeadsGorilla Alternatives for 2025 - April 22, 2025
- Best Leadzai Alternatives for 2025 - April 22, 2025
- Best LeadSwift Alternatives for 2025 - April 21, 2025
