
Ingredients
Fresh Basil Leaves: The Star of the Show
In the world of herbs, few can claim the same level of fame and versatility as fresh basil leaves. At the heart of many a Mediterranean dish, these emerald green wonders add a burst of flavor that elevates even the simplest of recipes to new heights. In this article, we’ll explore the star of our show: Fresh Basil Leaves.
Native to India, Africa, and Southeast Asia, basil’s origins are shrouded in mystery, but its allure is undeniable. A member of the mint family (Lamiaceae), basil’s delicate flowers and leaves have been prized for their fragrance, flavor, and medicinal properties since ancient times.
There are many varieties of fresh basil leaves, each with its unique characteristics and uses:
- Sweet Basil: The most commonly used variety in cooking, sweet basil has a warm, slightly spicy aroma and is often associated with Italian cuisine.
- Thai Basil: Also known as “Holy Basil,” this variety has a more pronounced anise flavor and is typically used in Thai and Southeast Asian recipes.
- Genovese Basil: Native to the Mediterranean region, this basil variety has a strong, pungent aroma and is often used in Italian pesto.
- Lemon Basil: As its name suggests, lemon basil adds a bright, citrusy flavor to dishes and is perfect for summer recipes.
- When selecting fresh basil leaves, look for:
- Vibrant color: Choose basil with rich green leaves or vibrant purple stems (depending on the variety). Avoid wilted or yellowing leaves.
- Firm texture: Fresh basil should feel slightly stiff to the touch. Avoid leaves that are soft or mushy.
- Aroma: Give the basil a sniff; fresh leaves should have a strong, pungent aroma.
- Once you’ve chosen your perfect basil, here’s how to store and use it:
- Store in an airtight container: Keep fresh basil refrigerated in a plastic bag or airtight container. This will help retain its flavor and fragrance.
- Use within 5-7 days: Fresh basil is best used within a week of purchase, so be sure to use it before it starts to wilt.
- Chop just before using: To preserve the herb’s potency, chop fresh basil leaves immediately before adding them to your recipe. This will release its essential oils and flavors.
- With these tips and tricks, you’re ready to shine with the star of our show: Fresh Basil Leaves!
1 cup fresh basil leaves
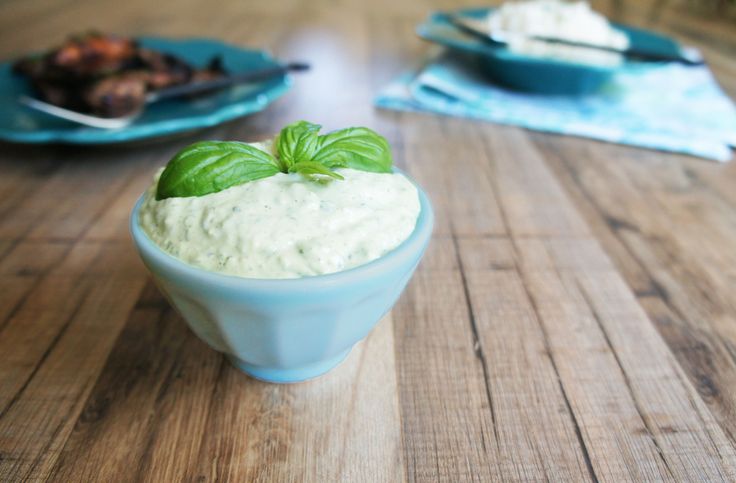
When it comes to making a delicious Basil Aioli recipe, one of the key ingredients you’ll need is 1 cup fresh basil leaves.
Fresh basil leaves are a crucial component in this recipe as they provide the distinctive flavor and aroma that defines the dish.
Here’s what you should look for when selecting your basil:
- Freshness: Choose leaves with no signs of wilting or yellowing, indicating optimal flavor and aroma.
- Color: Optimal color is vibrant green, but some brown edges are acceptable if the rest of the leaf appears healthy.
To ensure you’re getting the best possible basil for your Basil Aioli recipe, make sure to:
- Purchase from a reputable supplier or local farmer’s market. This will increase your chances of getting high-quality leaves.
- Choose organic options when available, as they tend to have better flavor and aroma compared to conventionally grown basil.
In terms of handling the basil, it’s best to:
- Handle leaves gently to avoid bruising or tearing, which can cause bitterness in the finished aioli.
- Store in an airtight container or plastic bag to maintain freshness and prevent moisture loss.
When preparing the basil for your Basil Aioli recipe, be sure to:
- Wash the leaves thoroughly with cold water to remove any dirt or debris.
- Dry the leaves gently using a salad spinner or by patting them dry with paper towels.
By following these guidelines, you’ll be able to select and prepare high-quality fresh basil leaves for your Basil Aioli recipe, ensuring an exceptional taste and aroma in your finished dish.
3 cloves garlic, peeled and minced
- The ingredient list for making Basil Aioli calls for a specific type of garlic that has been peeled and minced. Here are the details:
3 cloves garlic, peeled and minced
- In this recipe, 3 cloves of garlic are required to be used as an essential flavor component.
- The process of peeling and mincing the garlic is crucial in releasing its oils and flavors.
- To peel a clove of garlic, gently squeeze it between your fingers or use a spoon to remove the papery skin. You can also place it under running water and rub off the skins.
- Once peeled, cut each clove into very fine pieces using a sharp knife. This will help in evenly distributing the flavors throughout the aioli.
Why is this amount of garlic important?
The 3 cloves of garlic may seem like an insignificant quantity, but they are actually quite potent. When minced and cooked with other ingredients, they will add a depth of flavor that is essential to the Basil Aioli’s signature taste.
Here’s why you should not reduce or omit this ingredient
- The pungency of garlic complements the sweetness of the basil and the richness of the aioli, creating a well-balanced flavor profile.
- Garlic has antibacterial properties that can help preserve the aioli by preventing the growth of unwanted bacteria.
- This ingredient is what gives the Basil Aioli its distinct aroma, making it an essential component in this recipe.
In summary, 3 cloves garlic, peeled and minced are a crucial part of the Basil Aioli Recipe. They add depth of flavor, preserve the aioli, and provide a distinctive aroma that complements the other ingredients in this dish.
1/2 cup mayonnaise (preferably Duke’s or Hellmann’s)
The foundation of a delicious Basil Aioli recipe lies in selecting the right ingredients, and for many people, this means starting with high-quality mayonnaise. For those who swear by the classic Southern brand, Duke’s is often preferred due to its rich, creamy texture and balanced flavor.
For others, Hellmann’s may be their go-to choice, as it has a similar consistency to Duke’s but with a slightly sweeter undertone that pairs well with fresh herbs. While these two brands are commonly favored for their taste and consistency, feel free to use any mayonnaise that suits your palate.
Regardless of the chosen brand, using 1/2 cup of mayonnaise as the base provides a rich foundation for the aioli, allowing it to hold its own against the strong flavors of fresh basil. When combining the mayonnaise with other ingredients like garlic, lemon juice, and olive oil, you can create a harmonious balance that elevates the dish to new heights.
The importance of using high-quality mayonnaise cannot be overstated, as it directly affects the overall taste and consistency of the aioli. A good quality mayonnaise ensures that your Basil Aioli has the right amount of creaminess, tanginess, and richness without being overpowering.
Some people might ask why they can’t just use store-bought mayonnaise, but it’s worth noting that the difference between high-quality and lower-quality mayonnaise is often stark. The former will provide a depth of flavor and a silky texture that complements the other ingredients perfectly.
Key considerations:
- The rich, creamy texture provided by Duke’s or Hellmann’s mayonnaise
- The balanced flavor profile of these brands compared to others
- The importance of using high-quality mayonnaise for optimal taste and consistency
- The impact of choosing a different brand on the overall aioli recipe
1 tablespoon freshly squeezed lemon juice
The use of 1 tablespoon freshly squeezed lemon juice in the Basil Aioli Recipe serves a crucial role in achieving the perfect balance of flavors and textures.
Lemon juice, being acidic in nature, plays a significant part in breaking down the ingredients and creating an emulsion that is smooth and creamy. When combined with egg yolks, garlic, and olive oil, it helps to stabilize the mixture and prevents it from separating or becoming too thick.
The acidity of the lemon juice also helps to enhance the flavor of the basil leaves, allowing their bright and herbaceous notes to shine through in the finished aioli. This is particularly important in a Basil Aioli Recipe, as the dish relies heavily on the freshness and aroma of the basil for its character.
It’s worth noting that using freshly squeezed lemon juice is essential, as bottled or artificial lemon flavorings will not provide the same level of brightness and depth to the aioli. The acidity and flavor compounds present in freshly squeezed lemon juice are what make it an ideal addition to this recipe.
When adding the lemon juice to the mixture, be sure to start with a small amount (1 tablespoon) and adjust to taste. Some people may prefer a stronger or weaker citrus flavor in their aioli, so it’s better to err on the side of caution and add more lemon juice as needed rather than risking overpowering the other ingredients.
In conclusion, 1 tablespoon freshly squeezed lemon juice is an essential component of the Basil Aioli Recipe, serving not only as a flavor enhancer but also as a stabilizer for the mixture. Its acidity helps to break down the ingredients and create a smooth, creamy texture that is perfect for dipping bread or vegetables in.
Salt and pepper to taste
In the realm of cooking, ingredients play a crucial role in determining the flavor profile of a dish. When it comes to a Basil Aioli recipe, the quality and quantity of the ingredients can make all the difference between a mediocre condiment and an exceptional one.
One ingredient that is often overlooked but plays a vital role in the overall taste of the Basil Aioli is salt. Salt enhances the natural flavors of the other ingredients and helps to bring out their unique characteristics. In this recipe, we recommend using high-quality sea salt or kosher salt to add depth and complexity to the aioli.
Another essential ingredient is pepper, which adds a subtle yet crucial note to the basil flavor. Like salt, black pepper helps to balance out the flavors in the aioli and prevents any one ingredient from overpowering the others. When using pepper, it’s best to grind fresh peppercorns just before adding them to the mixture, as this will ensure the maximum amount of flavor is released.
The phrase “to taste” is often used in recipes to indicate that the addition of salt and pepper should be done according to personal preference. This can vary greatly from person to person, with some individuals preferring their aioli to be quite salty while others prefer it almost entirely neutral. When using this phrase, we recommend starting with a small amount of each ingredient (a pinch or two) and adjusting to taste as you go.
In the case of the Basil Aioli recipe, the “to taste” directive applies primarily to the salt and pepper additions. While you can certainly experiment with other ingredients and flavor combinations, the core of this aioli remains in its simplicity: garlic, lemon juice, olive oil, and basil, all held together by a delicate balance of salt and pepper.
When combining salt and pepper “to taste,” consider the natural sweetness of the garlic and the brightness of the lemon juice as you add each ingredient. Taste and adjust regularly, ensuring that each successive addition enhances rather than overpowers the flavors present in the aioli.
The result is a Basil Aioli with depth, complexity, and an irresistible charm that pairs perfectly with a range of dishes, from grilled meats to steamed vegetables and beyond.
Instructions
Crafting the Perfect Aioli
Crafting the perfect aioli is an art that requires patience, attention to detail, and a deep understanding of the ingredients involved.
The key to creating a rich and creamy aioli lies in its base ingredient: garlic. Fresh garlic cloves are typically used, as they provide a more vibrant flavor profile compared to powdered or dried garlic.
To begin, peel three to four fresh garlic cloves and mince them finely using a chef’s knife or a garlic press.
Mince the garlic until it reaches a state of near-pulpulence. This will ensure that the garlic flavors release evenly during emulsification.
In a large mixing bowl, combine 1/2 cup of neutral-tasting oil, such as canola or grapeseed oil, and the minced garlic. Using an immersion blender or a whisk, begin to blend the mixture on low speed.
Allow the mixture to emulsify for at least two minutes, gradually increasing the speed as needed to maintain stability. Be cautious not to over-blend the aioli, as this can result in an unpleasant separation of the oil and garlic.
Mixing at a moderate pace, slowly pour in 1/4 cup of freshly squeezed lemon juice while continuing to blend the mixture. This will introduce acidity into the aioli, creating a balanced flavor profile.
Continue blending the mixture for another minute or until it reaches a consistency similar to mayonnaise. Taste and adjust the seasoning as needed by adding more lemon juice or salt.
For an added depth of flavor, 1/4 cup of finely chopped fresh basil leaves can be incorporated into the aioli after its primary emulsification is complete.
To prevent oxidation and discoloration, cover the bowl with plastic wrap, pressing the wrap directly onto the surface of the aioli. This will create a vacuum seal that slows down the breakdown process.
Carefully store any unused or leftover aioli in an airtight container within the refrigerator at a temperature below 40°F (4°C). It is essential to use fresh ingredients and handle the aioli gently, as this can help extend its shelf life for up to three days.
In a food processor, combine garlic and basil leaves. Process until well combined and slightly smooth.
When it comes to following instructions, particularly in a recipe like this Basil Aioli Recipe, clarity and specificity are crucial for achieving the desired outcome.
The first step involves combining garlic and basil leaves in a food processor. This initial stage sets the foundation for the entire process, as the quality of the ingredients will directly impact the final taste and texture of the aioli.
It’s essential to note that using fresh, high-quality garlic is vital. The flavor profile will greatly benefit from the use of aromatic, succulent cloves that have been recently harvested or sourced from a reputable supplier.
Next, it’s crucial to finely chop the basil leaves before adding them to the food processor with the garlic. A sharp chef’s knife or a pair of kitchen shears can be used to achieve the desired texture.
The act of processing until well combined and slightly smooth is where patience and attention to detail come into play. Over-processing can lead to an unpleasant consistency, while under-processing may result in uneven flavors.
When it comes to achieving that perfect balance, the user should monitor the food processor closely, stopping to inspect the mixture every few seconds. This allows for adjustments to be made as needed, ensuring a uniform texture and flavor.
Furthermore, using the pulse function can aid in controlling the processing speed, giving more control over the final consistency of the basil aioli mixture.
Ultimately, following these precise instructions will yield a Basil Aioli Recipe that is not only flavorful but also visually appealing.
With the processor running, slowly pour in mayonnaise through the top. Continue processing until aioli reaches desired consistency.
To prepare a delicious Basil Aioli, it’s crucial to follow these instructions carefully:
- Start by ensuring that your processor is running smoothly, and you’re ready to begin.
- Safety First: Before proceeding, make sure the processor’s lid is secure to avoid any potential accidents or spills.
- To prepare the aioli, slowly pour in mayonnaise through the top of the processor while it’s running. This is a crucial step as it helps emulsify the mixture and gives it a smooth consistency.
- Continue processing the mayonnaise for about 10-15 seconds, or until it starts to break down and form a creamy texture.
Add in the following ingredients one at a time, allowing each ingredient to fully incorporate before adding the next:
- Fresh basil leaves (about 1/4 cup)
- Garlic clove (minced)
- Worcestershire sauce (about 1 teaspoon)
- Lemon juice (about 1 tablespoon)
Mix the ingredients until you reach your desired consistency for the aioli. You can stop processing once it reaches a smooth and creamy texture, or continue until you achieve the perfect spreadable consistency.
Taste the aioli and adjust the seasoning if necessary by adding more basil, lemon juice, or any other ingredients to taste.
Once you’re satisfied with the flavor and texture of your Basil Aioli, transfer it to a serving container, cover it with plastic wrap or aluminum foil, and refrigerate until chilled before using it as a dip, spread, or sauce for your favorite dishes.
Add lemon juice and season with salt and pepper to taste.
To prepare a delicious and aromatic Basil Aioli, it’s essential to add the right amount of citrus flavor to balance out the rich creaminess of the aioli.
The process begins by adding lemon juice, which not only adds a burst of citrus flavor but also helps to enhance the overall aroma and taste of the basil. It’s crucial to use fresh lemons for the best results, as bottled lemon juice can lack the vibrancy and depth that a real lemon provides.
The recommended amount of lemon juice is typically around 1-2 tablespoons per 1 cup of mayonnaise or aioli base. However, feel free to adjust this ratio according to your personal taste preferences, as some people prefer a stronger citrus flavor while others like it more subtle.
Once you’ve added the lemon juice, season with salt and pepper to taste. This is where you can really let your creative juices flow and add your own unique twist to the recipe. A pinch of salt will help to bring out the flavors in the basil, while a few grinds of pepper will add a subtle kick.
Remember, when working with herbs like basil, it’s essential to not overpower them with too many other ingredients. Keep the focus on letting the natural flavor and aroma of the herb shine through, and you’ll be rewarded with a delicious and aromatic Basil Aioli that’s sure to impress your friends and family.
Expert Tips
Taking It to the Next Level
To take your Basil Aioli recipe to the next level, start by focusing on using high-quality ingredients that will elevate the flavors and textures of this versatile condiment.
Select a variety of fresh basil leaves with vibrant green color and minimal signs of wilting or browning. You can use sweet basil or Thai basil for added depth and heat, depending on your personal preference.
For the aioli itself, choose a neutral-tasting oil like grapeseed or light olive oil to prevent overpowering the delicate flavors of the garlic and herbs.
Take your time when making the aioli from scratch. Allow each ingredient – garlic, lemon juice, egg yolks, salt, and oil – to infuse and emulsify gradually in the right proportions.
A key factor to achieving a silky-smooth aioli lies in tempering the egg yolks slowly while whisking constantly to prevent scrambling or breaking down.
To add an extra layer of complexity, consider incorporating other ingredients like minced shallots, anchovy paste for umami, or even microgreens for added freshness and color.
Experiment with various flavor combinations by using different types of basil or pairing your aioli with unique condiments and dips, such as sun-dried tomato tapenade or roasted garlic hummus.
Consider investing in a stand mixer equipped with a whisk attachment to simplify the process of making large batches of aioli without sacrificing quality or control.
Finally, don’t be afraid to get creative and make this classic Italian sauce your own by incorporating regional specialties or family traditions into your recipe.
To enhance flavor, add a pinch of red pepper flakes or some grated Parmesan cheese.
To take your basil aioli to the next level and elevate its flavor profile, consider adding a pinch of red pepper flakes or some grated Parmesan cheese. The heat from the red pepper flakes will not only add depth but also create a fascinating contrast in flavors.
Start by sprinkling a small pinch of red pepper flakes over your basil leaves before blending them into the aioli mixture. This will allow the heat to mellow out slightly as it combines with the creaminess of the mayonnaise and the freshness of the basil.
If you prefer a more subtle kick, begin by adding just one-eighth teaspoon of red pepper flakes and taste as you go. You can always add more heat, but it’s harder to remove it once it’s been added. Alternatively, use a generous sprinkle of grated Parmesan cheese for an intense savory flavor that pairs perfectly with the bright, herbaceous notes of basil.
Grated Parmesan adds a satisfying umami taste and a delightful texture to the smooth aioli sauce. Begin by sprinkling just a pinch over your basil leaves before blending them into the mixture, adjusting to taste as you go. For an extra boost, try mixing in some chopped fresh parsley or tarragon for added freshness.
Experimenting with different combinations of flavors will help you develop your own unique take on this classic sauce. The key is to balance bold flavors with a delicate touch – after all, the beauty of aioli lies in its ability to enhance and complement rather than overpower the natural flavors of its ingredients.
For an intense basil experience, use Thai basil leaves instead of sweet basil.
For an intense basil experience, using Thai basil leaves instead of sweet basil is highly recommended. This is because Thai basil has a more complex and pungent flavor profile compared to its sweet basil counterpart.
The reason for this difference in flavor lies in the distinct characteristics of each type of basil. Sweet basil, as its name suggests, has a milder and sweeter taste, with hints of licorice and anise. In contrast, Thai basil has a more pronounced aroma and a spicy, slightly bitter flavor, which pairs perfectly with many Asian-inspired dishes.
Using Thai basil in your Basil Aioli Recipe will add a depth of flavor that sweet basil cannot match. The bold and pungent taste of the Thai basil will complement the rich creaminess of the aioli, creating a harmonious balance of flavors that will elevate your dish to new heights.
If you’re feeling adventurous, you can also try combining Thai basil with other herbs like lemongrass or galangal to create an even more complex flavor profile. However, for a true Thai-inspired experience, using just Thai basil is the way to go.
So don’t be afraid to experiment and swap out the sweet basil for its spicier counterpart in your Basil Aioli Recipe. Your taste buds will thank you, and you’ll be rewarded with a truly authentic and intense basil experience.
Store aioli in an airtight container in the refrigerator for up to 5 days.
To ensure the freshness and quality of your basil aioli, it’s essential to store it properly. Here are some expert tips:
Store in an airtight container
This will prevent air from entering the container and causing the aioli to spoil or become rancid.
In the refrigerator at all times
Keeping the aioli refrigerated will slow down the growth of bacteria and extend its shelf life.
Avoid cross-contamination
Make sure to keep the aioli away from other strong-smelling foods, as it can absorb odors easily.
Consume within 5 days
If you don’t plan on using the aioli within this timeframe, consider freezing it (see our next tip).
Freezing options
- Puree the aioli and freeze it in ice cube trays. This will make it easy to thaw only what you need.
- Transfer the aioli to an airtight container or freezer bag, press out as much air as possible, and store it in the freezer for up to 3 months.
Before using frozen aioli
- Thaw it slowly overnight in the refrigerator.
- Gently stir it before using, as it may separate during freezing.

- Best Lusha Alternatives for 2025 - April 22, 2025
- Best Overloop Alternatives for 2025 - April 22, 2025
- Best 6sense Alternatives for 2025 - April 22, 2025
